This easy Mediterranean lentil salad is tasty and packed with protein and whole grains. A perfect addition to a packed lunch, an awesome appetizer or a unique side dish.
Disclaimer: This post may contain affiliate links. I earn commission at no additional cost to you.
Start by cooking the bulgur and lentils according to package directions. Chill the lentils and bulgur in a bowl in the refrigerator while you prepare the other ingredients. Once chilled, add the tomatoes, shallot, green onions, and parsley to the bowl and mix. Add the olive oil and lemon juice and mix well. Finally add the sumac, cumin and tomato powder. Mix until well incorporated. Chill for at least 1 hour before serving. If your salad is too dry add additional olive oil and lemon juice to taste.
4-5 green onions finely sliced (both whites and greens)
3/4 Cup minced fresh parsley
1/2 cup olive oil
Juice of one lemon
2 Tablespoons ground sumac
2 Tablespoons cumin
2 tablespoons tomato powder
DIRECTION
Start by cooking the bulgur and lentils according to package directions. Chill the lentils and bulgur in a bowl in the refrigerator while you prepare the other ingredients. Once chilled, add the tomatoes, shallot, green onions, and parsley to the bowl and mix. Add the olive oil and lemon juice and mix well. Finally add the sumac, cumin and tomato powder. Mix until well incorporated. Chill for at least 1 hour before serving. If your salad is too dry add additional olive oil and lemon juice to taste.
NOTES
As an Amazon associate I earn on qualified purchases.
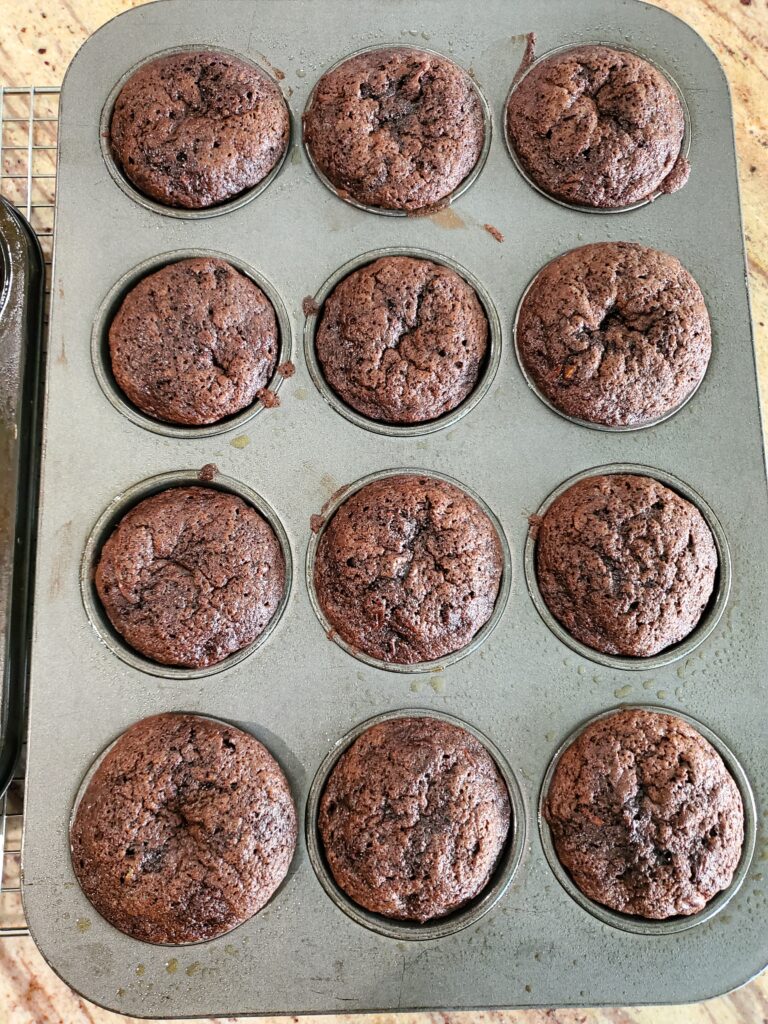
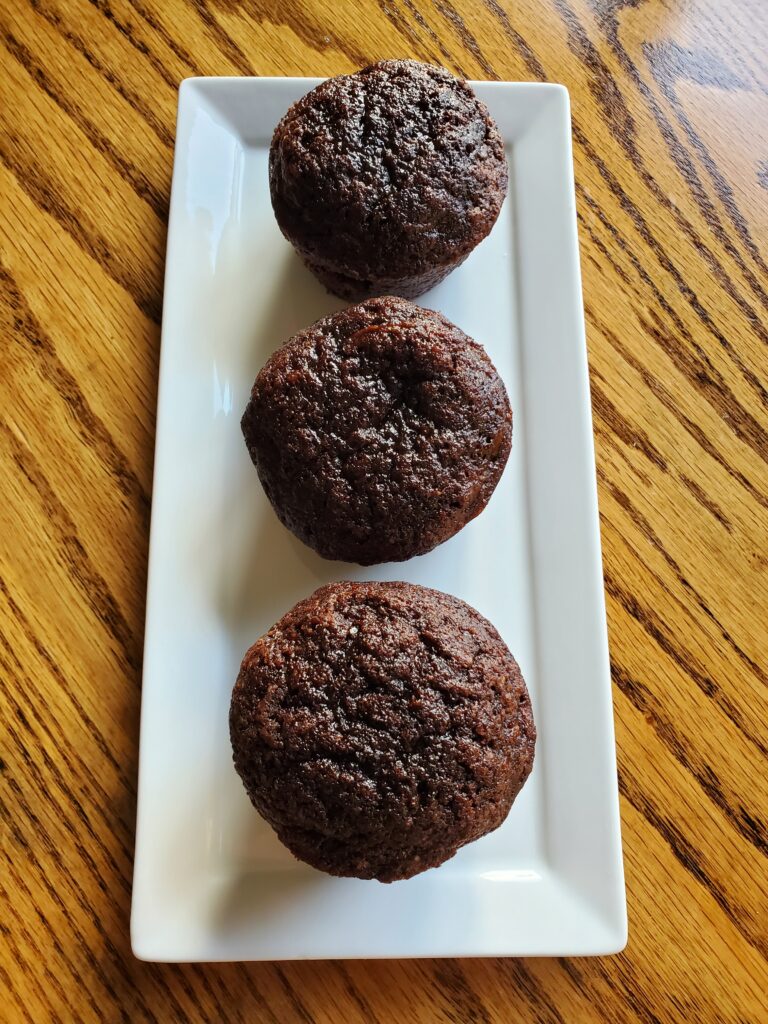
Turn some zucchini into a tasty breakfast treat with this delicious whole wheat chocolate zucchini muffin recipe. These muffins are great way to sneak some vegetables and whole grains into your kiddos. Warning, they will disappear fast!
Disclaimer: This post may contain affiliate links. I earn commission at no additional cost to you.
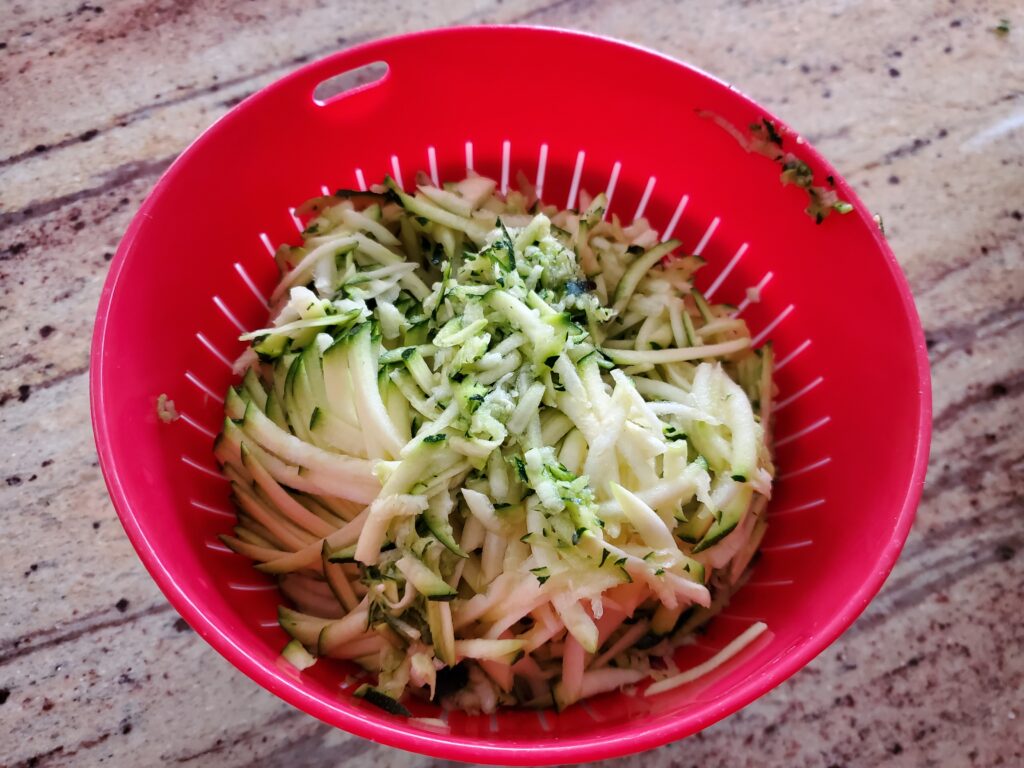
Start by grating the zucchini in a food processor. If you are using a large zucchini, remove the seeds before grating. Set aside in a colander to drain off excess moisture while you prepare the muffins.
Preheat the oven to 350 degrees F.
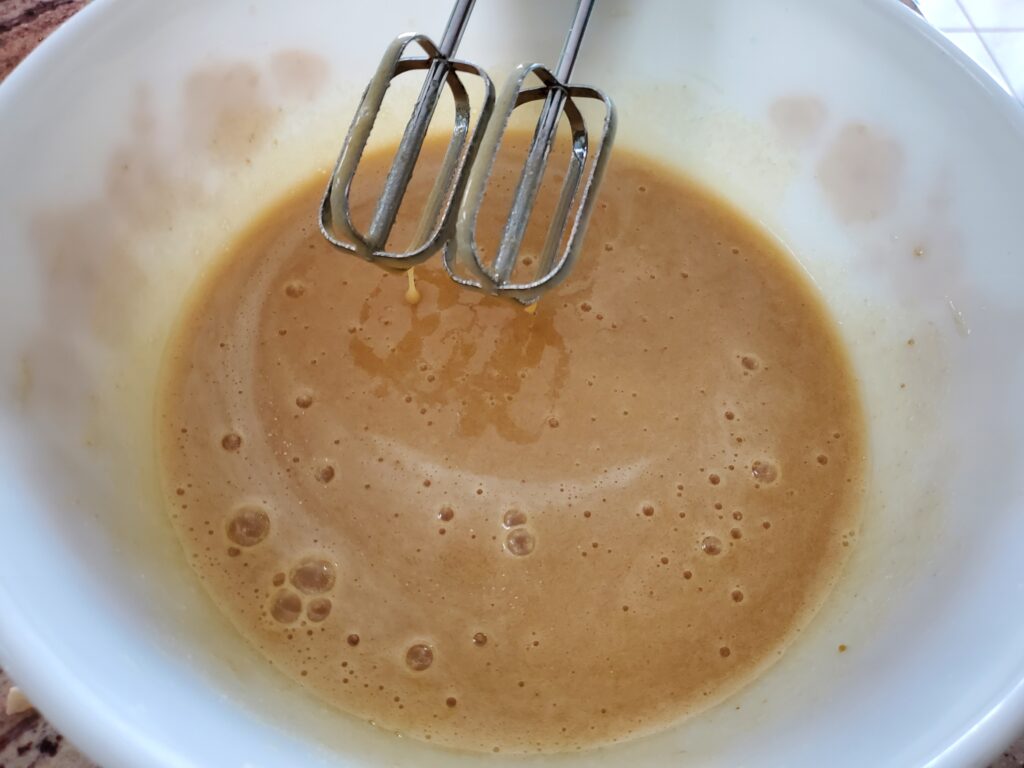
In a large bowl, beat together the sugars, oil, eggs and vanilla with an electric mixer until well combined.
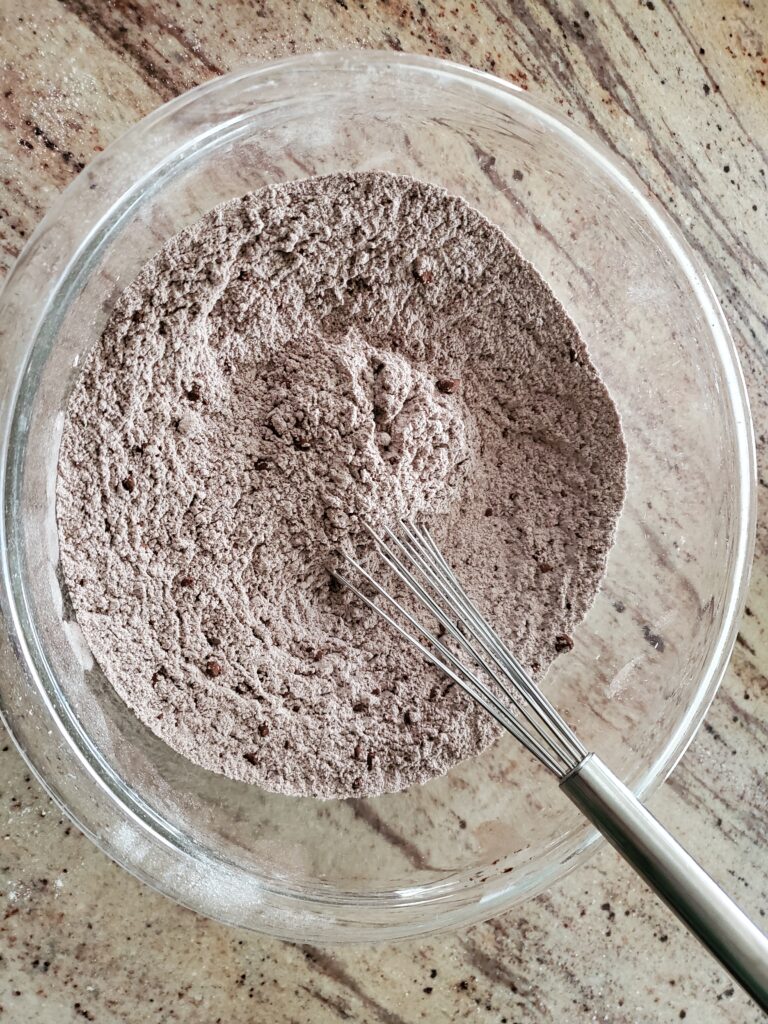
In another bowl whisk together the flours, cocoa powder, salt, baking soda and cinnamon.
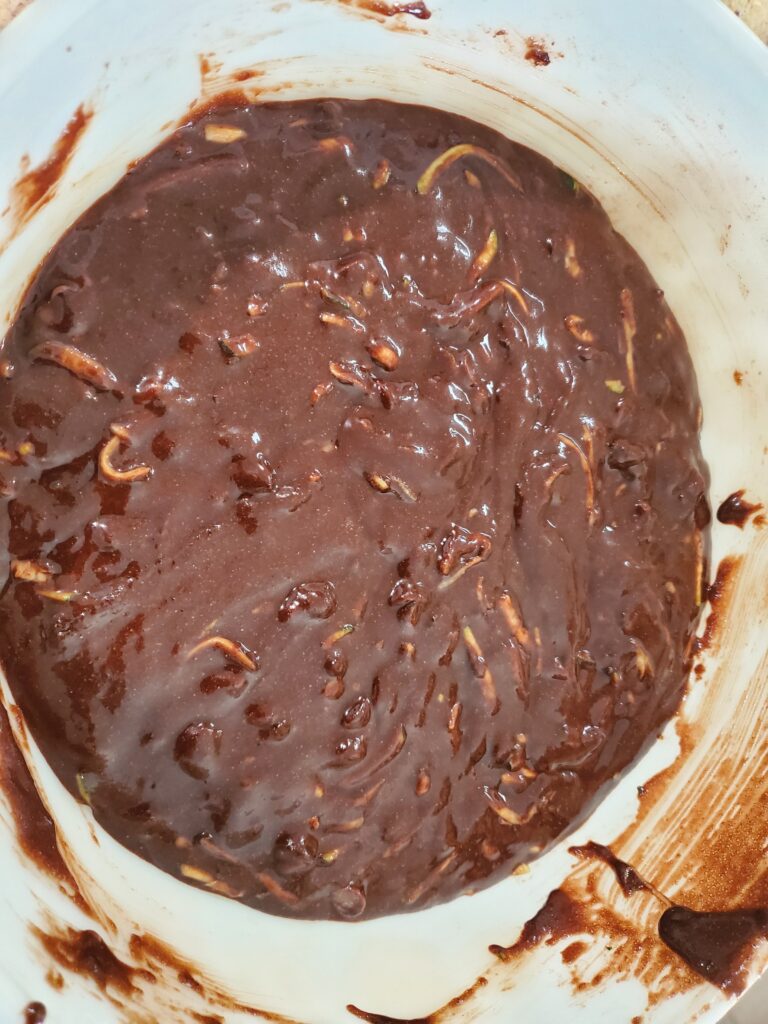
Gradually add the dry ingredients to the wet ingredients until combined. Fold in the zucchini and chocolate chips.
Spray 2 large muffin pans with non-stick spray or line with paper liners. Fill each muffin well 2/3-3/4 full with the batter. This recipe makes approximately 20-22 muffins.
Bake for 20-22 minutes or until a fork comes out clean.
Transfer the muffins to a cooling rack. Once cooled, store them in an airtight container for up to 3 days.
Start by grating the zucchini in a food processor. If you are using a large zucchini, remove the seeds before grating. Set aside in a colander to drain off excess moisture while you prepare the muffins.<br>
Preheat the oven to 350 degrees F.
In a large bowl, beat together the sugars, oil, eggs and vanilla with an electric mixer until well combined.<br>In another bowl whisk together the flours, cocoa powder, salt, baking soda and cinnamon.
Gradually add the dry ingredients to the wet ingredients until combined. Fold in the zucchini and chocolate chips.<br>Spray 2 large muffin pans with non-stick spray or line with paper liners. Fill each muffin well 2/3-3/4 full with the batter. This recipe makes approximately 20-22 muffins.<br>
Bake for 20-22 minutes or until a fork comes out clean.<br>Transfer the muffins to a cooling rack.
NOTES
As an Amazon associate, I earn on qualified purchases.
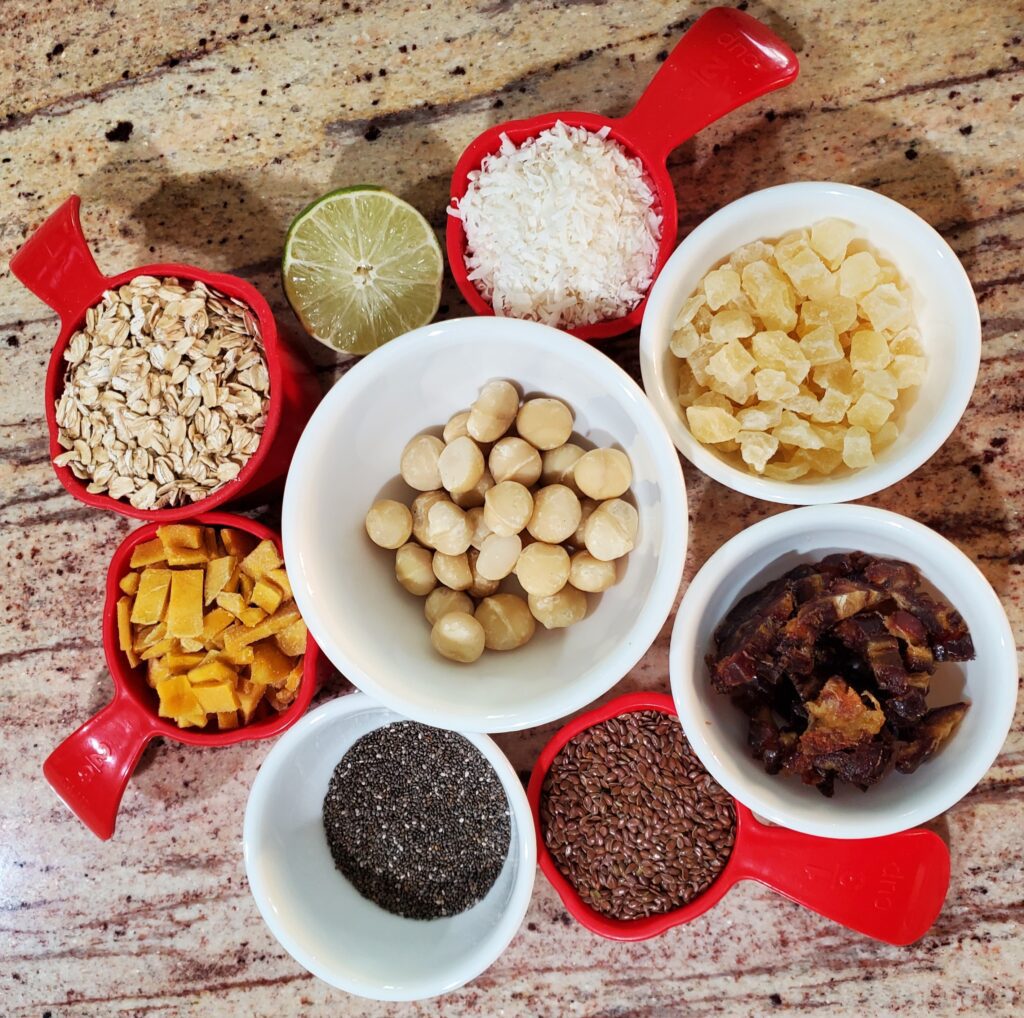
These Tropical no bake high fiber energy balls are also a great source of protein. They are made with all natural ingredients with no added sweeteners.
Disclaimer: This post may contain affiliate links. I earn commission at no additional cost to you.
2 tablespoons lime juice, or tropical juice of your choice
Lime zest to taste (optional)
How to make Tropical energy balls
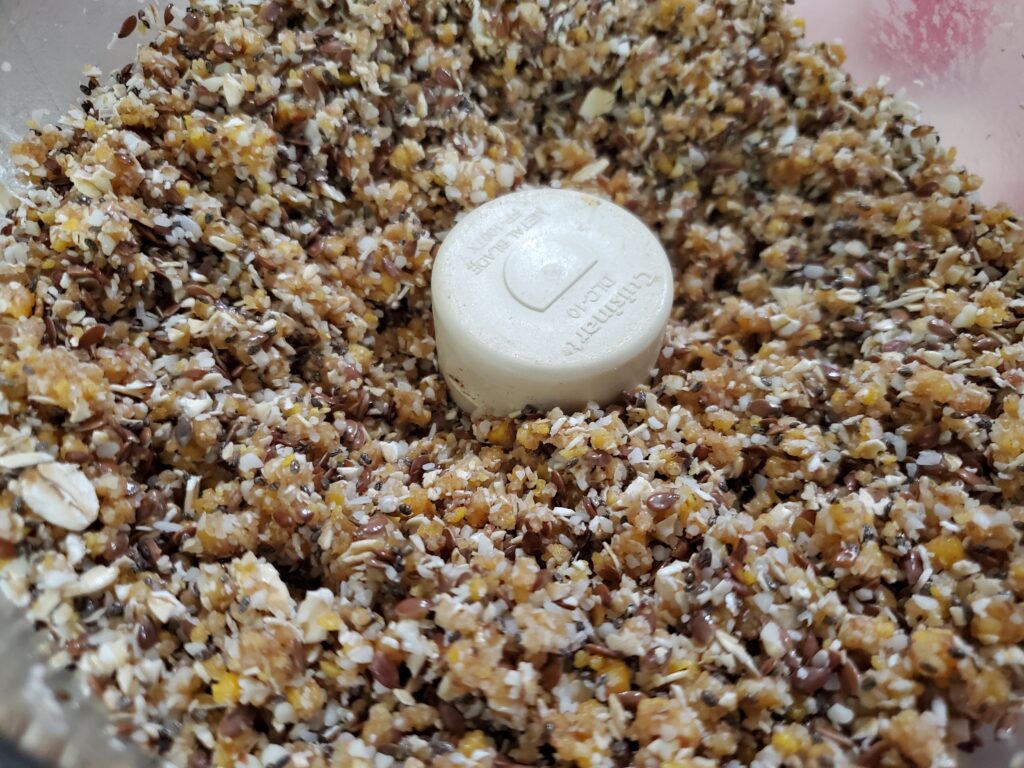
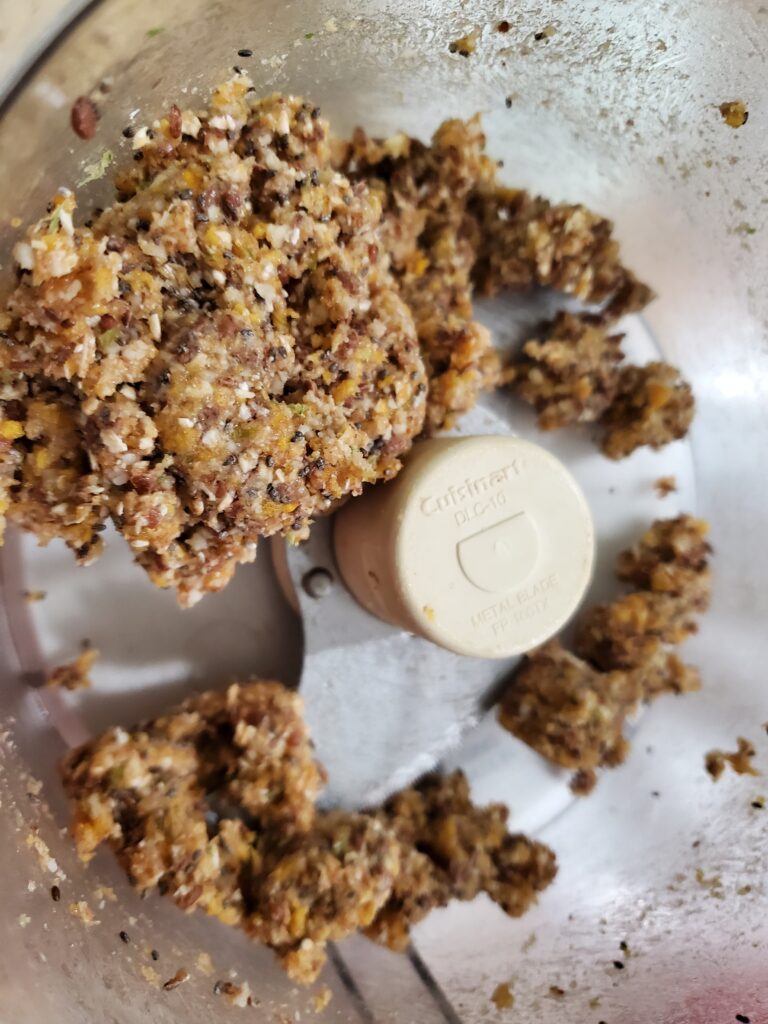
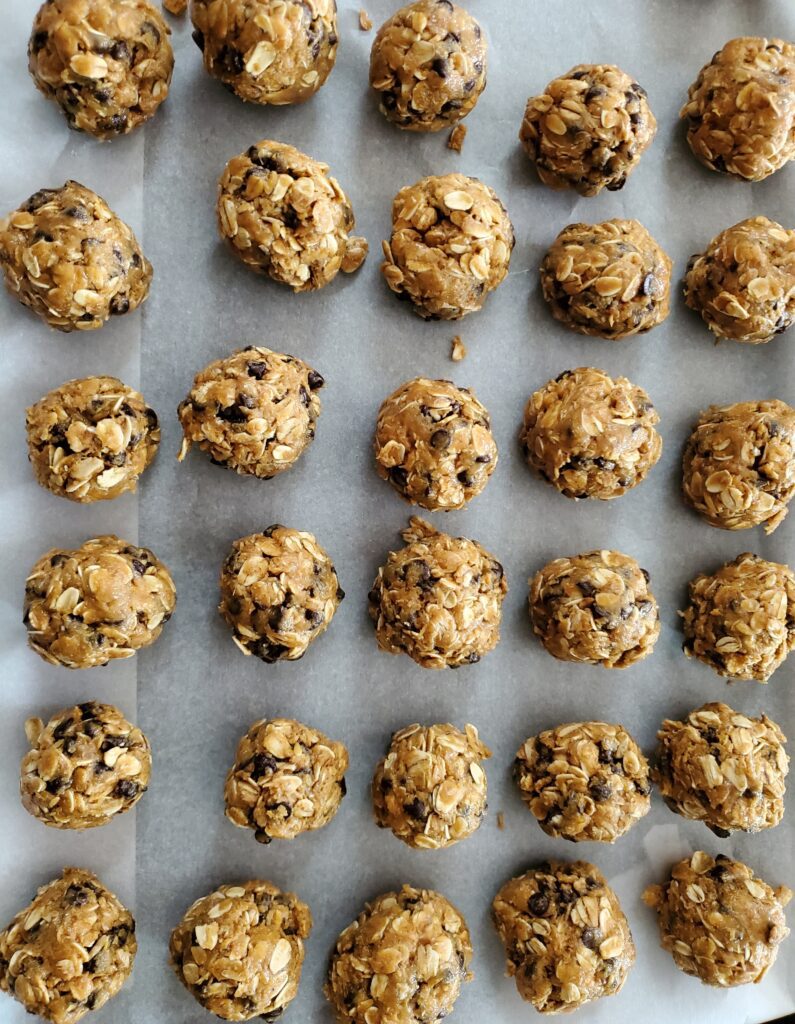
Place the dried fruits and 1/4 cup of the oats into a food processor. Pulse until well processed. If it clumps together, break up the clumps and add the macadamia nuts. Pulse again until evenly processed. Add the seeds and pulse again until well blended. Add the remaining oats and zest if desired pulse until evenly mixed. Although the mixture is very sticky, it will appear dry at this point.
Finally add the juice, and pulse until it starts to clump.
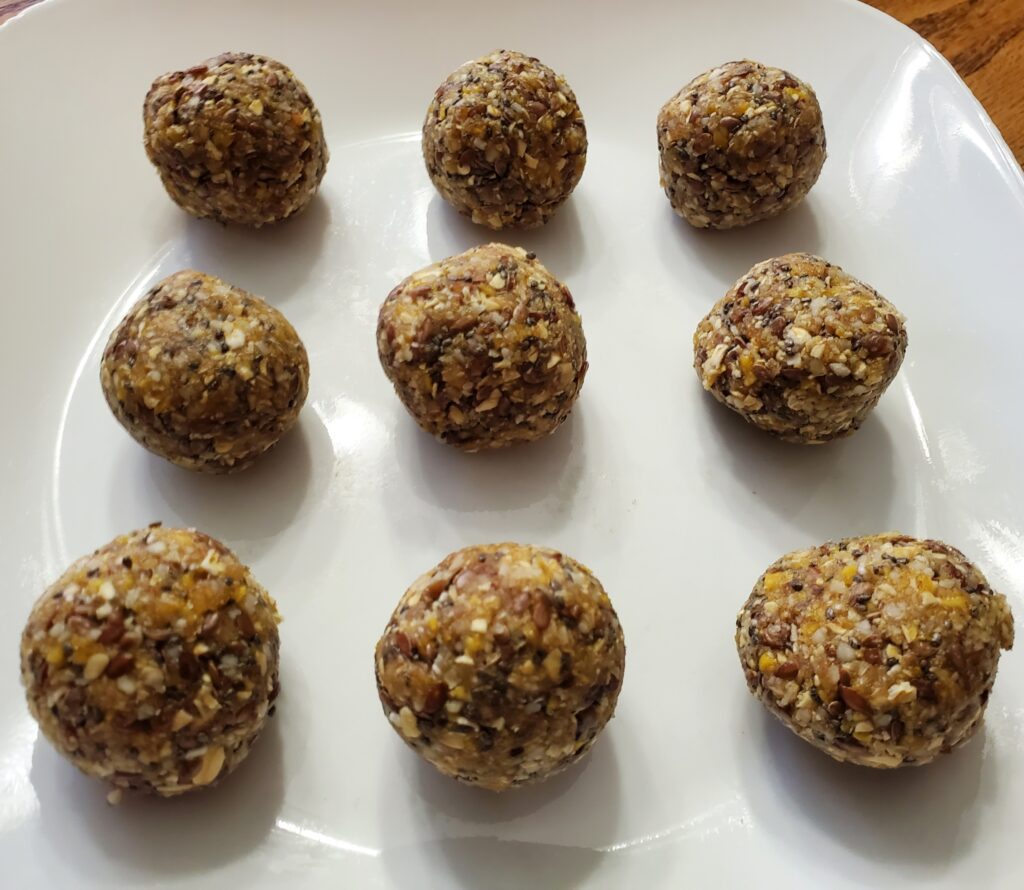
Remove from the food processor and roll into one inch balls.
Refrigerate for at least one hour before serving.
How to store energy balls
Store your energy balls in an air tight container the refrigerator for 3 weeks. If you don’t plan to use them in 3 weeks, store them in the freezer. If they are too hard when you remove them from the freezer, allow them to sit at room temperature for 5-10 minutes.
2 tablespoons lime juice, or tropical juice of your choice
Lime zest to taste (optional)
DIRECTION
Place the dried fruits and 1/4 cup of the oats into a food processor. Pulse until well processed. If it clumps together, break up the clumps and add the macadamia nuts. Pulse again until evenly processed. Add the seeds and pulse again until well blended. Add the remaining oats and zest if desired pulse until evenly mixed. Finally add the juice, and pulse until it starts to clump.
Remove from the food processor and roll into one inch balls. Refrigerate for at least one hour before serving.<br>
NOTES
As an Amazon associate, I earn on qualified purchases.
There are several ways to make Polish Easter soup aka: Barszcz Bialy or white borscht. The traditional way involves fermenting rye flour for weeks. There are also a couple of easy ways to make it with packets or bottled Zur. Lastly, you can make it with sourdough discard.
Disclaimer: This post may contain affiliate links. I earn commission at no additional cost to you.
Polish Easter Soup Ingredients:
Sour Broth (see below for 4 ways to make the broth)
1 large onion
1 teaspoon Marjoram
Hard boiled eggs
Smoked polish sausage
Fresh grated horseradish
Rye bread
Step 1 Make the Sour Broth in one of 4 ways:
Option 1: Using a packet to make sour broth
This is the easiest way to make the sour broth needed to make Polish Easter soup. When served with quality Polish sausage this broth is quite tasty and very easy. You will need to purchase Barszcz Bialy White Borscht Soup Mix packets. You can find them in a Polish or European market or find them here. The directions are printed on the back, but may be in Polish. Just add 1 Liter of water, and simmer for 5 minutes. Simply heat and serve!
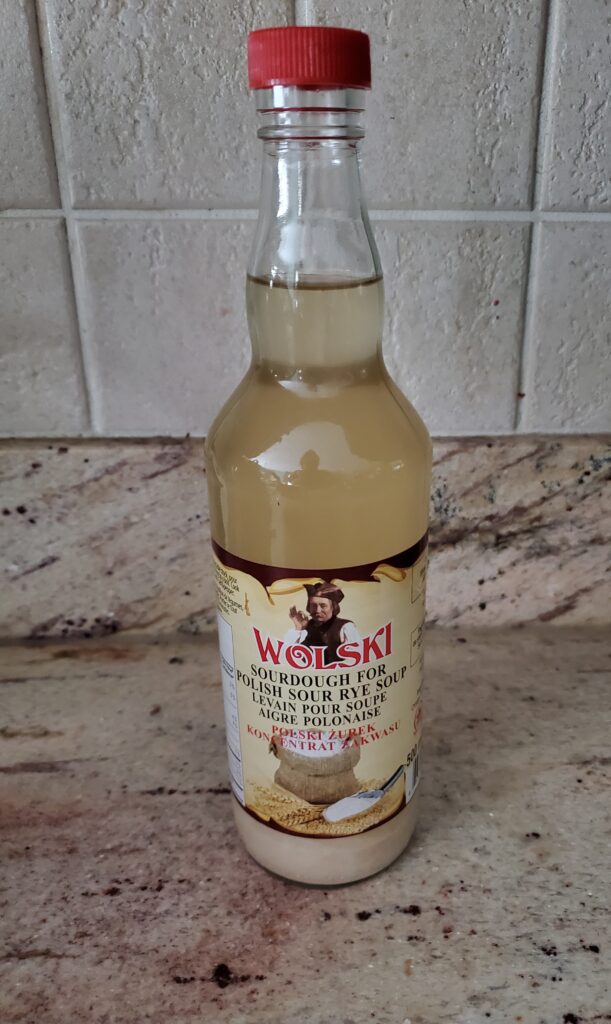
Option 2: Using Bottled Zur to make Polish Easter Soup
There are several different brands or Zur you can purchase to mix and make your sour broth. These bottles can be found in Polish or European markets. They may or may not have directions in English or Polish on them.
Typical directions, if available suggest mixing the contents of a 500 mL bottle of Zur with 2.5 Liters of vegetable stock. This results in a broth that is not very sour in my opinion. I prefer to mix the liquid portion of the contents half and half with vegetable broth. Allow the bottle to sit until all of the flour is on the bottom. Carefully pour the liquid portion into the pan, leave as much flour as possible in the jar. The flour will thicken the soup too much if you add less water. I recommend starting there, heat the soup to a simmer before tasting it. If it is too sour add more vegetable broth.
Homemade vegetable stock is best. I use this recipe, but when I make it for Polish Easter soup I add a couple slices of horseradish before simmering the broth.
Option 3: Make Homemade Zur
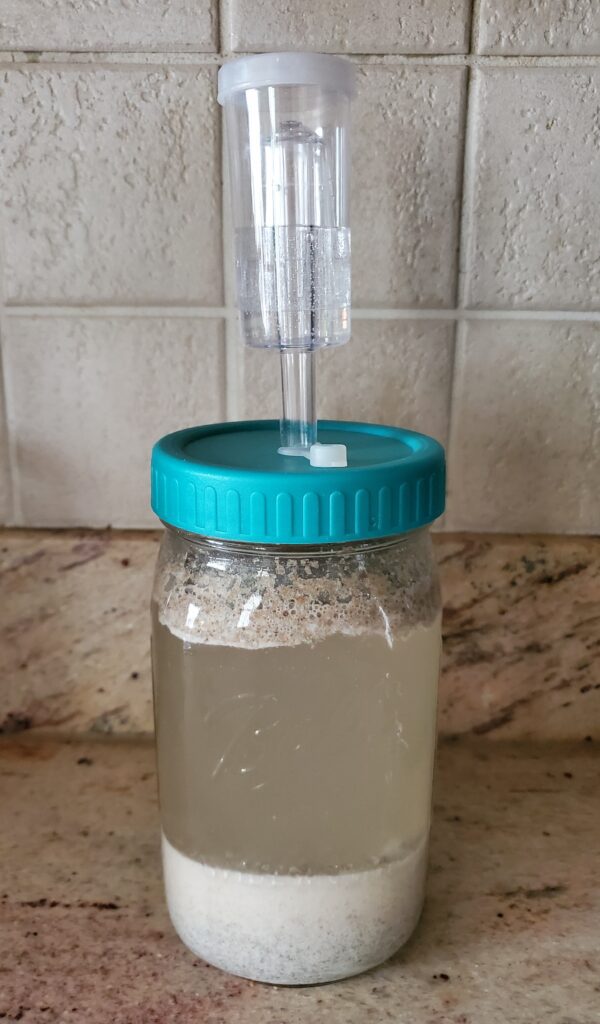
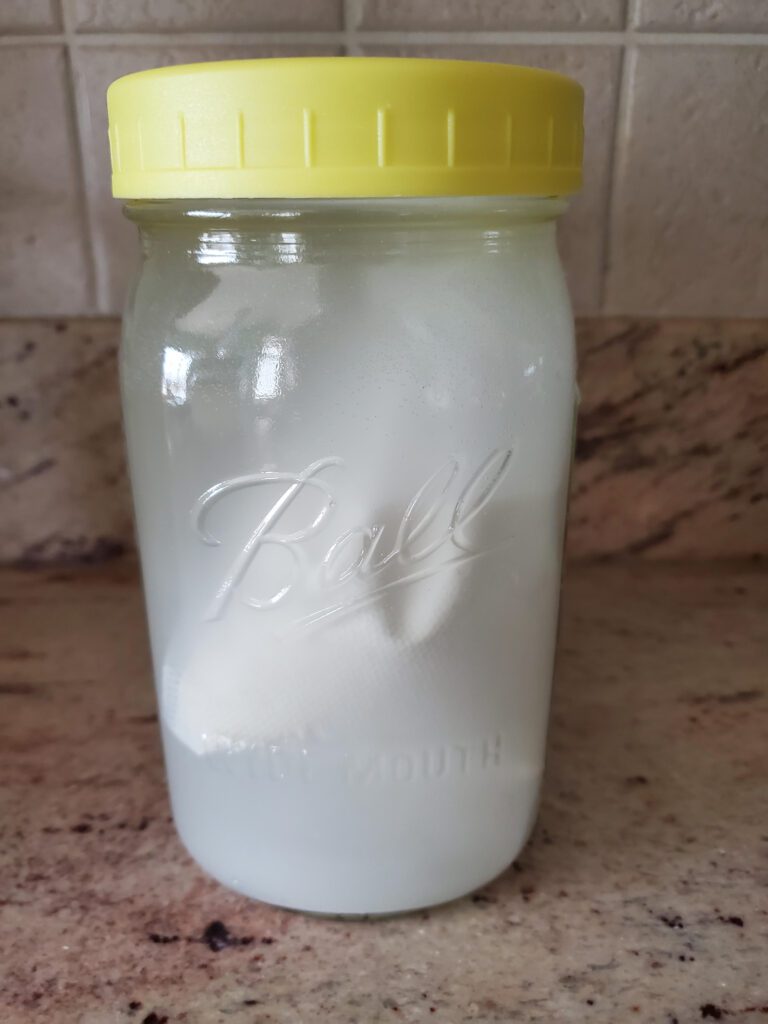
Sterilize a 1 quart mason jar with boiling water. Allow the boiled water to cool to room temperature. Add 1/2 cup of rye flour to the jar, then pour the cooled water over top to nearly fill the jar. Cover the jar with a fermentation lid. Allow this jar to sit in a warm dark place for 2-4 weeks. The result will be a sour liquid you can use to make Polish Easter soup.
Option 4: Make sour broth with Sourdough Discard
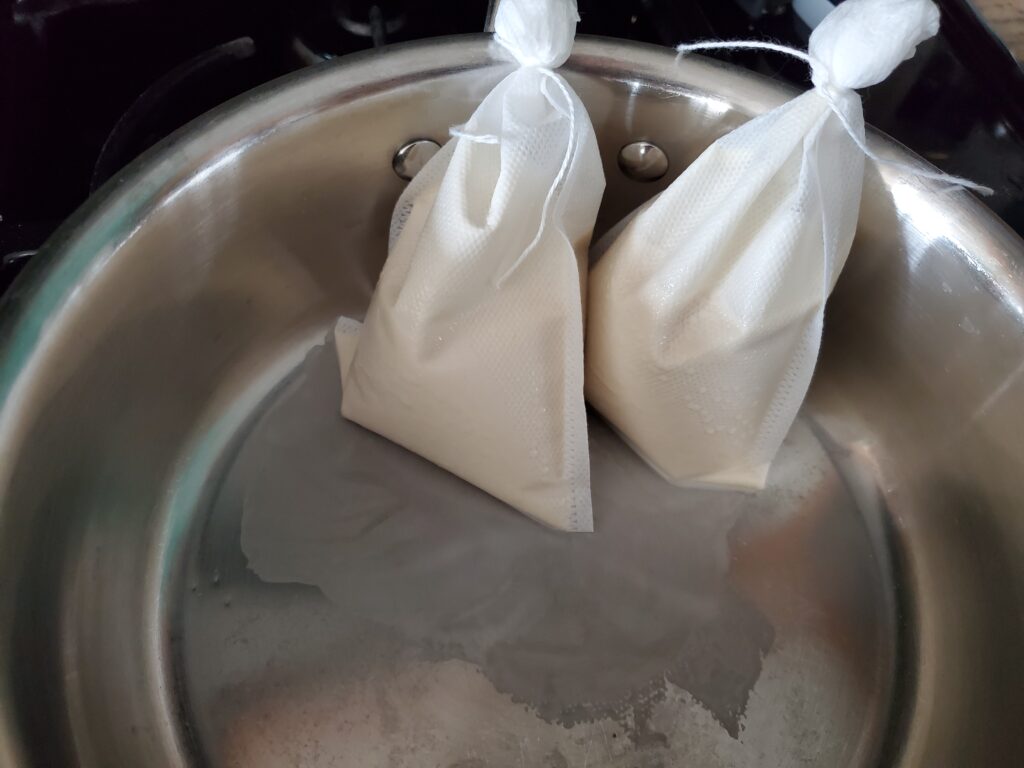
Add 1/2-2/3 cup of sourdough discard to 2-3 Tea bags. Tie off the tea bags as tightly as possible. Place the filled bags into a mason jar filled with water and store in your refrigerator for at least one week. Squeeze the remaining sour flavor from the bags and use the sour broth to make your soup.
Alternatively you can fill the bags and soak them in your pot of water or vegetable stock as you heat it. Add as many bags of sourdough discard as you like to make your soup as sour as desired. Some of the flour will escape to slightly thicken your soup.
Step 2: Make the Polish Easter Soup
Sautee onions in a small amount of olive oil until softened. Add the sour broth and 1 teaspoon of marjoram. Simmer until heated to serving temperature, stirring occasionally.
Note: If you prefer a thicker soup, you can add a tablespoon of flour to the onions to make roux before adding the sour broth. Another way to thicken the broth is to add the hot broth 1 tablespoon at a time to 2 tablespoons of sourdough discard until the discard is heated. Then slowly pour the warm discard into the soup until the desired thickness is achieved.
Step 3: Serve the Polish Easter Soup
To Serve, spoon the broth into a bowl, then add a hard boiled egg, sliced smoked sausage and fresh horseradish to taste. Serve with a slice of rye bread for dipping.
As an Amazon associate I earn from qualified purchases.
Grind flaxseed in a coffee grinder or mix flaxseed meal and all other ingredients in a large bowl, start by using a spoon or spatula. You will end up having to use your hands to mix it well.
Once mixed roll into 1 inch balls and place them on a parchment lined rimmed cookie sheet. Place the balls in the freezer for one hour before serving.
Storing energy balls
After freezing for one hour, you can remove the energy balls from the freezer and store them in the refrigerator in an air tight container for up to 3 weeks. If you don’t think you will use them in 3 weeks, then place them in a freezer bag and store them in the freezer. If the balls are too hard to eat when removed from the freezer allow them to sit at room temperature for 5-10 minutes.
Grind flaxseed in a coffee grinder or mix flaxseed meal and all other ingredients in a large bowl, start by using a spoon or spatula. You will end up having to use your hands to mix it well. Once mixed, roll into 1 inch balls and place them on a parchment lined rimmed cookie sheet. Place the balls in the freezer for one hour before serving.
NOTES
As an Amazon associate, I earn from qualified purchases.
Start by boiling the diced potatoes in salted water until just soft enough to break with a fork.
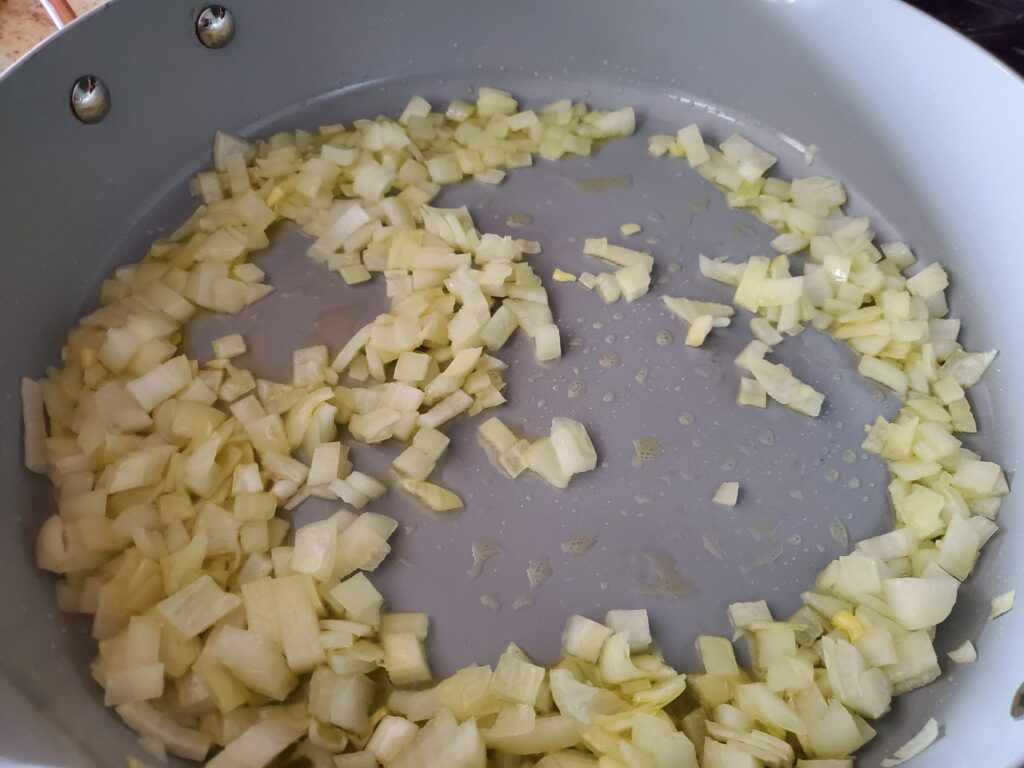
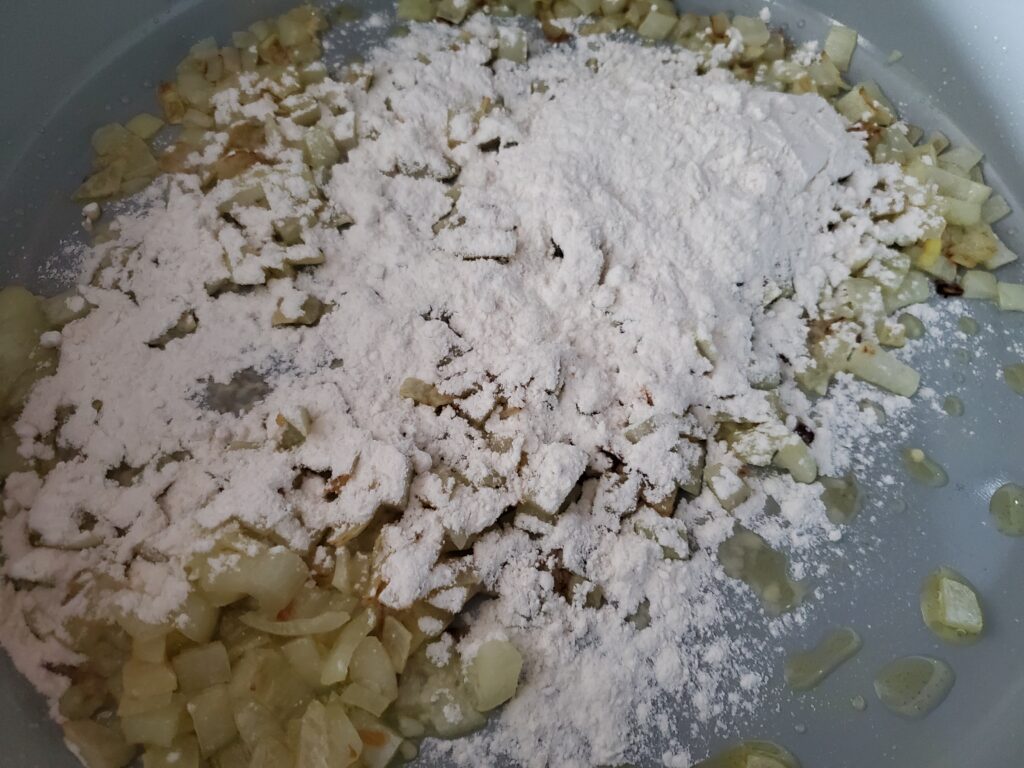
Sauté the diced onion in the olive oil or butter until softened. Mix in the flour.
Sauté onionsadd flour
Add the stock 1/2 cup at a time, mixing until well absorbed before adding more. A thickened sauce will form. Mix in the poultry seasoning, salt and pepper. Add the frozen vegetables and mix until warmed.
Remove from heat and stir in the drained potatoes.
Finally add the diced baked chicken.
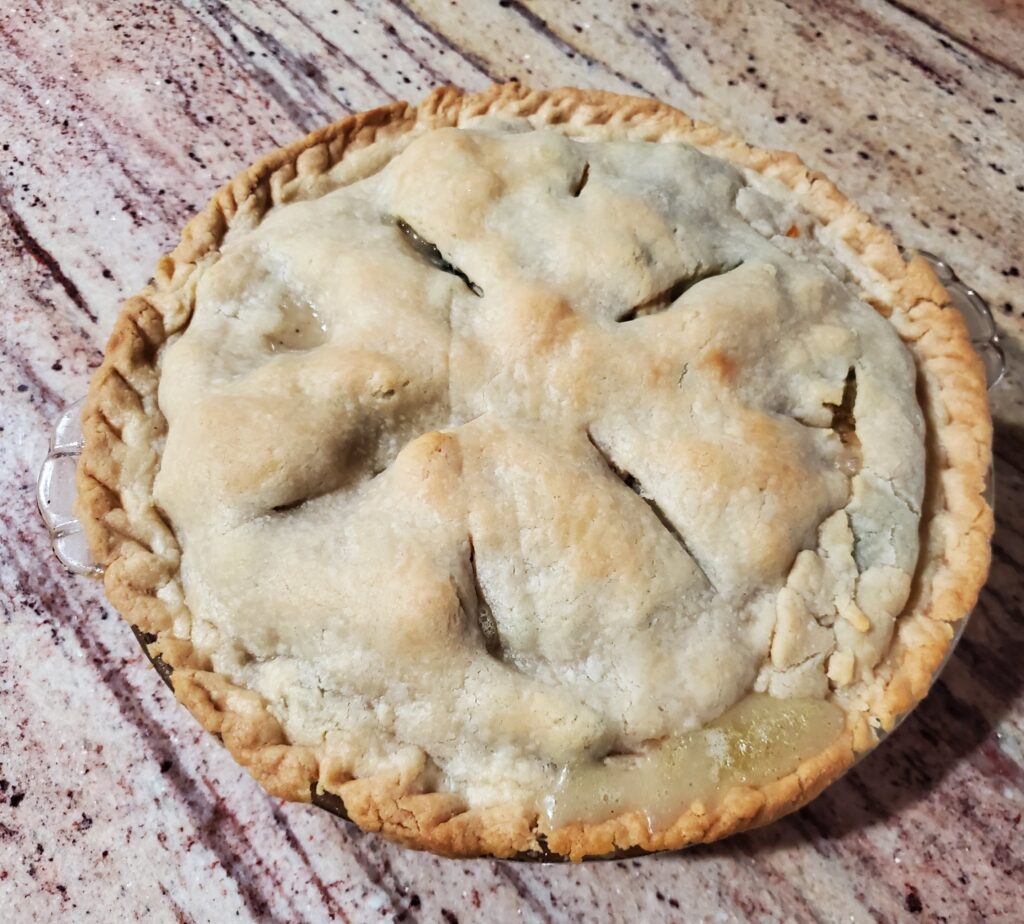
Place the bottom crust into a 9.5 inch Pyrex pie dish. Pour in the filling then place the top crust over it. Pinch the edges shut with the handle of a butter knife. Cut a few slits in the top.
Cover the edge of the pie with foil to protect from over browning.
Preheat the oven to 375 degrees F. Place the pie in the oven and bake for 30 minutes. Remove the foil and bake for 10-15 more minutes or until the crust is lightly browned.
Start by boiling the diced potatoes in salted water until just soft enough to break with a fork.<br>Sauté the diced onion in the olive oil or butter until softened. Mix in the flour. Add the stock 1/2 cup at a time, mixing until well absorbed before adding more. A thickened sauce will form. Mix in the poultry seasoning, salt and pepper. Add the frozen vegetables and mix until warmed. Remove from heat and stir in the drained potatoes. Finally add the diced baked chicken.<br>Place the bottom crust into a 9.5 inch Pyrex pie dish. Pour in the filling then place the top crust over it. Pinch the edges shut with the handle of a butter knife. Cut a few slits in the top. Cover the edge of the pie with foil to protect from over browning.<br>Preheat the oven to 375 degrees F. Place the pie in the oven and bake for 30 minutes. Remove the foil and bake for 10-15 more minutes or until the crust is lightly browned.
NOTES
As an Amazon Associate, I earn on qualified purchases.
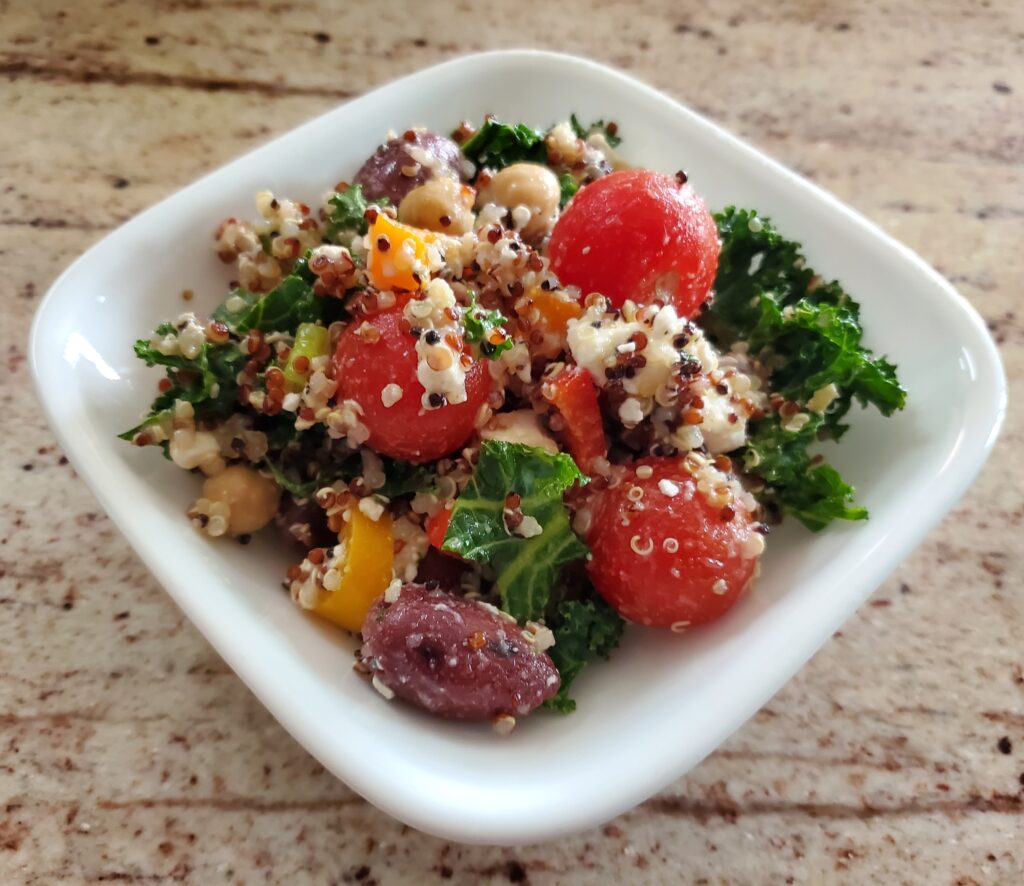
This healthy and easy Greek quinoa salad recipe is a great way to increase whole grains and vegetables in your diet. This salad is loaded with vegetables and has the added benefit of whole grains, lean protein, and healthy fats. A perfect prepare ahead quick lunch.
Disclaimer: This post may contain affiliate link. I earn commission at no additional cost to you.
1 – 15.5 ounce can of chickpeas, drained and rinsed
1/3 cup olive oil
1/3 cup red wine vinegar
Juice of one lemon
1 teaspoon oregano
1 teaspoon Dijon mustard
salt and pepper to taste
How to make Greek quinoa salad:
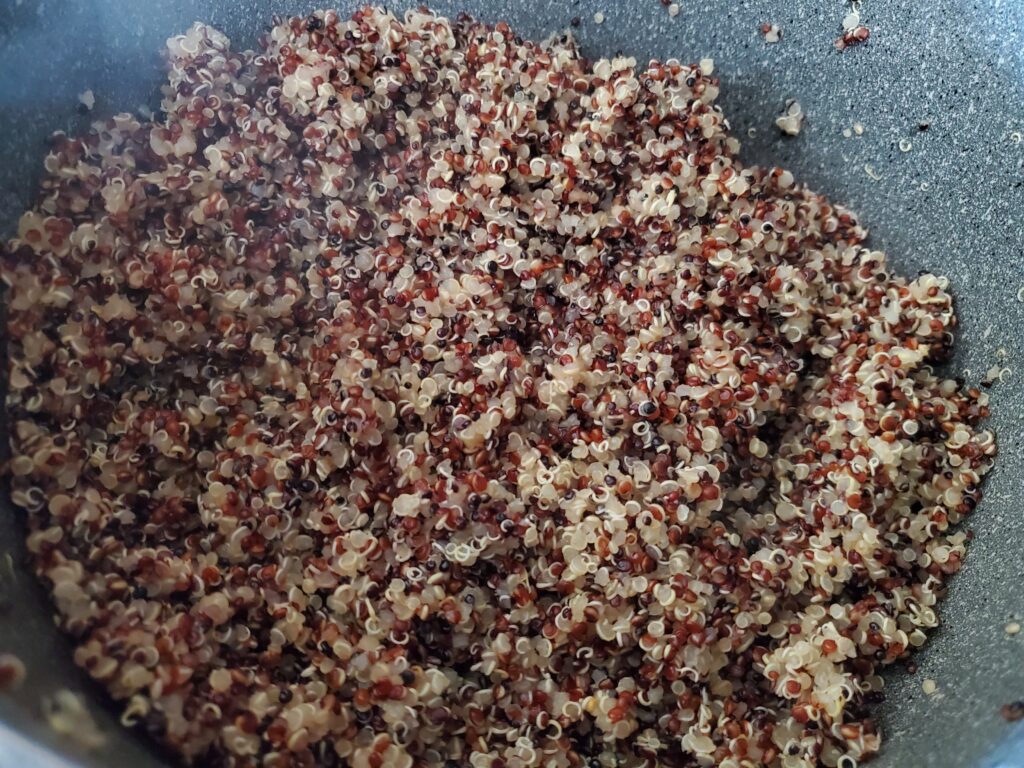
Start by preparing the quinoa. Rinse 1 cup of the tri-color quinoa in a mesh strainer. Add the quinoa and 2 cups of water to a saucepan. Bring it to a boil. Cover and reduce the heat to simmer for 15 minutes. Turn off the heat and allow it to remain covered for 5 more minutes.
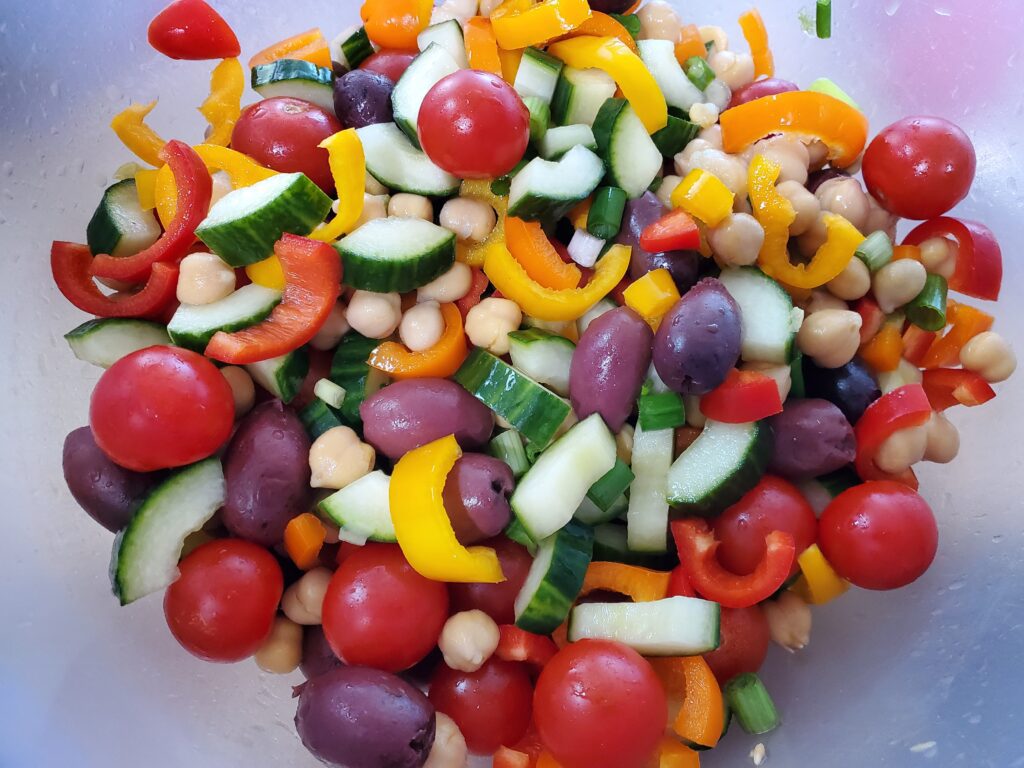
Place the tomatoes, peppers, onions, cucumbers, kale, olives, feta and chickpeas in a large bowl. Add the quinoa once it has cooled.
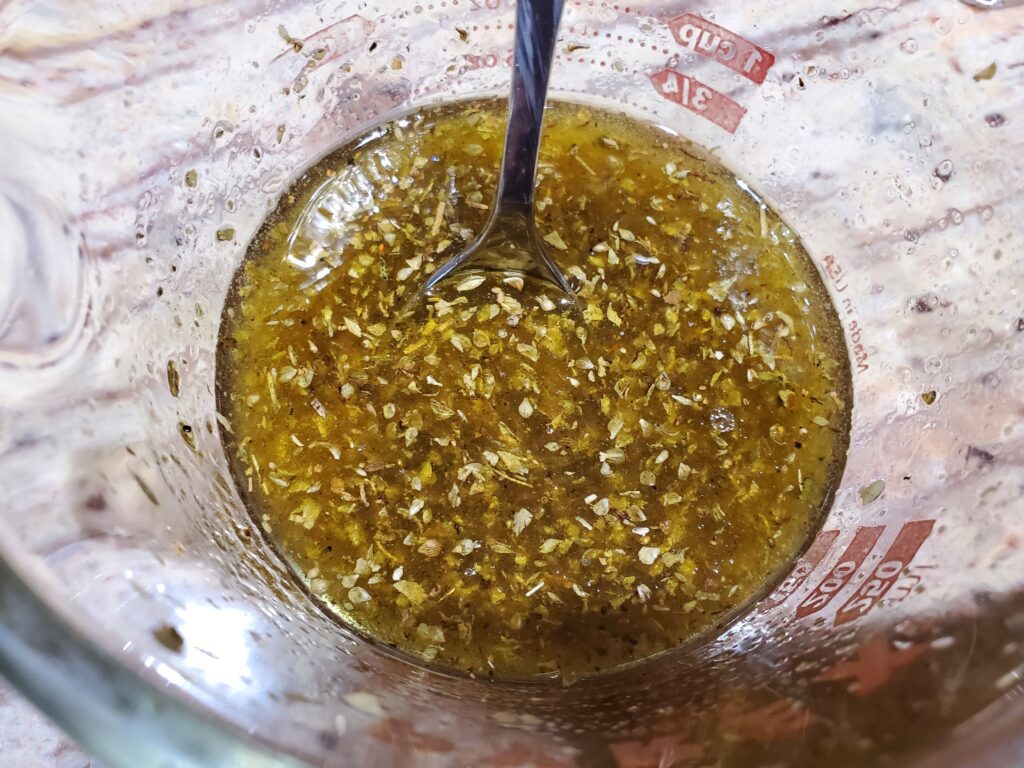
Prepare the dressing in a separate bowl. Add the olive oil, vinegar, lemon juice, oregano, mustard, salt and pepper to a bowl. Whisk until combined.
Pour the dressing over the salad and toss until well coated.
More Great Salad Recipes:
Check out this post for more great salad recipes for packed lunches.
1 – 15.5 ounce can of chickpeas, drained and rinsed
1/3 cup olive oil
1/3 cup red wine vinegar
Juice of one lemon
1 teaspoon oregano
1 teaspoon Dijon mustard
salt and pepper to taste
DIRECTION
Start by preparing the quinoa. Rinse 1 cup of the tri-color quinoa in a mesh strainer. Add the quinoa and 2 cups of water to a sauce pan. Bring it to a boil. Cover and reduce the heat to simmer for 15 minutes. Turn off the heat and allow it to remain covered for 5 more minutes.<br>Place the tomatoes, peppers, onions, cucumbers, kale, olives, feta and chickpeas in a large bowl. Add the quinoa once it has cooled.<br>Prepare the dressing in a separate bowl. Add the olive oil, vinegar, lemon juice, oregano, mustard, salt and pepper to a bowl. Whisk until combined.<br>Pour the dressing over the salad and toss until well coated.
NOTES
As an Amazon Associate, I earn on qualified purchases.
So easy and so healthy, this baked chicken and rice recipe is an easy meal to serve for your family , but also makes amazing leftovers for packed lunches. Bonus: it helps add whole grains to your diet which will make your nagging doctor happy when your cholesterol drops.
Disclaimer: This post contains affiliate links. I earn from qualified purchases at no additional cost to you.
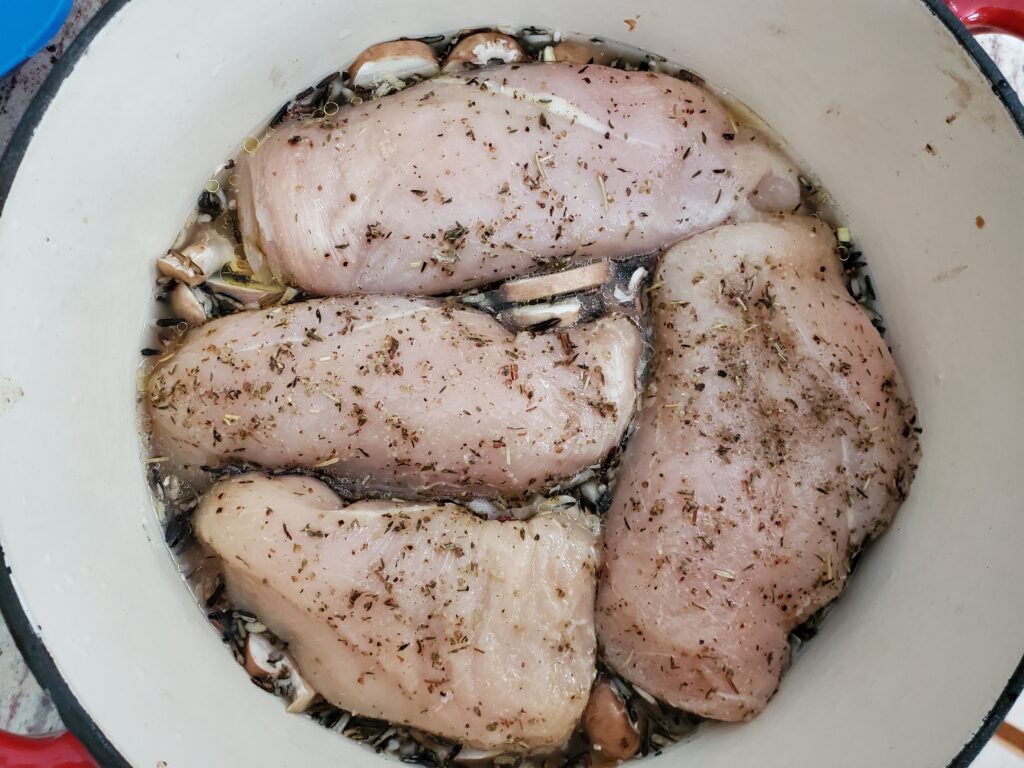
Start by trimming the chicken breasts. Mix the olive oil, garlic powder, Italian seasoning, salt and pepper. Pour it over the chicken breasts. Allow the chicken to marinade for at least one hour.
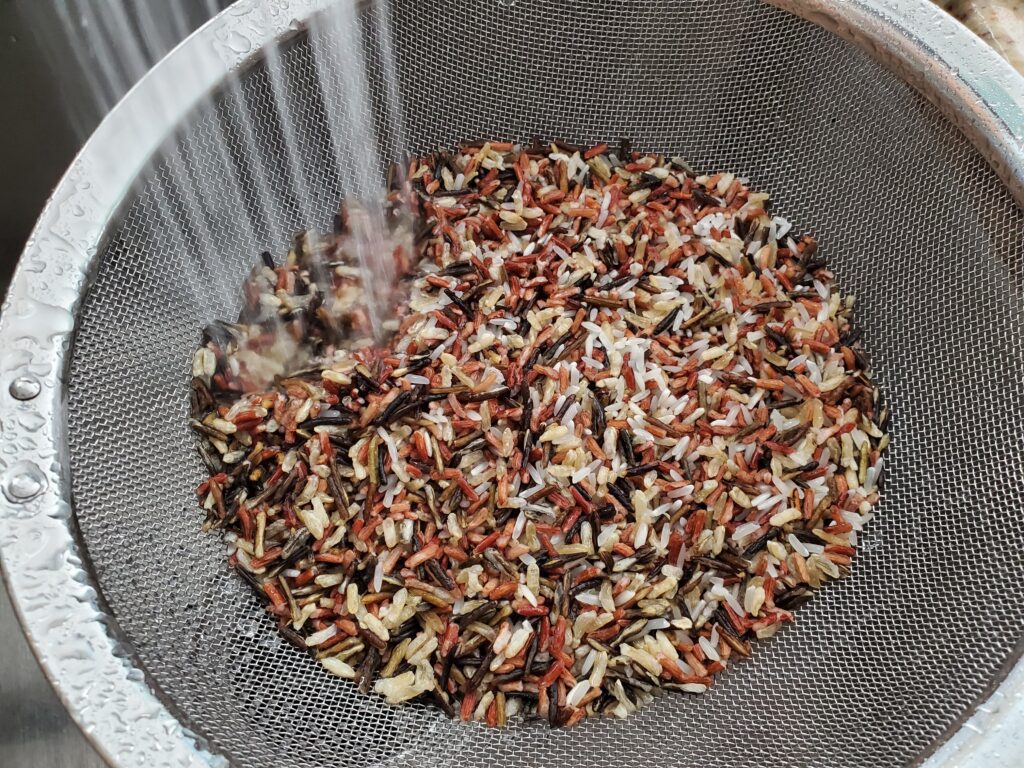
Rinse the rice
Rinse the rice. Preheat the oven to 375 degrees F.
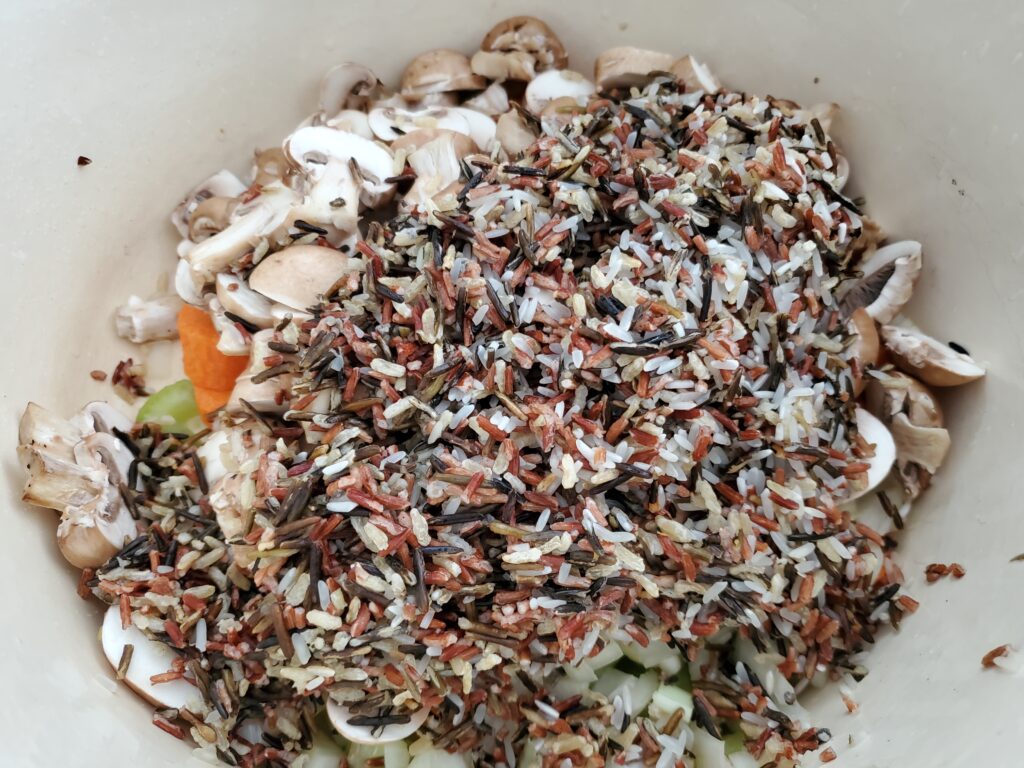
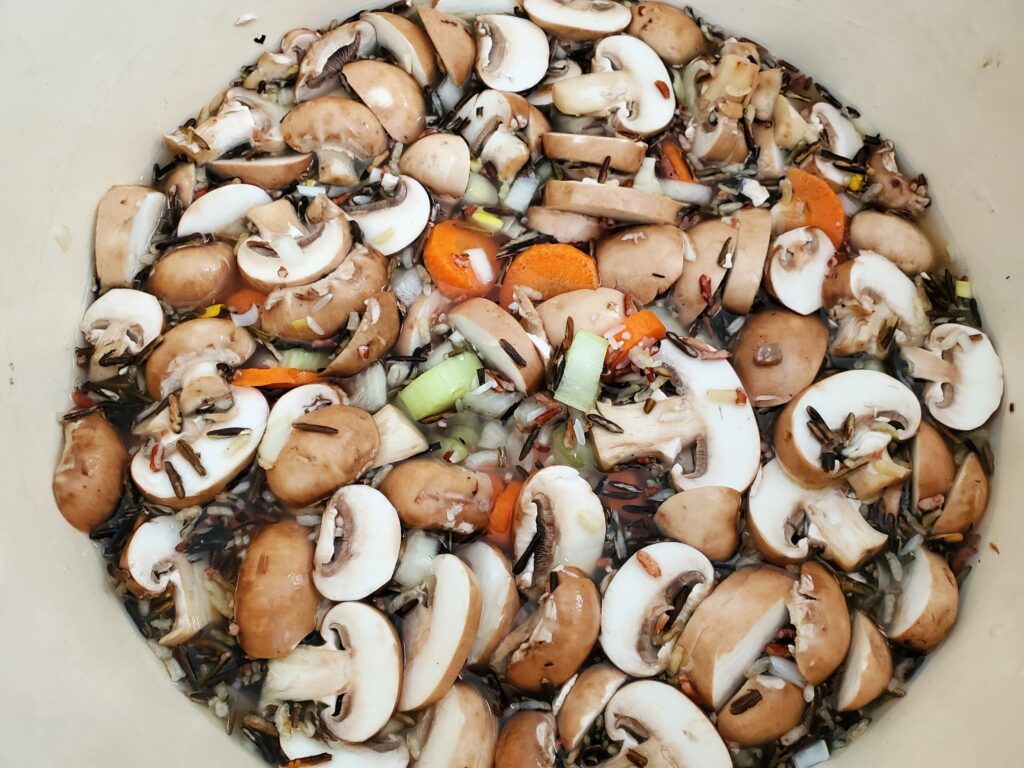
Place the carrots, celery, onions, and mushrooms in the Dutch oven. Add the rinsed rice and mix. Pour the chicken or vegetable stock over the vegetable mixture.
Top with 4 marinated chicken breasts. Drizzle the remaining marinade over top.
Cover and bake for 60 minutes.
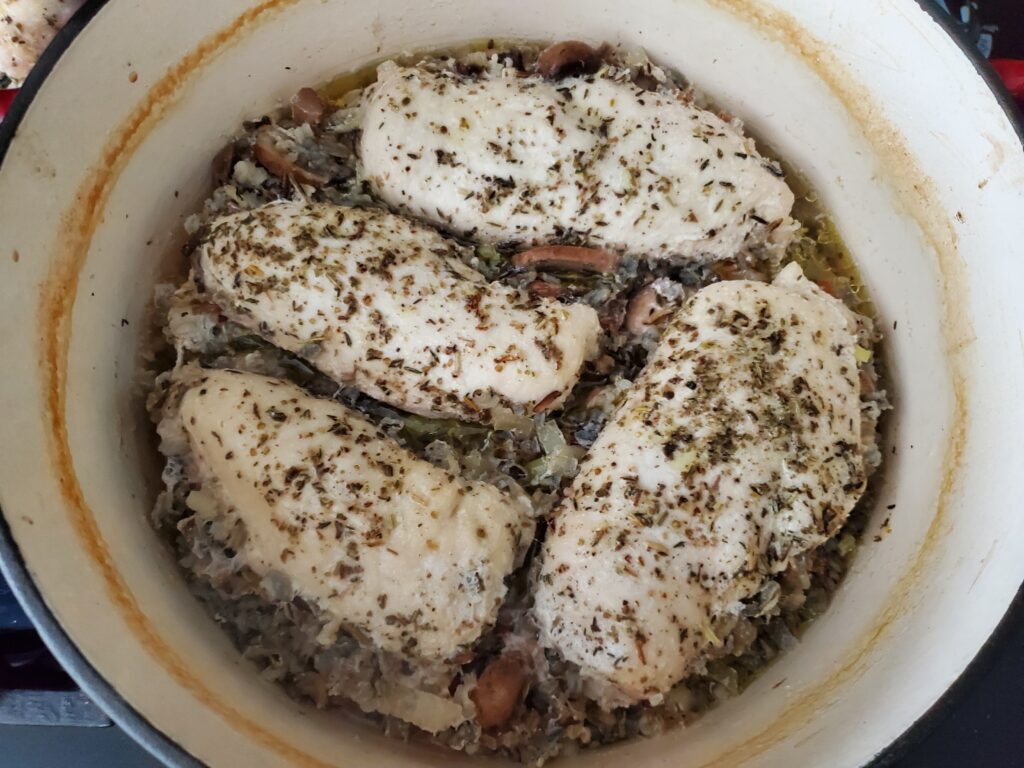
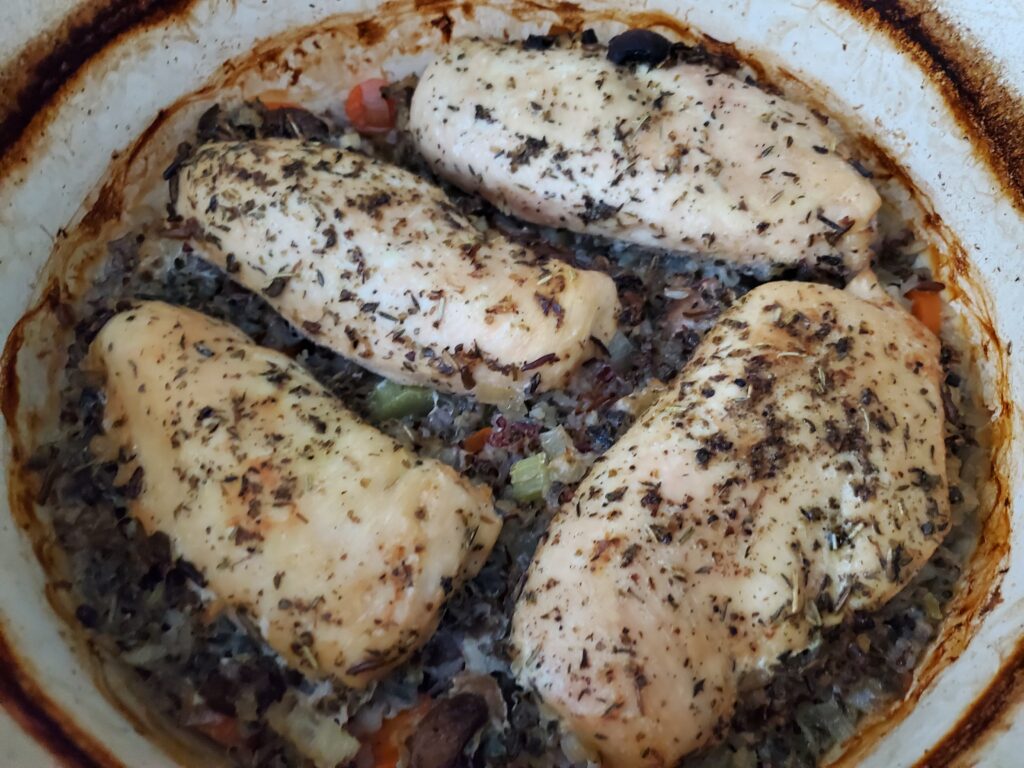
Remove the cover and continue to bake for another 45 minutes or until the chicken stock is completely absorbed and the chicken breast is lightly browned.
Start by trimming the chicken breasts. Mix the olive oil, garlic powder, Italian seasoning, salt and pepper. Pour it over the chicken breasts. Allow the chicken to marinade for at least one hour.<br>Rinse the rice. Preheat the oven to 375 degrees F.<br>Place the carrots, celery, onions, and mushrooms in the Dutch oven. Add the rinsed rice and mix. Pour the chicken or vegetable stock over the vegetable mixture. Top with 4 marinated chicken breasts. Drizzle the remaining marinade over top.<br>Cover and bake for 60 minutes. Remove the cover and continue to bake for another 45 minutes or until the chicken stock is completely absorbed and the chicken breast is lightly browned.
NOTES
As an Amazon Associate, I earn from qualified purchases.
Chocolate dipped pretzel rods are so easy to make and are a perfect gift for any occasion. You can add colors and sprinkles for any holiday and wrap them individually for a tasty treat. A simple an inexpensive gift for any holiday.
Disclaimer: This post may contain affiliate links. I earn commission at no additional cost to you.
Tools needed to make chocolate dipped pretzel rods:
First follow the package directions for melting the chocolate. This can be done in a double boiler or in a microwave. I prefer the microwave method. Fill a microwave safe coffee mug with white, milk or dark chocolate melts. Set the microwave to 50% power and microwave for 30 second. Remove the mug and stir for about 1 minute. If it is not melted enough, return the mug to the microwave for another 15 seconds on 50% power. Remove the mug and stir for another minute. It should be fully melted by now, but if it is still not melted return it to the microwave on 50% power for 5 seconds. Do not over heat.
How to dip the pretzel rods
Hold onto one end of the pretzel and dip it into the mug filled with chocolate. Use a spoon to lift the chocolate and drizzle it down the pretzel, this method allows you to reduce chocolate waste.
How to decorate the pretzel rods
Once the pretzel is coated in chocolate. Place it on a piece of parchment paper and immediately add sprinkles of your choice.
If you want to add a drizzle of another color use a fresh white chocolate dipped pretzel to drizzle on a dark chocolate dipped pretzel or vise versa.
Next, allow the chocolate to set. The time will vary depending on the temperature of your home. If you desire a fasted set, place the parchment paper on a cookie sheet and put the pretzels in the refrigerator.
Preparing the chocolate dipped pretzel rods for gifting
Once the chocolate is set, slip the pretzel chocolate covered end first into a self sealing pretzel bag. Remove the strip from the seal. Fold over the end of the bag and press to seal. You can gift as is or add a ribbon and gift tag if desired.
How to make Easter pretzel rods
bunnies and chickscarrots
For the bunnies: Dip in white, milk or dark chocolate. Place some candy eyes on. Allow the chocolate to set, then pipe on the melted pink candy melt to make ears and a nose.
For the chicks: Dip the pretzel in melted yellow candy melt. Place some candy eyes on. Allow the candy to set, them pipe on melted orange candy melt to make a beak.
For the carrots: Dip the pretzel in melted orange candy melt. Add orange sprinkles or pipe on more orange candy if desired. After placing the pretzel in a self sealing pretzel bag, tie some green curing ribbon over the top.
How to make Halloween pretzel rods
For Halloween pretzel rods: orange candy melts, Halloween sprinkles, and eyeballs are must! Since candy is a huge part of Halloween, you can also sprinkle candy on the dipped pretzels. Mini M&Ms are perfect for this.
How to make Thanksgiving Pretzel rods
These adorable turkey pretzel rods are made by dipping the pretzel in dark chocolate then placing and un-melted dark chocolate melt at the bottom of the dipped pretzel. Add a couple drops of melted chocolate on top of the round chocolate and add the eyes. Pipe on orange candy melts for the beak and red for the wattle. Then drizzle with red, orange and/or yellow candy melts for the fan.
For these turkey pretzels use an Oreo thin coated in chocolate to make the base of the fan. Surround the head with candy corn to make the fan. Use 2 eyeballs for the eyes, a mini orange M&M for the beak and piped on red candy for the waddle.
How to make Christmas Pretzel rods
For these adorable reindeer pretzel rods you will need: dark chocolate melts, candy eye balls, red M&Ms, red candy melts, gold ball sprinkles, and mini pretzel knots.
Dip the pretzel rod in dark chocolate, place the top end on a mini pretzel knot. You can place another pretzel knot under the bottom end of the pretzel to help balance it until it dries.
Decorate with 2 eyeballs, and an M&M nose. Later use piped on red candy melt to make the collar and decorate with gold ball sprinkles to make the bells.
For these festive snowman dipped pretzel rods you will need: white chocolate melts, candy eyeballs, orange Tic Tacs, mini chocolate chips, freeze dried mini marshmallows, dark chocolate melts, festive holiday sprinkles and pull and peel Twizzlers.
Start by dipping the pretzel rod into the white chocolate. Decorate with eyeballs, a tic tac nose, mini chocolate chip mouth and mini marshmallow body. Later dip the top into dark chocolate for the hat and decorate with some sprinkles. Once dry, tie a Twizzler scarf around the snowman’s neck. These snowmen still fit inside the Self sealing pretzel bags.
These Christmas tree pretzel rods are so easy. Simply dip in white or dark chocolate. Pipe on green candy melts and decorate with a yellow M&M star and sprinkles of your choice. Pipe on some red candy melt for garland if desired.
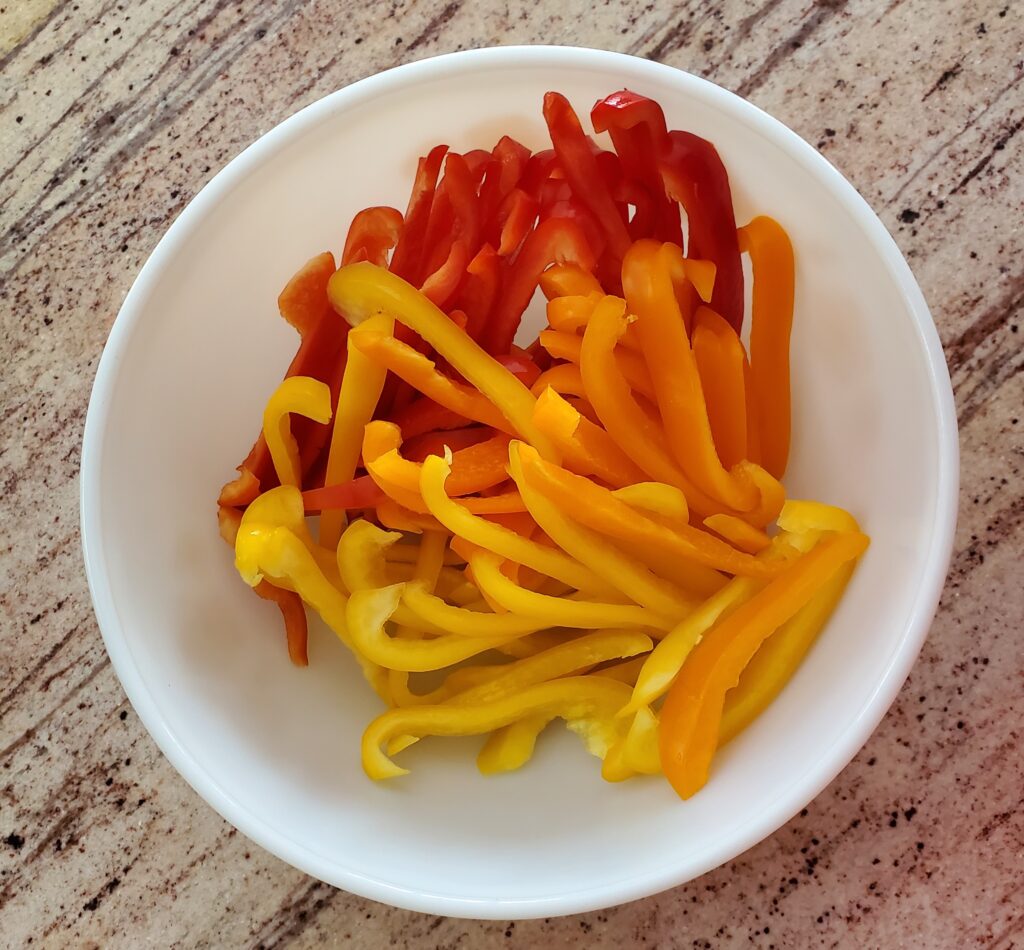
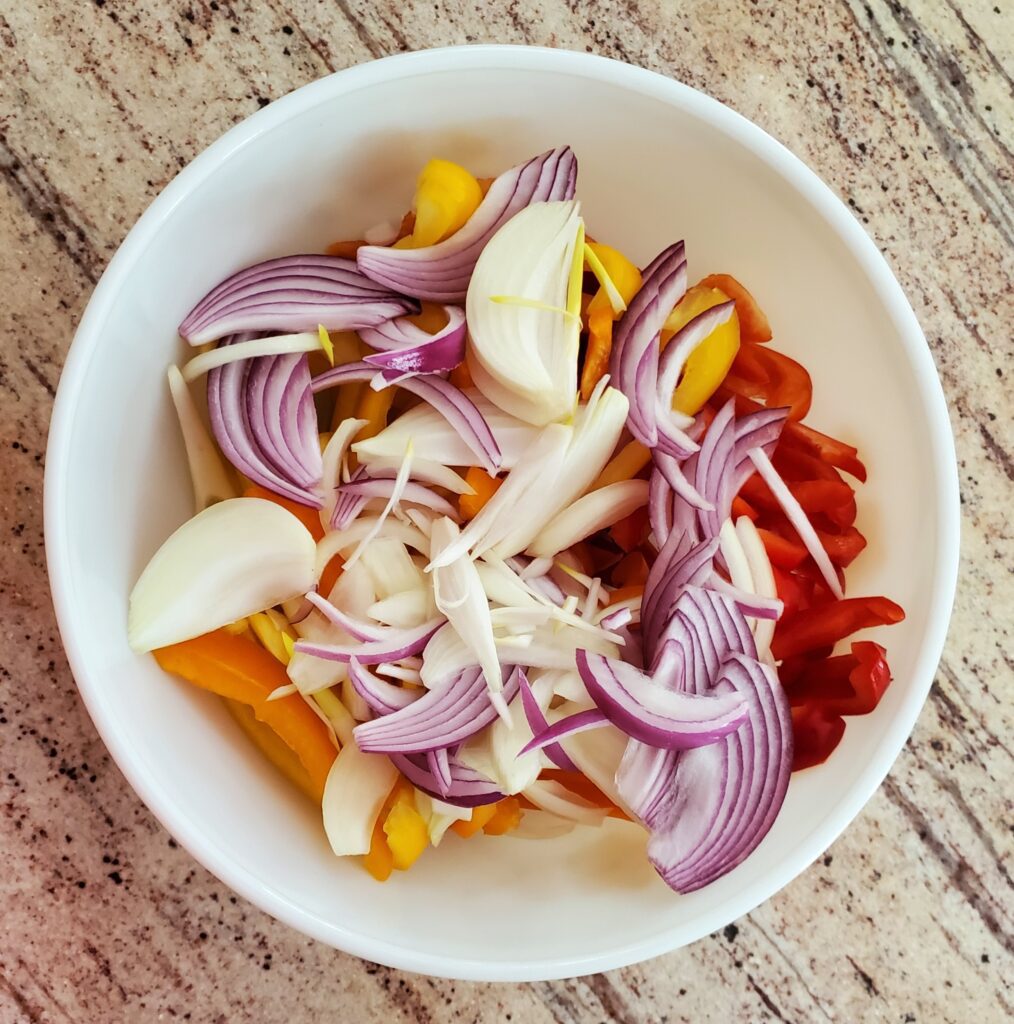
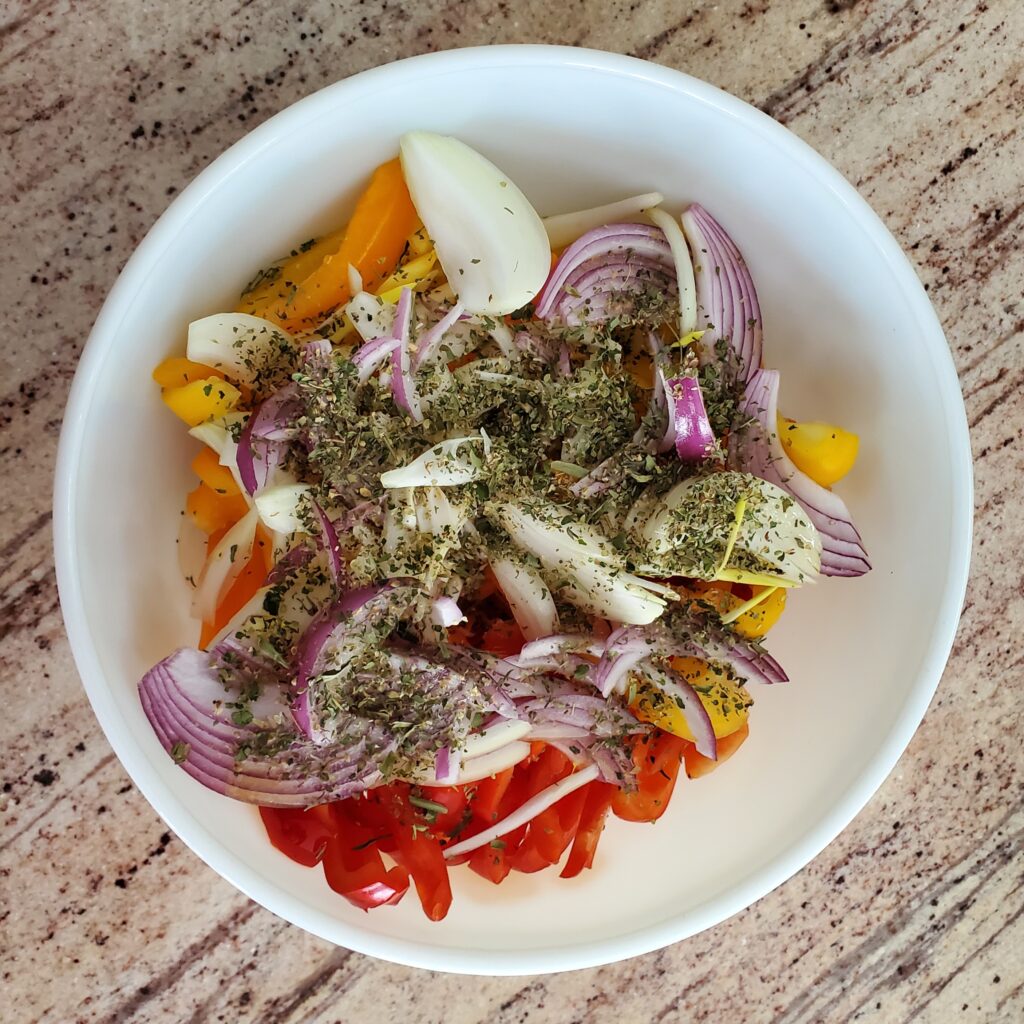
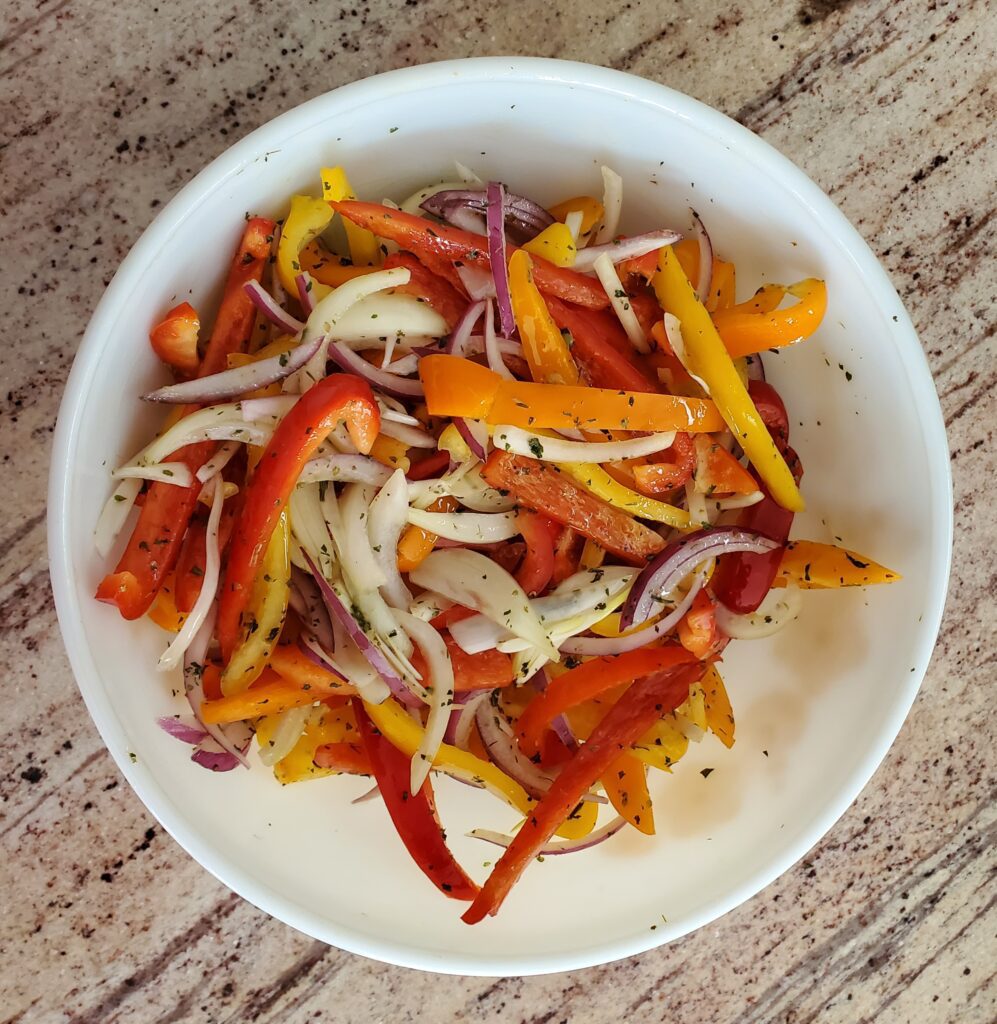
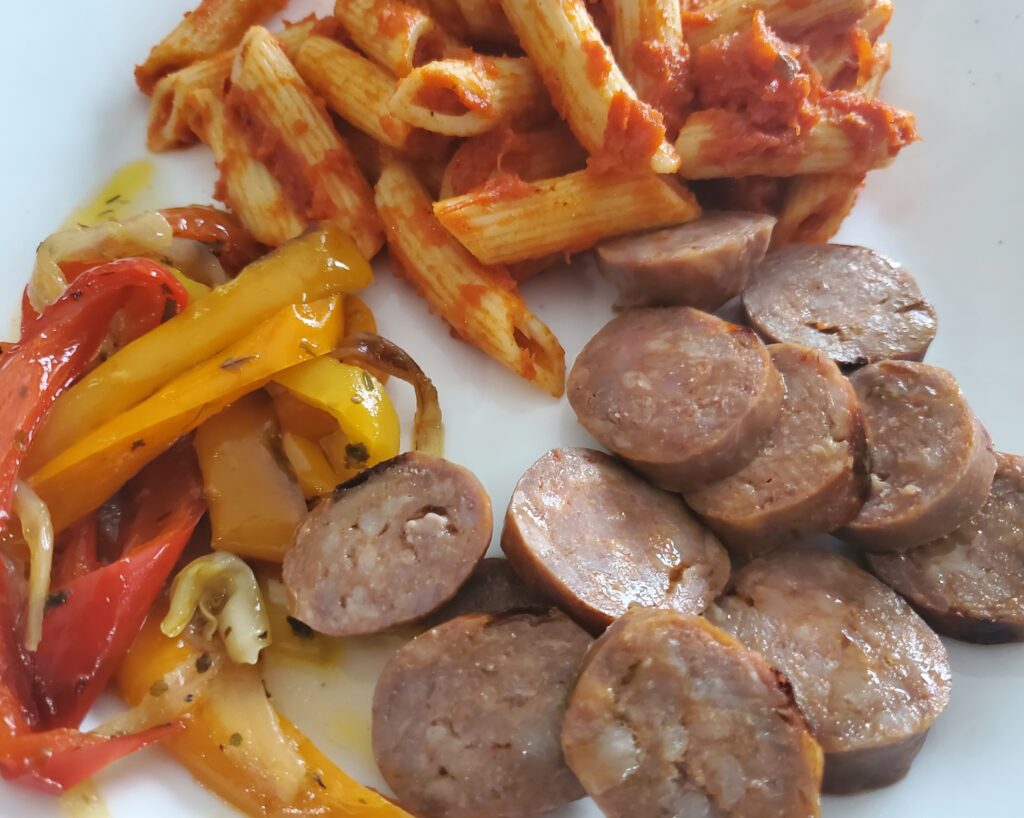
Try this amazing and easy sheet pan Italian sausage and peppers meal. Serve on a hoagie bun or with a side of pasta. Either way this is an easy mid week meal or a simple way to feed a crowd. Perfect for lunch or dinner.
Disclaimer: This post may contain affiliate links: I earn commission at no additional cost to you.
Sheet Pan Italian Sausage and Peppers Instructions:
Start by tossing the peppers and onions with olive oil and Italian seasoning.
Sliced PeppersAdd Sliced OnionsAdd Italian SeasoningToss with Olive Oil
Line a sheet pan with parchment paper. Place the Italian sausages on one side of the sheet pan and the seasoned veggies on the other side.
Preheat the oven to 375 degrees F. Bake the Sausages and veggies for 15 minutes then flip the sausages and toss the veggies. Bake for another 10-15 minutes or until the internal temperature of the sausages is 165 degrees F.
Start by tossing the peppers and onions with olive oil and Italian seasoning.
Line a sheet pan with parchment paper. Place the Italian sausages on one side of the sheet pan and the seasoned veggies on the other side.
Preheat the oven to 375 degrees F. Bake the Sausages and veggies for 15 minutes then flip the sausages and toss the veggies. Bake for another 10-15 minutes or until the internal temperature of the sausages is 165 degrees F.
NOTES
Serve on a hoagie bun or with a side of pasta.
More Easy Meals
Are you looking for a simple meal? You came to the right place. Try some of these easy mid-week recipes:
Websites store cookies to enhance functionality and personalise your experience. You can manage your preferences, but blocking some cookies may impact site performance and services.
Essential cookies enable basic functions and are necessary for the proper function of the website.
Name
Description
Duration
Cookie Preferences
This cookie is used to store the user's cookie consent preferences.
30 days
These cookies are needed for adding comments on this website.
Name
Description
Duration
comment_author
Used to track the user across multiple sessions.
Session
comment_author_email
Used to track the user across multiple sessions.
Session
comment_author_url
Used to track the user across multiple sessions.
Session
These cookies are used for managing login functionality on this website.
Name
Description
Duration
wordpress_logged_in
Used to store logged-in users.
Persistent
wordpress_sec
Used to track the user across multiple sessions.
15 days
wordpress_test_cookie
Used to determine if cookies are enabled.
Session
Statistics cookies collect information anonymously. This information helps us understand how visitors use our website.
Google Analytics is a powerful tool that tracks and analyzes website traffic for informed marketing decisions.
Contains information related to marketing campaigns of the user. These are shared with Google AdWords / Google Ads when the Google Ads and Google Analytics accounts are linked together.
90 days
__utma
ID used to identify users and sessions
2 years after last activity
__utmt
Used to monitor number of Google Analytics server requests
10 minutes
__utmb
Used to distinguish new sessions and visits. This cookie is set when the GA.js javascript library is loaded and there is no existing __utmb cookie. The cookie is updated every time data is sent to the Google Analytics server.
30 minutes after last activity
__utmc
Used only with old Urchin versions of Google Analytics and not with GA.js. Was used to distinguish between new sessions and visits at the end of a session.
End of session (browser)
__utmz
Contains information about the traffic source or campaign that directed user to the website. The cookie is set when the GA.js javascript is loaded and updated when data is sent to the Google Anaytics server
6 months after last activity
__utmv
Contains custom information set by the web developer via the _setCustomVar method in Google Analytics. This cookie is updated every time new data is sent to the Google Analytics server.
2 years after last activity
__utmx
Used to determine whether a user is included in an A / B or Multivariate test.
18 months
_ga
ID used to identify users
2 years
_gali
Used by Google Analytics to determine which links on a page are being clicked
30 seconds
_ga_
ID used to identify users
2 years
_gid
ID used to identify users for 24 hours after last activity
24 hours
_gat
Used to monitor number of Google Analytics server requests when using Google Tag Manager