Categories
Recipes

Make Your Own Sauerkraut: Red or Green

If you love sauerkraut, you will really love it if you make your own. It’s so easy, just 2 ingredients. It’s better to make your own because you can choose how sour you want it to be, which color cabbage you want to use and any additional flavors you want to add. Red cabbage sauerkraut adds a lot of color to your recipes. Any additional flavors are up to you! It’s your sauerkraut, make it the way you want it.

This post may contain affiliate links. I earn commission at no additional cost to you.

What tools do you need to make sauerkraut?

  • Kitchen Scale – The ingredients for sauerkraut are most accurately measured by weight. Since fermentation is a scientific process, it’s best to measure accurately. Choose one that converts from grams to ounces. Find a good one here.
  • Fermentation kit – Although not absolutely necessary, a fermentation kit will make the process easier. I love this set, it is compatible with any size wide mouth canning jar.
  • Quart size wide mouth canning jars – These jars are the perfect size for fermenting 1 pound of cabbage at a time. They are also compatible with my preferred fermentation lids. The wide mouth is large enough to fit a jam jar to hold down the cabbage.
  • Sauerkraut Pounder – A wooden tool used to press the cabbage down into the brine.
  • Jam jars – These 8 ounce jam jars fit perfectly inside the quart size canning jars. They are used to hold down the cabbage while it ferments. Alternatively, you could use weights for this purpose.
  • 8″ Chef’s knife – An 8″ chef’s knife is the best knife for slicing large vegetables like a full head of cabbage. I honestly don’t know how a kitchen could function without at least one 8″ chef’s knife. Find one here.
  • Cutting Board – Choose wood or plastic, never glass. Make sure it is large enough to slice a head of cabbage.

Homemade Sauerkraut Ingredients:

1 pound red or green cabbage -chopped or shredded

9 grams (~1.5 tablespoons) kosher salt or sea salt (not iodized- no anticaking ingredients)

Great Sauerkraut additions:

For extra flavor, you can add any of these to your homemade sauerkraut. This is anther reason why it is so much better to make your own sauerkraut.

  • Caraway seeds
  • Juniper berries
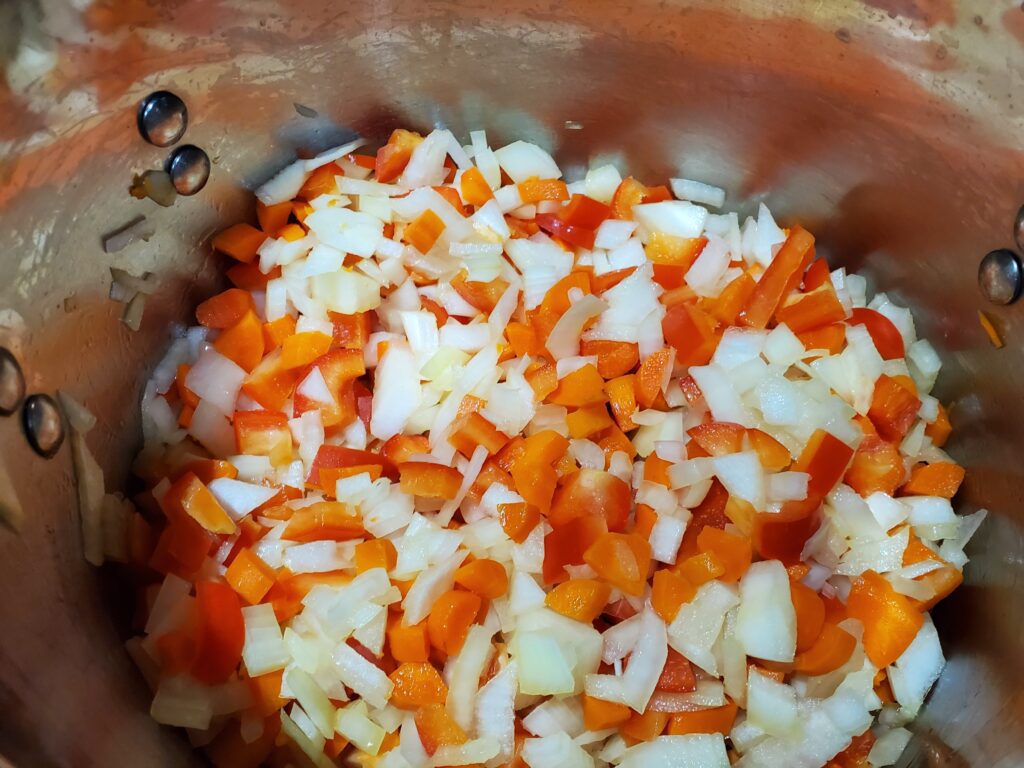
  • Shredded carrots or beets (80% cabbage/20% beets or carrots – otherwise the sugar from the beets or carrots can affect the fermentation)
  • Garlic
  • Ginger
  • Lemon peel
  • Fresh dill

How to prepare cabbage to make sauerkraut

Slice the cabbage in half with an 8″ Chef’s knife.
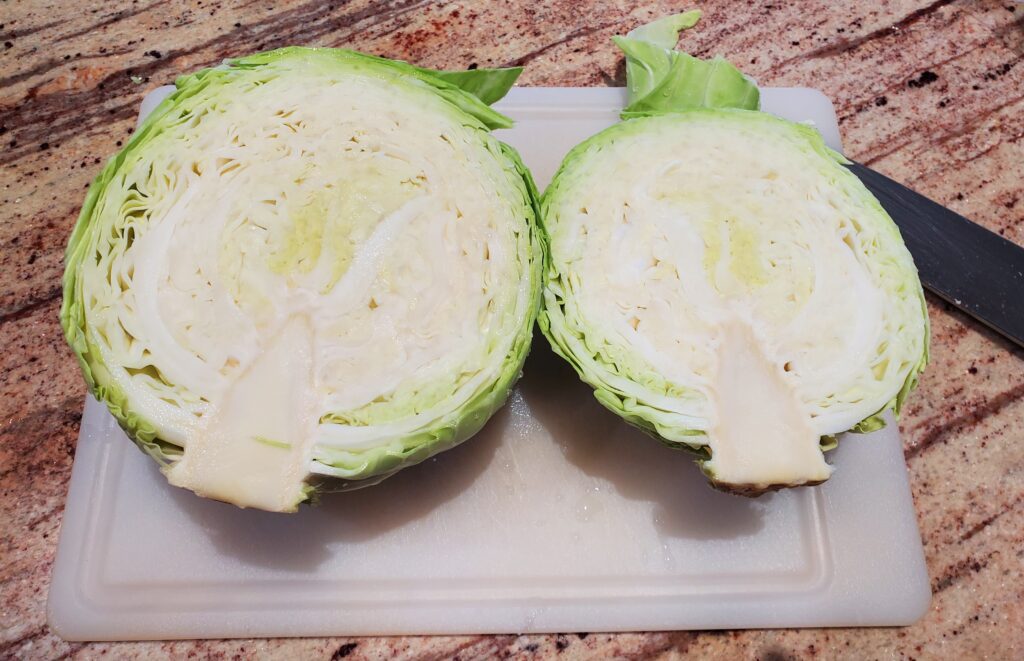
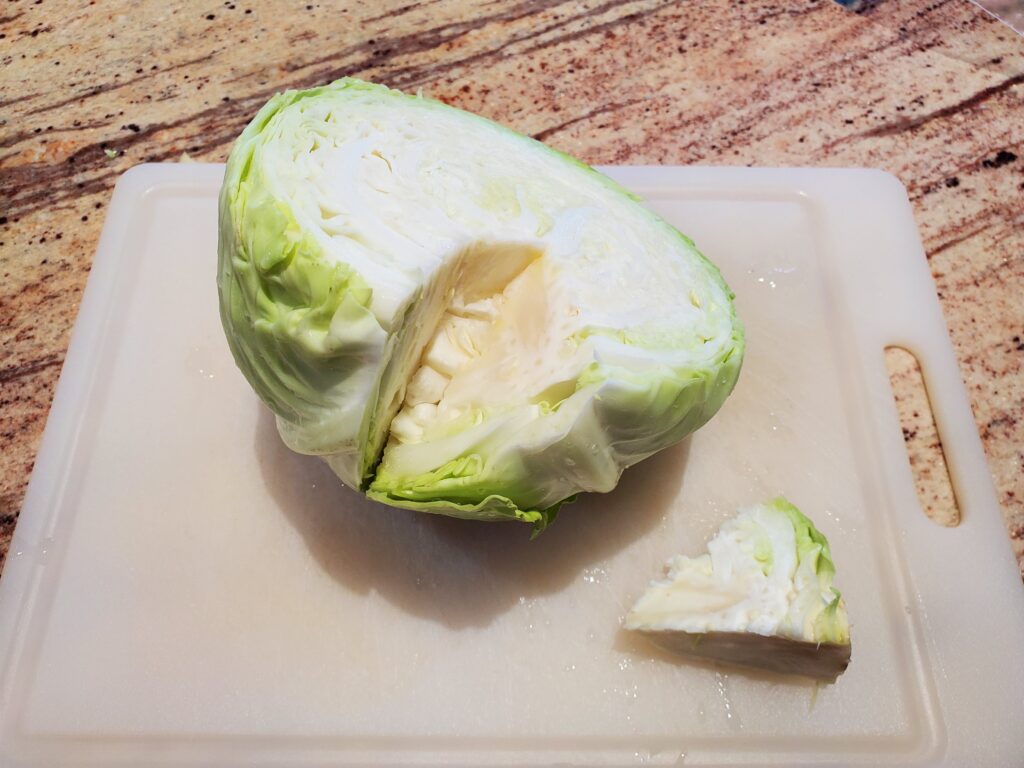
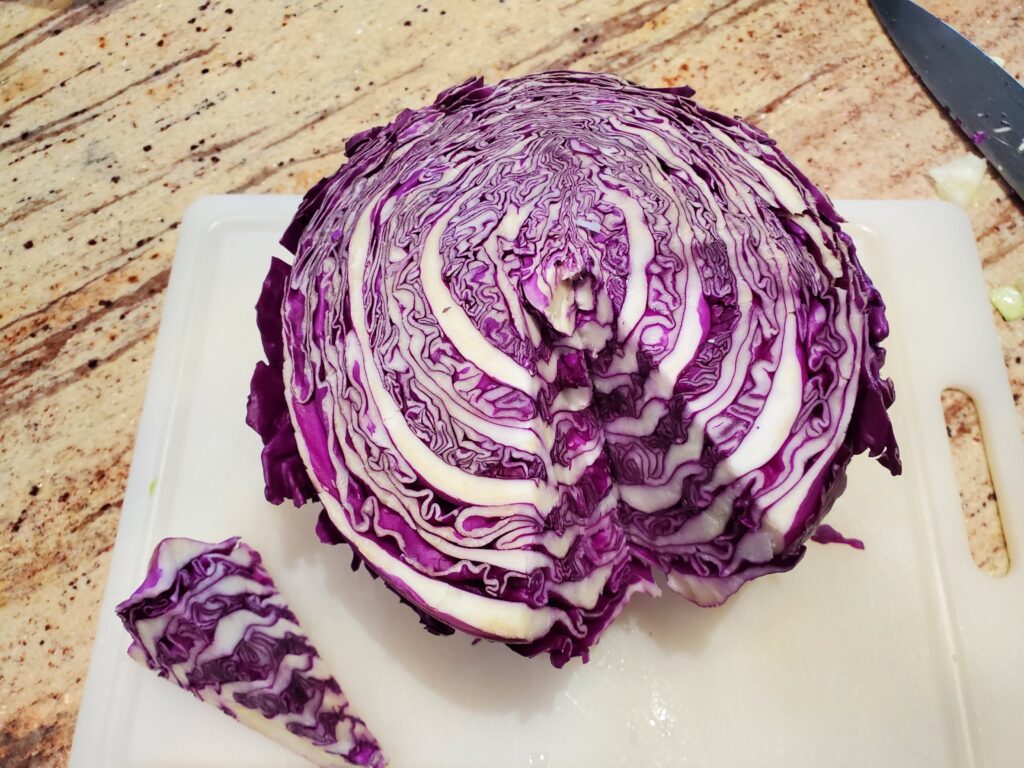
Cabbage cut in half
cabbage with core removed
red cabbage with core removed

Remove the core.

chopped cabbage

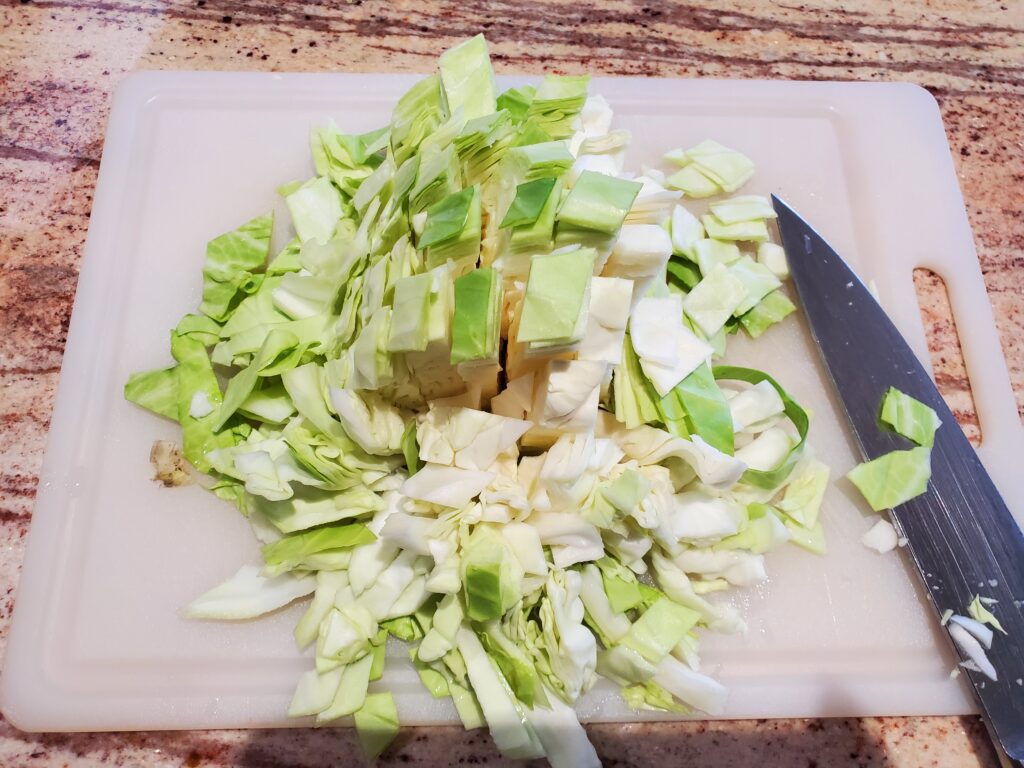
Chop the cabbage any way you like, it’s your sauerkraut! I prefer to dice the cabbage into 1/4 to 1/2 inch squares. This makes the perfect bite size pieces, easy for adding to sandwiches or sausages.

How to make Your Own Sauerkraut:

adding salt to cabbage

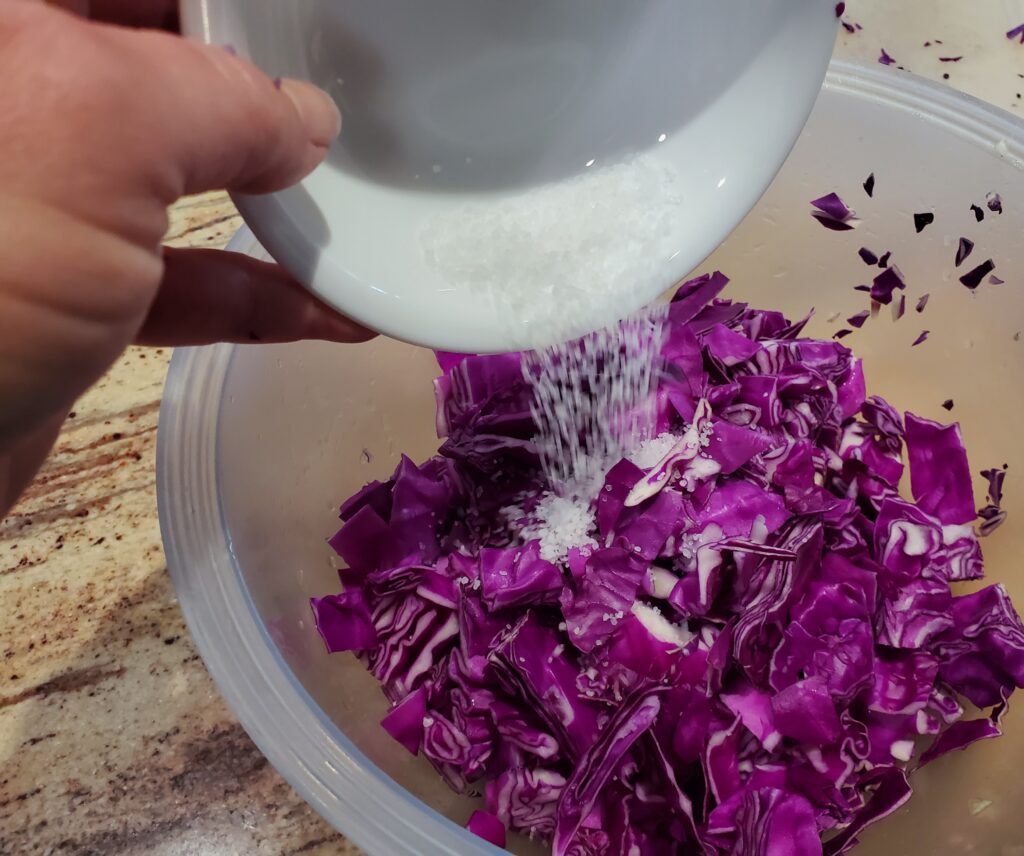
Weigh your chopped cabbage on a Kitchen Scale. Put the diced cabbage in a bowl, then add 1.5 teaspoons of kosher salt per pound of cabbage.

squeezing juice from green cabbage
squeezing juice from cabbage

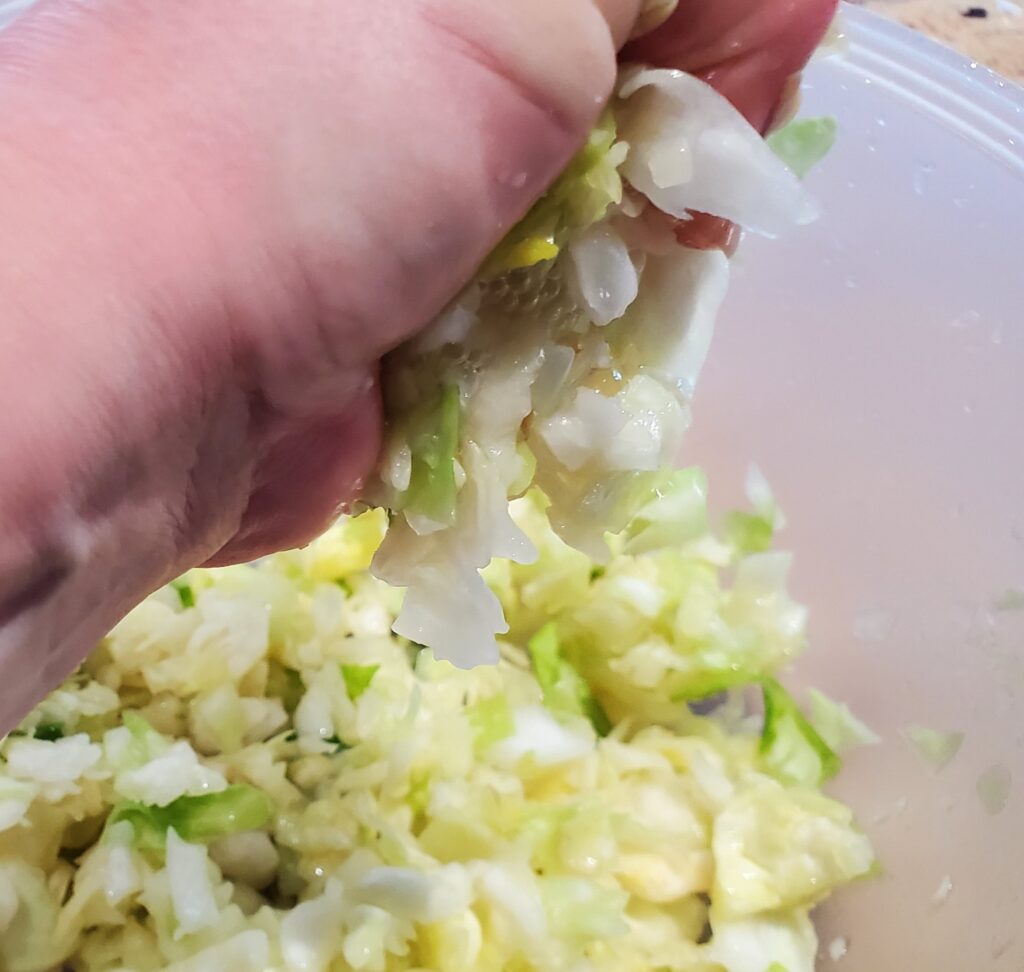
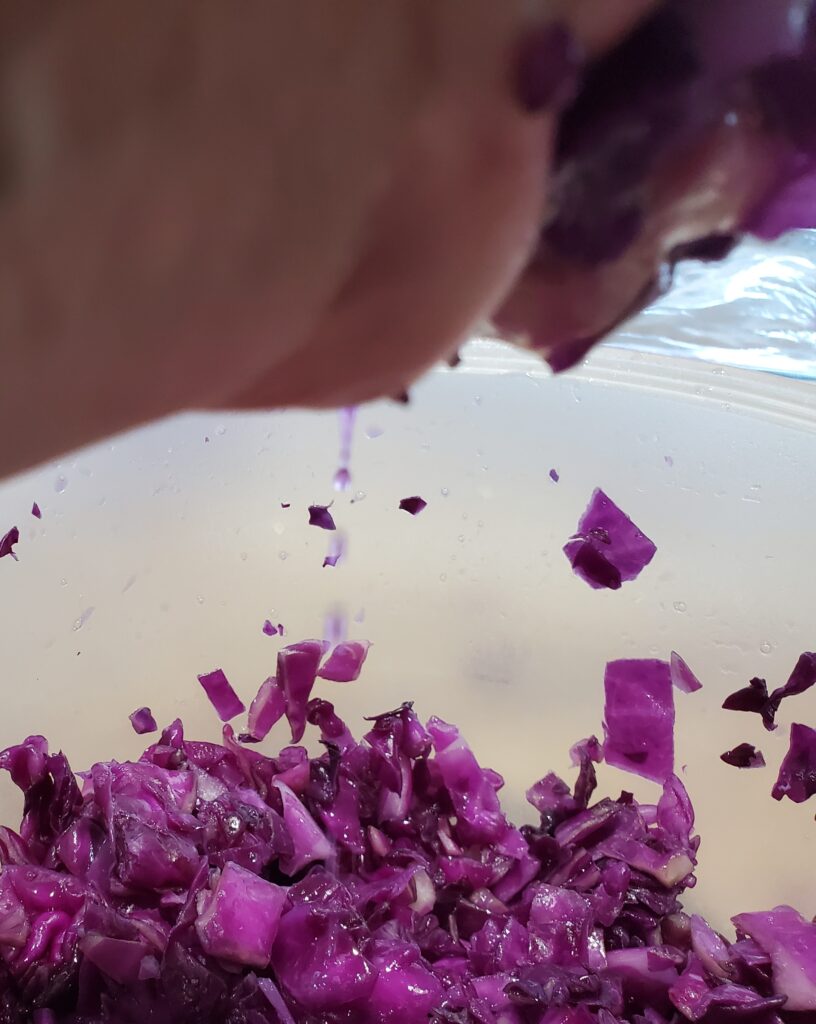
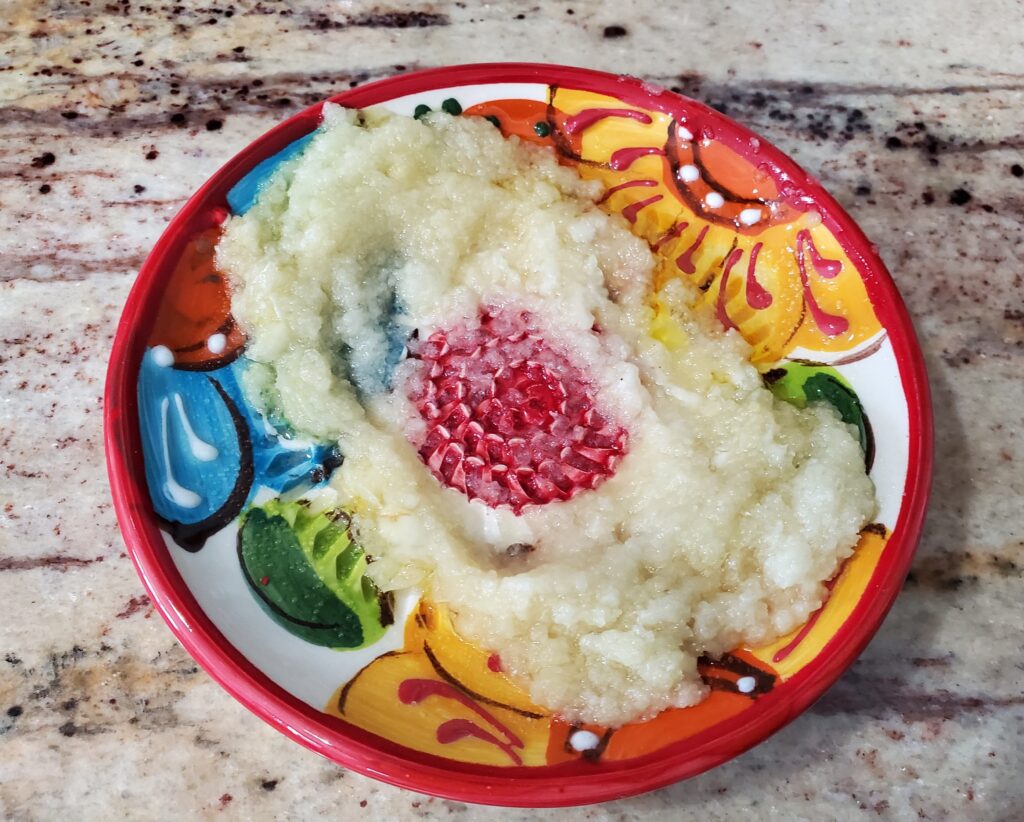
With clean hands, press and squeeze the cabbage until it is very wet. You should be able to see the water dripping down when you squeeze it. This will take a few minutes.

cabbage in quart size canning jars

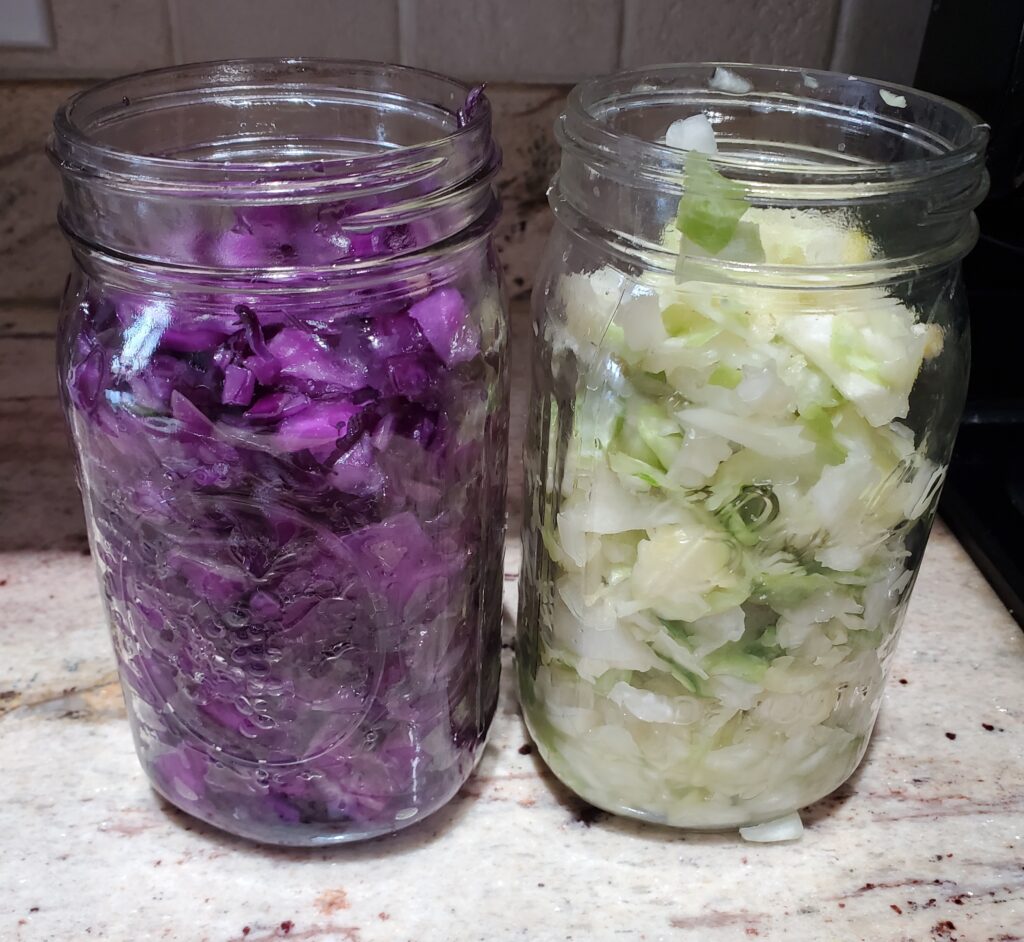
Transfer the wet cabbage and all of the juice “brine” into Quart size wide mouth canning jars.

press cabbage down into jar

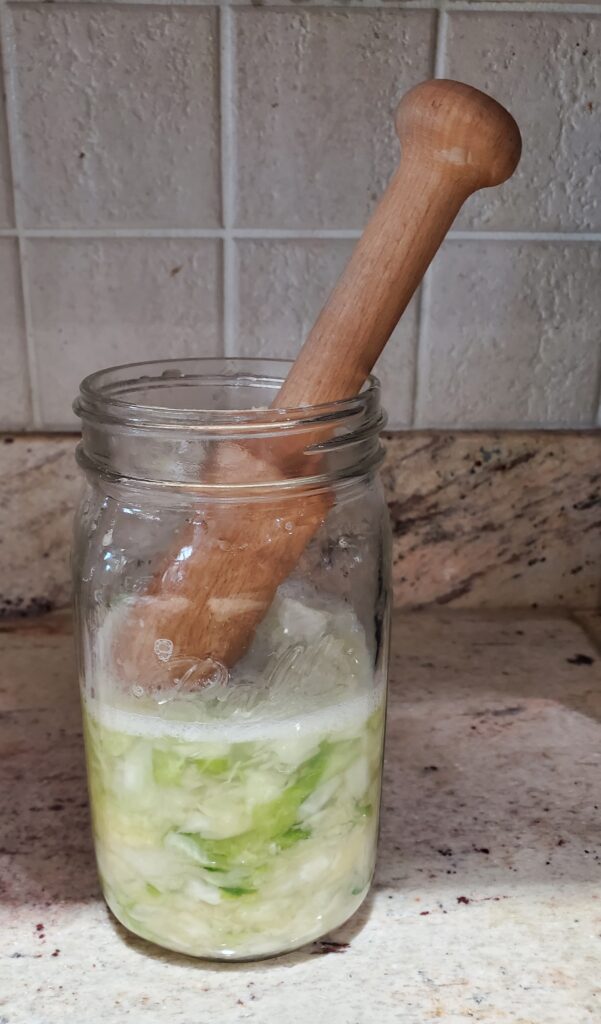
Use a Sauerkraut Pounder to press the cabbage down into the brine. The cabbage should all be completely submerged in brine.

add jam jars to hold cabbage down

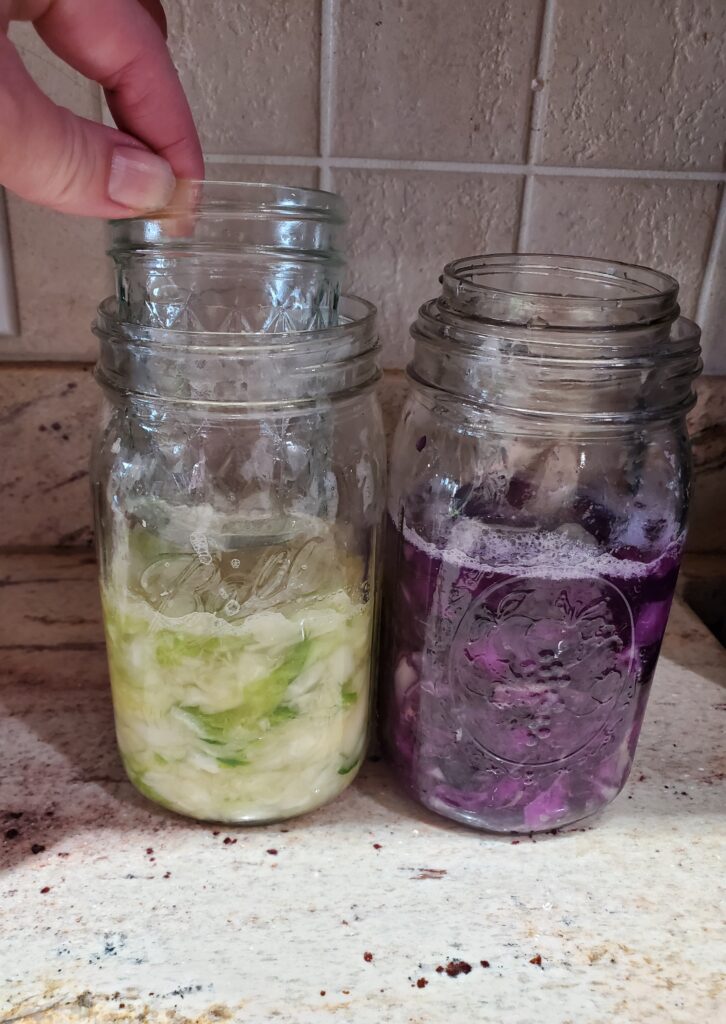
Place the jam jars, or fermentation weights inside the quart size jars to hold the cabbage down in the brine.

jars with fermenting lids

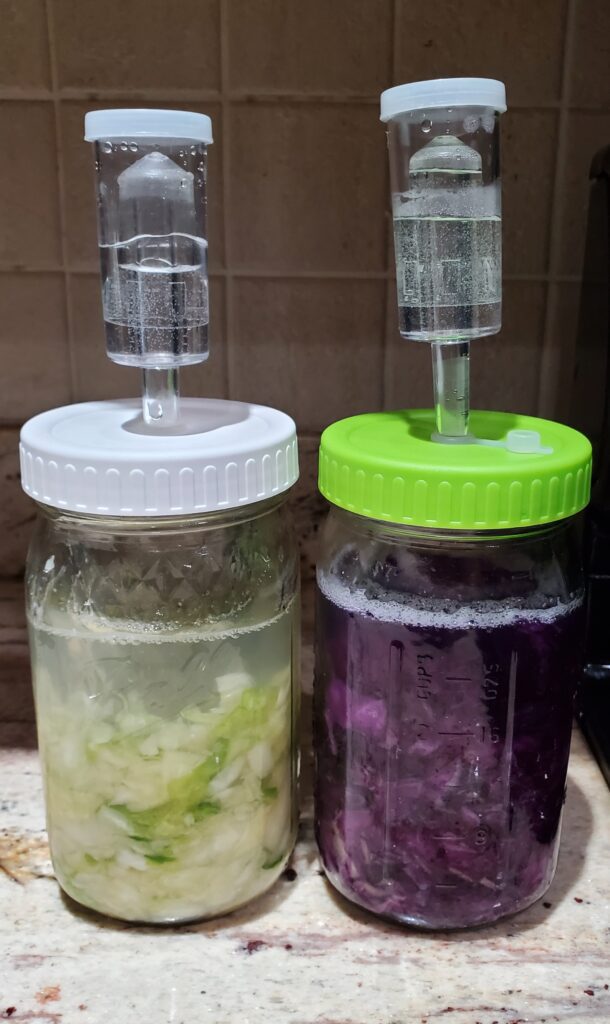
Screw on the fermentation lids. Let the jars sit on the counter out of direct sunlight for 1-6 weeks. I usually date the jars. The ideal temperature for fermentation is between 60-70 degrees F. After a couple of days you will begin to see bubbles forming in the jars. This is the fermentation taking place. Check for desired sourness after 7 days. Continue checking every couple days or at least weekly after that. Once you have your desired sourness, put an airtight cap on it, and place it in the refrigerator. The fermentation lids I used have an air tight seal that can be closed when the fermentation vent is removed.

Is Sauerkraut Healthy?

Yes! Cabbage alone is very healthy. It is a good source of Vitamin C and Vitamin K. Cabbage is also good for you because it is a great low calorie high fiber food. Fermentation adds the benefit of probiotics which are good for gut health. Sauerkraut has many health benefits, it is anti-inflammatory, a great anti-oxidant, and may even protect against cancer. Some people experience upset stomach or diarrhea from eating sauerkraut. If you are new to sauerkraut it would be best to start with a small serving, you can increase your serving size when your body adjusts to it.

Recipe By Kristin
Course: Condiment Cusine:German Difficulty:Easy

Servings

20 minutes

Preparing Time

30 minutes

Cooking Time

minutes

Calories

6 kcal

INGREDIENTS

  1. 1 pound Cabbage

  2. 1.5 teaspoons kosher salt

DIRECTION

  1. Chop the cabbage.

  2. Add the salt.

  3. Mash and squeeze the cabbage until it is very wet and water drops form when squeezed. 2-5 minuets.

  4. Press the cabbage into a wide mouth quart size canning jar with a sauerkraut pounder.

  5. Hold the cabbage down in the brine with fermentation weights or jam jars.

  6. Place a fermentation lid on the jar.

  7. Leave on the counter out of direct sunlight, between 60-70 degrees F for 1-6 weeks. Check weekly for desired sourness.

NOTES

Follow me for more healthy recipes

As an amazon associate, I earn from qualified purchases.

Categories
Recipes

Quick and Easy Chili

Sometimes even those of us who enjoy cooking just don’t have time to cook. Sometimes we need to get dinner on the table as quick and painless as possible. If you ever have a busy day and need a quick and easy dinner, this chili recipe is for you. This is not an award winning recipe, but it wins many compliments at my house and makes great leftovers for packed lunches.

This post may contain affiliate links. I earn commission on qualified purchases at no additional cost to you.

Quick and Easy Chili Ingredients

  • 2 pounds ground beef
  • 4 15-ounce cans tomato sauce
  • 2 14.5-ounce cans diced tomatoes with juice
  • 1 15.5-ounce can kidney beans, drained and rinsed
  • 1 15.5-ounce can black beans, drained and rinsed
  • 1 15.5-ounce can chili beans, with sauce
  • 1 large onion, minced
  • 2 tablespoons olive oil
  • 1/4 cup chili powder
  • 1 teaspoon cumin
  • 2 teaspoons garlic powder
  • 2 tablespoons cocoa powder

How to prepare quick and easy chili

Start by browning the ground beef. Once it is fully cooked, drain it and set it aside. Next sauté the onion in the olive oil. When the onion is softened, add the tomato sauce and mix well. Add the drained meat, beans and diced tomatoes, mix well. Add the remaining ingredients and mix until well combined. Continue to heat until warm and bubbly. Taste and add additional seasoning if desired. Simmer on low for about 20 min.

Garnish with cheese and chopped onion if desired.

Serve with crackers or fresh bread.

easy chili with bread

As an amazon associate, I earn from qualified purchases.

Categories
Healthy Home Recipes

Easy Morning Glory Muffins Recipe

These morning glory muffins are a favorite in my home. It’s best to make them on the weekend, that way you will have easy breakfast all week. They are loaded with heathy ingredients. Plenty of nuts, seeds, fruits and vegetables to start your day out right.

This post may contain affiliate links. I earn commission on qualified purchases at no additional cost to you.

Morning Glory Muffin Ingredients:

  • 1 cup Craisins
  • 2 cups flour
  • 1 cup packed light brown sugar
  • 1 teaspoon baking soda
  • 2 teaspoons cinnamon
  • 1/2 teaspoon ginger
  • 1/2 teaspoon salt
  • 2 cups carrots, peeled and grated
  • 2 medium apples, cored and grated
  • 1/2 cup unsweetened shredded coconut
  • 3/4 cup chopped pecans
  • 1/3 cup pumpkin or sunflower seeds
  • 3 large eggs
  • 2/3 cup vegetable or canola oil
  • 2 teaspoons pure vanilla extract
  • 1/4 cup orange juice or juice of one orange

Morning glory muffin instructions:

Preheat the oven to 375 degrees F. Grease three 6-cup muffin tins.

In a small bowl soak the craisins in hot water. Set aside.

Grate the carrots and apples in a food processor.

In a large bowl mix the dry ingredients: flour, sugar, baking soda, salt and seasonings. Then stir in carrots, apples, coconut, nuts, and seeds.

In a separate bowl beat together the wet ingredients: eggs, oil, juice, and vanilla.

Add the wet ingredients to the dry ingredients and mixt until well combined.

Drain the water from the craisins and stir them in.

Morning glory batter

Fill the muffin cups all the way to the top. You should be able to fill 12-16 cups.

Filling muffin cups with morning glory batter

Bake for 25-28 minutes or until a fork comes out clear.

Remove from the oven and allow them to cool for about 5 minutes, then finish cooling on a cooling rack.

Morning glory muffins baked

Store in an airtight container for a few days, or freeze for longer storage.

Morning glory muffins make a great breakfast

Morning glory muffin served with yogurt and fruit

Recipe By Kristin
Course: breakfast Cusine:American Difficulty:Easy

Servings

14 minutes

Preparing Time

15 minutes

Cooking Time

25 minutes

Calories

kcal

INGREDIENTS

  1. 1 cup Craisins

  2. 2 cups flour

  3. 1 cup packed light brown sugar

  4. 1 teaspoon baking soda

  5. 2 teaspoons cinnamon

  6. 1/2 teaspoon ginger

  7. 1/2 teaspoon salt

  8. 2 cups carrots, peeled and grated

  9. 2 medium apples, cored and grated

  10. 1/2 cup unsweetened shredded coconut

  11. 3/4 cup chopped pecans

  12. 1/3 cup pumpkin or sunflower seeds

  13. 3 large eggs

  14. 2/3 cup vegetable or canola oil

  15. 2 teaspoons pure vanilla extract

  16. 1/4 cup orange juice or juice of one orange

DIRECTION

  1. Preheat oven to 375 degrees F. Grease three 6-cup muffin tins.

  2. In a small bowl soak the craisins in hot water. Set aside.

  3. In a large bowl mix the dry ingredients: flour, sugar, baking soda, salt and seasonings. Then stir in carrots, apples, coconut, nuts, and seeds.

  4. In a separate bowl beat together the wet ingredients: eggs, oil, juice, and vanilla.

  5. Add the wet ingredients to the dry ingredients and mixt until well combined.

  6. Drain the water from the craisins and stir them in.

  7. Fill the muffin cups all the way to the top. You should be able to fill 12-16 cups.

  8. Bake for 25-28 minutes or until a fork comes out clear. Remove from the oven and allow them to cool for about 5 minutes, then finish cooling on a cooling rack. Store in an air tight container for a few days, or freeze for longer storage.

NOTES

As an amazon associate, I earn on qualified purchases.

Categories
Healthy Home Recipes

Easy Pumpkin Apple Soup Recipe

Try this easy vegan pumpkin apple soup for a meatless Monday meal or for a Friday during lent. It is so delicious and warms you up in the winter. This soup is loaded with healthy vegetables and makes great leftovers for packed lunches. It’s a great way to get more vegetables into your diet.

This post may contain affiliate links. I earn commission on qualified sales at no extra cost to you.

Pumpkin Apple Soup Ingredients

  • 1 large onion diced
  • 2 tablespoons olive oil
  • 3 sweet potatoes cubed
  • 1 large apple diced
  • 4 cloves garlic
  • 4 cups vegetable stock
  • 15 ounce can of diced tomato
  • 15 ounce can pumpkin puree ( or 2 cups homemade pumpkin puree)
  • 15 ounce can cannellini beans, drained and rinsed
  • 2 Tablespoons Jerk Seasoning
  • pumpkin seeds for garnish

How to make Pumpkin Apple soup

Sauté the onion in the olive oil over medium heat in a large pot. Grate the garlic on a plate grater.

Garlic grated on a plate grater.

Add the sweet potatoes, apple and garlic to the pot and cook for one minute.

Stir in the stock, tomatoes, beans, pumpkin, and jerk seasoning. Find a great homemade jerk seasoning recipe here. Simmer for 25 minutes, or until potatoes are fork tender.

Serve with pumpkin seeds.

Is Pumpkin Healthy?

Yes, pumpkin is loaded with vitamins and is a low calorie food that is great for filling you up without excess calories. Pumpkin is a good source of vitamin A, Vitamin C, Vitamin E, iron and folate. Unfortunately many pumpkin recipes include tons of sugar and fat because it is so delicious it ends up being included in many desserts and lattes. If this is how you plan to enjoy your pumpkin, then the health benefits may not be as great. Pumpkin apple soup, however, is a very healthy way to enjoy pumpkin.

Easy Pumpkin Apple Soup Recipe

Recipe By Kristin
Course: main Cusine:American Difficulty:Easy

Servings

6 minutes

Preparing Time

10 minutes

Cooking Time

25 minutes

Calories

kcal

INGREDIENTS

  1. 1 large onion, diced

  2. 2 tablespoons olive oil<br>

  3. 3 sweet potatoes cubed<br>

  4. 1 large apple diced<br>

  5. 4 cloves garlic<br>

  6. 4 cups vegetable stock<br>

  7. 15 ounce can of diced tomato<br>

  8. 15 ounce can pumpkin puree ( or 2 cups homemade pumpkin puree)<br>

  9. 15 ounce can cannellini beans, drained and rinsed<br>

  10. 2 Tablespoons Jerk Seasoning

  11. pumpkin seeds for garnish

DIRECTION

  1. Sauté the onion in the olive oil over medium heat in a large pot. Grate the garlic.

  2. Add the sweet potatoes, apple and garlic to the pot and cook for one minute.

  3. Stir in the stock, tomatoes, beans, pumpkin, and jerk seasoning. Simmer for 25 minutes, or until potatoes are fork tender.<br>

  4. Serve with pumpkin seeds.

NOTES

Printable Recipe:

As an Amazon associate I earn on qualified purchases.

Categories
Healthy Home Recipes

Caribbean Rice with Jerk Seasoning Recipe

Are you looking for a vegan or vegetarian recipe, or maybe you just need something for Meatless Monday or a Friday during Lent? Maybe you just want a great unique side for something you grilled! If you are looking for any of these, this Caribbean Rice with Jerk Seasoning is for you!

This post may contain affiliate links. I earn commission on qualified purchases at no additional cost to you.

Caribbean Rice Ingredients

  • 2 cups cooked white rice (~1 cup of dry rice)
  • 2 Tablespoons Coconut Oil
  • 4 Carrots, diced
  • 1 Red bell pepper, diced
  • 1 onion, diced
  • 1/4 cup unsweetened shredded coconut
  • 13.6 ounce can unsweetened coconut milk
  • 5 cloves garlic
  • 15 ounce can kidney beans, drained and rinsed
  • 15 ounce can corn, drained
  • 1/4 cup chopped fresh cilantro
  • 3 Tablespoons Jerk Seasoning -more if desired
  • 1 lime sliced into wedges (optional)

How to make Caribbean Rice

Start by preparing the white rice according to package directions. Make sure you rinse the rice before cooking. This will remove the outer layer of starch, so the rice will be more fluffy and less sticky. The easiest way to rinse rice is with a fine mesh strainer or sieve.

Rinsing rice through a fine mesh strainer
Rinsing Rice

Next mix the dried coconut with 1/4 cup of the coconut milk and set aside to soften. Hint: Shake the can of coconut milk before opening.

Dried coconut with coconut milk

Grate the garlic on a plate grater. Set aside.

Garlic grated on a plate grater.

Add the coconut oil to a large pot or wok, and begin to sauté the carrots.

Sauté carrots
Sauté carrots

When the carrots are slightly softened, add the peppers and onions. Continue to sauté, mixing often.

Peppers onions and carrots in a pan
Sauté peppers onions and carrots.

Once all the vegetables are softened, mix in the shredded coconut mixture and the grated garlic.

Adding coconut and garlic to sauteed vegetables.
Adding coconut and garlic.

Then add the kidney beans, corn and 1/2 cup of the coconut milk. Mix well.

Add kidney beans, corn, and 1/2 cup of coconut milk.

Once the corn and beans are warm, add the rice and mix well.

Caribbean rice
Add the rice.

Add the cilantro, jerk seasoning and remaining coconut milk. Mix until well combined and heated throughout. Taste and add additional seasoning if desired.

Add cilantro and jerk seasoning to Caribbean rice.
Add cilantro and jerk seasoning, and remaining coconut milk.

Serve with a lime wedge if desired. This dish is a delicious vegetarian meal on its own or makes an excellent side dish to baked or grilled chicken or pork.

Caribbean Rice
Caribbean Rice with Jerk Seasoning

Printable recipe for Caribbean Rice with Jerk Seasoning

As an Amazon Associate, I earn on qualified purchases.

Categories
Recipes

Homemade Jamaican Jerk Seasoning Recipe

Save money by making your own seasoning blends. Homemade Jamaican Jerk seasoning is a must have. It’s so easy to make and a great one to have on hand for some fabulous Caribbean flavor. Traditionally it is used for seasoning chicken and pork, but there are plenty of other uses for it.

Disclaimer: This post includes affiliate links. I earn commission at no additional cost to you.

What can you use Jamaican Jerk Seasoning for?

  • Seasoning chicken, pork or fish
  • Seasoning grilled or roasted vegetables
  • Add to rice or risotto for Caribbean flavor, try this Caribbean Rice
  • Great for squash or pumpkin soups or stews

Jamaican Jerk Seasoning Ingredients:

  • 1 tablespoon granulated onion or onion powder
  • 1 tablespoon granulated garlic or garlic powder
  • 2 teaspoons cayenne pepper
  • 2 teaspoons smoked paprika
  • 1 teaspoon allspice
  • 2 teaspoons Himalayan pink sea salt
  • 1 teaspoon black pepper
  • 1 teaspoon red pepper flakes
  • 1 teaspoon cumin
  • 1/2 teaspoon nutmeg
  • 1/2 teaspoon cinnamon
  • 1/2 teaspoon ground clove
  • 1 tablespoon sugar
  • 2 teaspoons dried thyme
  • 1 tablespoon dried parsley (optional)
Jamaican Jerk Seasoning Ingredients

How to make Homemade Jamaican Jerk Seasoning

Measure and mix all of the above ingredients in a bowl. Use a funnel to put the mixture into a 4 ounce spice jar. Label it and you are all set.

Is Jamaican Jerk Seasoning Gluten Free?

This is one of the best reasons to make your own seasoning blends. Some seasonings contain anticaking ingredients that contain gluten, especially seasoning blends. If you make your own blend you can make sure all of your ingredients are gluten free.

Is Jamaican Jerk Seasoning healthy?

Many of the ingredients in Jamaican Jerk seasoning have health benefits. Really the only unhealthy ingredients are salt and sugar. If you make your own, you could eliminate those ingredients, but keep in mind they are minimal when you only plan to use a couple tablespoons of the blend at a time.

Jamaican Jerk Seasoning Printable Recipe

As an Amazon Associate, I earn on qualified purchases.

Categories
Recipes

Pork Schnitzel With Dot’s Pretzel Crumble

Pork Schnitzel is a family favorite! The leftover pork Schnitzel can be re-heated to make delicious Schnitzel sandwiches aka: Schnitzelwiches. Dot’s Homestyle Pretzels used to make a delicious crumble. They stopped making it, but read on to find out how to make it. The pretzel coating adds so much flavor and it does not burn like other coatings, making it a great choice for Pork Schnitzel.

Disclaimer: This post may contain affiliate links. I earn a commission on purchases at no additional cost to you.

What is Schnitzel?

Schnitzel is a German term for thin meat pounded until tender then breaded and fried. It is similar to Chicken-fried steak.

What kind of meat is used to make Schnitzel?

Traditionally veal is used, but other meats can be just as tasty. For this recipe I used pork chops, but you can also use beef or chicken.

Dot’s Pretzel Pork Schnitzel Recipe Ingredients:

How to prepare meat for Schnitzel?

First you must trim off all of the fat. This is important because after you bread the pork, you will not be able to see where the fat is.

Trimming pork chops
Trimming pork chops

Next you need to pound out the pork chops until they are approximately 1/4 inch thick. The best way to do this is to cover the meat with plastic wrap (to avoid splashing) and pound it with the flat side of a meat tenderizer mallet. It is best to do this on a plastic cutting board to protect your kitchen counter.

Tenderizing Pork.
Tenderizing Pork.

How to make Dot’s Pretzel Crumble

I was sad when Dot’s stopped selling their crumble. I contacted the company to find out where to buy it. They responded telling me they no longer make it. Fortunately, they told me I could make my own by crushing or food processing Dot’s Homestyle Pretzels . Here’s how:

Measure out 2 cups of Dot’s Homestyle Pretzel’s for every 4 pork chops you desire to coat. Place them in a food processor and process until evenly crumbled.

Original Dot's Homestyle pretzels in a food processor.
Original Dot’s Homestyle pretzels in a food processor.
Homemade Original Dot's Homestyle pretzel crumble in a food processor.
Homemade Original Dot’s Homestyle pretzel crumble in a food processor.

How to Bread Schnitzel

First coat the pork chops with flour.

coating pork in flour
Coating pork in flour

Then dip the breaded pork chops into the egg mixture (see recipe).

Dipping pork into egg mixture before adding pretzels

Then coat the pork chops in the homemade Dot’s Pretzel Crumble. Hint: Only put a little crumble at a time on the plate. That way you can save the leftover crumble. If it touches raw meat you will have to dispose of it.

Breading pork in Homemade Dot's Pretzel Crumble
Breading pork in Homemade Dot’s Pretzel Crumble
Pork coated in Homemade Dot's Pretzel Crumble
Pork coated in Homemade Dot’s Pretzel Crumble

How to Cook Pork Schnitzel

First add 1/4 inch of canola or vegetable oil to a frying pan and heat. Add your breaded pork 3-4 at a time to the pan. Cook 3 minutes then flip and cook another 3 minutes.

Schnitzel in frying pan
Browning the first side of schnitzel
schnitzel in frying pan
Browning Pork Schnitzel

The pork will not be fully cooked at this time. Place the fried pork chops on a jelly roll pan and bake at 350 degrees F for 15-20 min. Use a meat thermometer to ensure the internal temperature has reached 160 degrees F.

Pork Schnitzel with Dot's Pretzel Crumble
Pork Schnitzel with Dot’s Pretzel Crumble, ready to bake.
Best Homemade Tomato Bisque Recipe
If you love tomato bisque, you should definitely try making it homemade. …
The Secret to Great Potato Salad Recipe
Have you ever wondered why some people just make better potato salad …
Easy Ratatouille Lentil Soup Recipe
This easy ratatouille lentil soup is a perfect way to get more …
Easy Chicken and Orzo Soup with Lemon
Do you need quick idea for dinner tonight? Try this easy chicken …

How to serve Pork Schnitzel

Serve with any side dish you wish. Some great suggestions include: roasted vegetables, rice, risotto, and/or potatoes. Alternatively, you can serve it on a bun as a sandwich with lettuce, tomato, mayo/mustard, onions, pickles or slaw. Get creative!

Pork Schnitzel served with roasted vegetables
Pork Schnitzel Sandwich
Pork Schnitzel Sandwich served with kohlrabi slaw.

What can you do with Leftover Pork Schnitzel?

Air fry your leftover Schnitzel for best results. I air fry on high in my Ninja Foodi for 6 minutes. You can serve with your leftover sides or make a sandwich and serve with fries, chips or slaw!

Is Pork Schnitzel Healthy?

Absolutely not. This is why I suggest serving it with some roasted vegetables or a side of coleslaw! Try sauteed beet tops for another healthy side.

Recipe for Pork Schnitzel with Dot’s Pretzel Crumble

As an Amazon associate I earn from qualified purchases.

x  Powerful Protection for WordPress, from Shield Security
This Site Is Protected By
Shield Security