This easy Asian cabbage slaw salad is a little more filling than the typical cabbage salad because it has more protein. Fresh lime, ginger and cilantro paired with garlic and miso give this salad a unique and very addictive flavor. Keep the dressing on the side until ready to serve, this way it can last up to a week in the refrigerator. Perfect for packed lunches, picnics, or potlucks!
Disclaimer: This Post may contain affiliate links. I earn commission on qualified purchases at no additional costs to you.
Are you tired of reading labels for allergens? Would you like to eat more real food? Why not make your own homemade granola bars? These easy homemade granola bars are simple to modify to add real food ingredients and avoid allergens. One recipe is nut-free. They are so tasty!
Disclaimer: This post may contain affiliate links. I earn commission on qualified purchases at no additional cost to you.
First ensure all ingredients are labeled nut-free.
Preheat the oven to 325 degrees F. Place oats and seeds on a sheet pan. Bake the oats and seeds for 15 minutes to lightly toast them. Meanwhile, combine oil, honey and sunflower butter in a sauce pan. Mix and bring to a boil over medium heat. Once boiling, remove form heat.
Prepare the baking dish by coating it with cooking spray.
In a large mixing bowl, combine the toasted seeds and oats with the dried fruit, cinnamon and the honey mixture. Toss to coat. Press the mixture into the prepared Pyrex 2 Quart 11 x 7 inch dish.
Bake the granola bars at 325 degrees F for 10 minutes or until golden brown. Allow the bars to cool for 1 hour, then slice into 24 bars. Store in an airtight container.
Fruity Granola Bars
Ingredients:
2 Cups rolled oats
1 1/2 Cups Nuts (any nut)
2/3 Cup honey
1/4 Cup nut butter
2 Tablespoons canola or avocado oil
1/2 cup raisins or diced dried fruit of your choice
cooking spray
How to make fruity Granola Bars:
Preheat the oven to 325 degrees F. Place oats and nuts on a sheet pan. Bake the oats and nuts for 15 minutes to lightly toast them. Meanwhile, combine oil, honey and nut butter in a sauce pan. Mix and bring to a boil over medium heat. Once boiling, remove form heat.
Prepare the baking dish by coating it with cooking spray.
In a large mixing bowl, combine the toasted nuts and oats with the dried fruit and the honey mixture. Toss to coat. Press the mixture into the prepared Pyrex 2 Quart 11 x 7 inch dish.
Bake the granola bars at 325 degrees F for 10 minutes or until golden brown. Allow the bars to cool for 1 hour, then slice into 24 bars. Store in an airtight container.
Chocolate Hazelnut Granola Bars
Ingredients:
2 Cups rolled oats
1 1/2 Cups Hazelnuts (slightly crushed)
2/3 Cup honey
1/4 Cup nut butter
2 Tablespoons canola or avocado oil
1/2 Cup mini dark chocolate chips
Cooking spray
How to make homemade Chocolate Hazelnut granola bars:
Preheat the oven to 325 degrees F. Place oats and nuts on a sheet pan. Bake the oats and nuts for 15 minutes to lightly toast them. Meanwhile, combine oil, honey and nut butter in a sauce pan. Mix and bring to a boil over medium heat. Once boiling, remove form heat.
Prepare the baking dish by coating it with cooking spray.
In a large mixing bowl, combine the toasted nuts and oats with the chocolate chips and the honey mixture. Toss to coat. Press the mixture into the prepared Pyrex 2 Quart 11 x 7 inch dish.
Bake the granola bars at 325 degrees F for 10 minutes or until golden brown. Allow the bars to cool for 1 hour, then slice into 24 bars. Store in an airtight container.
Tropical Granola Bars
Ingredients:
2 Cups rolled oats
1/2 Cup unsweetened shredded dried coconut
1 Cup Pecans, slightly crushed
2/3 Cup Honey
1/4 cup nut butter
2 Tablespoons canola or avocado oil
1/4 diced dried pineapple
1/4 diced dried mango
1/2 teaspoon fresh grated nutmeg
cooking spray
How to make homemade Tropical Granola Bars:
Preheat the oven to 325 degrees F. Place oats, coconut and nuts on a sheet pan. Bake the oats, coconut and nuts for 15 minutes to lightly toast them. Meanwhile, combine oil, honey and nut butter in a sauce pan. Mix and bring to a boil over medium heat. Once boiling, remove form heat.
Prepare the baking dish by coating it with cooking spray.
In a large mixing bowl, combine the toasted nuts, coconut and oats with the dried fruits, nutmeg and the honey mixture. Toss to coat. Press the mixture into the prepared Pyrex 2 Quart 11 x 7 inch dish.
Bake the granola bars at 325 degrees F for 10 minutes or until golden brown. Allow the bars to cool for 1 hour, then slice into 24 bars. Store in an airtight container.
Lemon Blueberry Granola Bars
Ingredients:
2 Cups rolled oats
1 1/2 Cups Almonds, slightly crushed
2/3 Cup Honey
1/4 Cup nut butter
2 Tablespoons canola or avocado oil
1/2 Cup dried blueberries
Zest of one lemon
1 teaspoon lemon extract
cooking spray
How to make Lemon Blueberry Granola Bars:
Preheat the oven to 325 degrees F. Place oats and nuts on a sheet pan. Bake the oats and nuts for 15 minutes to lightly toast them. Meanwhile, combine oil, honey and nut butter in a sauce pan. Mix and bring to a boil over medium heat. Once boiling, remove form heat.
Prepare the baking dish by coating it with cooking spray.
In a large mixing bowl, combine the toasted nuts and oats with the dried blueberries, zest, extract and the honey mixture. Toss to coat. Press the mixture into the prepared Pyrex 2 Quart 11 x 7 inch dish.
Bake the granola bars at 325 degrees F for 10 minutes or until golden brown. Allow the bars to cool for 1 hour, then slice into 24 bars. Store in an airtight container.
From simple swaps to tasty recipes, it is really easy to add more whole grains to your diet. Whole grains have many health benefits, they can reduce your risk of cardiovascular disease and help prevent type 2 diabetes. They are also good for gut health, keeping you regular! Read on to learn how to get started with adding whole grains to your diet.
Disclaimer: This post may contain affiliate links. I earn commission at no additional cost to you.
Benefits of eating whole grains:
The new food pyramid just released by the Department of Health and Human Services placed whole grains in the smallest section on the newly inverted pyramid. This makes it appear that whole grains are not important. This is far from the truth, and if you actually read the statement they are trying to promote whole grains. The focus is on eating real food not processed food. Dramatically reducing refined carbohydrates while incorporating 2-4 servings per day in whole grains.
Whole grain health benefits:
Reduce your risk of cardiovascular disease
Lower your risk of stroke
Help you maintain a healthy weight
Lower your risk of Type-2 Diabetes
Support healthy digestion
Reduce chronic inflammation
May reduce risk of cancer
Could extend your life
List of whole grains:
Amaranth*
Barley
Black rice*
Brown rice*
Buckwheat*
Bulgur
Corn*
Einkorn
Farro
Freekeh
Kamut
Millet*
Popcorn*
Quinoa*
Red rice*
Rye
Oats*
Sorghum*
Spelt
Teff*
Triticale
Wheat berries
Whole wheat
Wild rice*
* Gluten Free Grains. Note oats are sometimes contaminated with wheat. Look for gluten free oats if you are very sensitive to gluten.
Add more whole grains to your favorite recipes:
You can add easily add whole grains to many of you favorite recipes. Try swapping out some white flour for whole wheat flour. Don’t just swap all of the flour at once, or you may end up with very dry pastries. Try these tasty morning glory muffins with half of the flour swapped with whole wheat flour. They will turn out great, I promise.
Try fajita bowls instead of using flour tortillas. Just serve the meat and veggies on a bed of quinoa or brown rice instead of wrapping it in a tortilla. Top with salsa and guacamole for a tasty dinner.
Add buckwheat or quinoa to your favorite soup.
Simple swaps to add more whole grains to your diet:
Choose brown rice or wild rice instead of white rice
Try whole wheat pasta instead of regular pasta
Choose whole wheat or rye bread instead of white bread
Use rolled oats instead of bread crumbs in meatloaf
Snack on popcorn instead of potato chips
Choose corn tortillas instead of flour tortillas
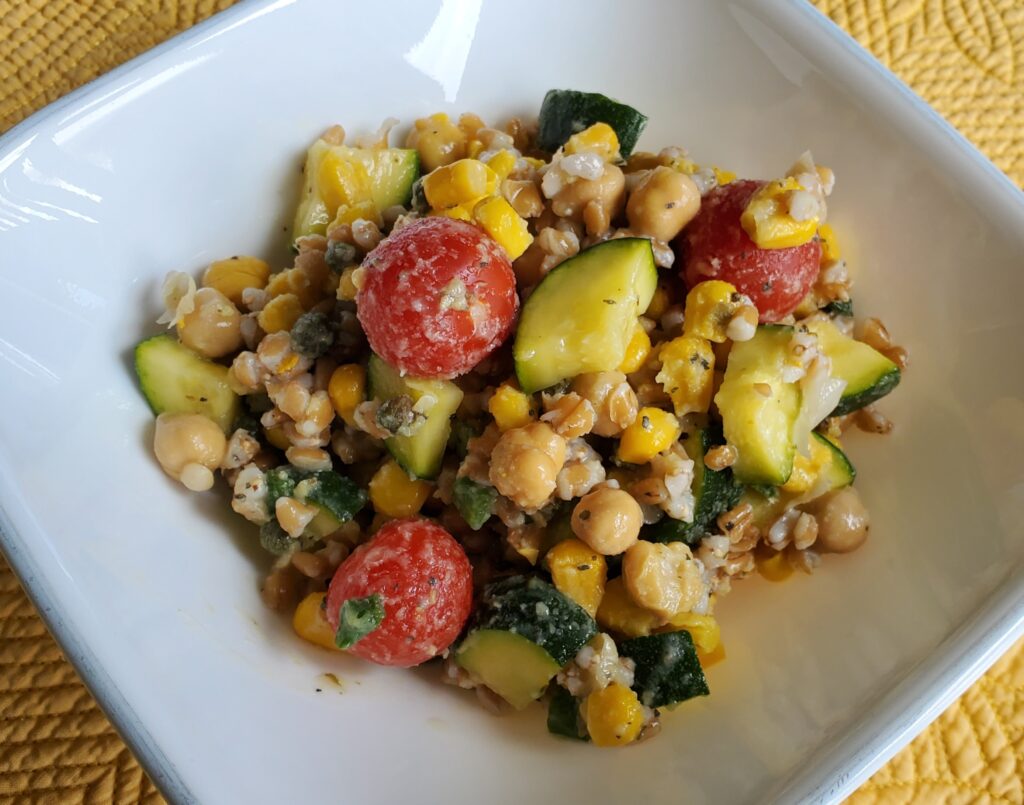
Make your own Gain Bowl
These grain bowls are easy to make. They can be served warm or cold. Simple choose a grain for the base, then choose some vegetables, seasonings and a protein. Then garnish as desired. Use the options on the chart below or make your own creation.
Grain bowl suggested combinations:
Quinoa, broccoli, cauliflower, carrots, sliced chicken breast, chickpeas, lemon pepper, lemon juice and hummus.
Brown rice, sauteed onions and bell peppers, corn, chicken breast, black beans, fajita seasoning, queso fresco, guacamole and salsa.
Millet, sweet potatoes, onions, black pepper, thyme, eggs, and avocado.
grain bowl
Easy ways to add whole grains to breakfast Lunch and Dinner
Whole Grain Breakfast Ideas:
Steel Cut Oats – steel cut oats can be made ahead of time. Refrigerate and reheat them each morning for a quick and easy breakfast. Top with blueberries, slivered almonds and flax seeds. Sweeten with honey or agave if desired.
Add a side of quinoa to your eggs – Quinoa can be prepared ahead of time. Just warm it up and serve it with eggs and sauteed vegetables for a tasty breakfast. Or make these delicious Quinoa egg bites.
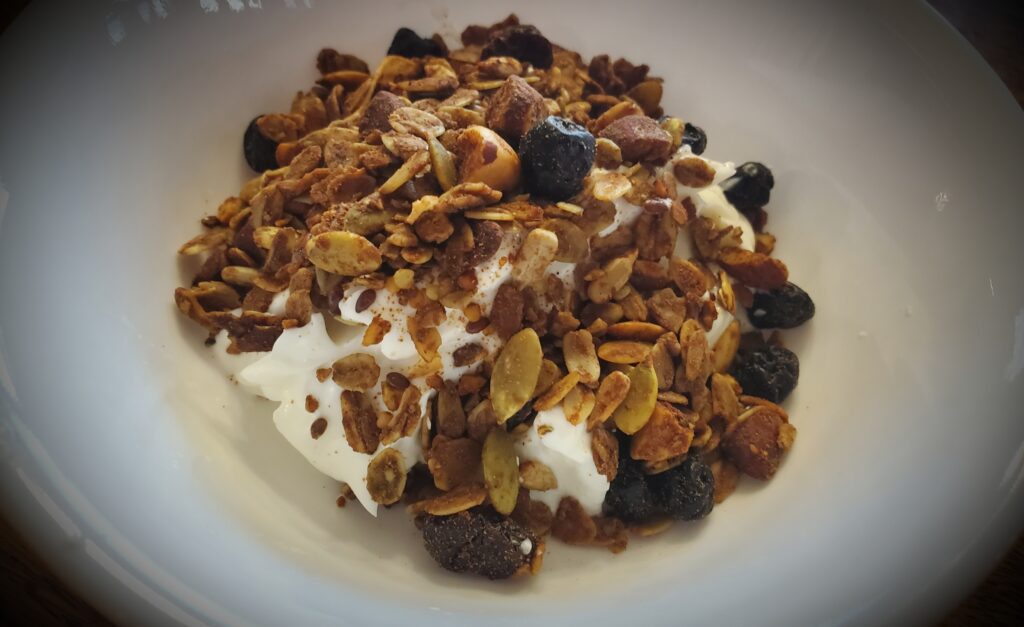
Yogurt topped with granola – Sprinkle some homemade granola on unsweetened yogurt for breakfast.
Baked Oatmeal – Baked oatmeal is perfect for feeding a crowd for breakfast, but is also a great way to prepare one breakfast that can be reheated each morning. Try this tasty pumpkin apple baked oatmeal.
Toss some grains or granola on a smoothie bowl – Find some smoothie bowl recipes here. Sprinkle some granola or cooked quinoa or millet on top of your prepared smoothie bowl.
Toast made with whole wheat or rye bread – Choose whole wheat, rye or even multigrain bread instead of white bread. Try this tasty multigrain sourdough bread.
Choose whole wheat or rye– Make sandwiches with whole wheat bread. Choose whole wheat crackers for your soup. Add whole grain croutons for your salads.
Make a grain bowl – See the chart above for ideas.
Baked chicken and wild rice
Make whole grains more convenient:
It takes a while to cook whole grains. If they are sitting in a bag in your pantry they are probably not going to make it into your diet!
Invest in a rice and grains cooker. I’m usually not a fan of extra kitchen gadgets, but this one really helped me get more grains in my diet: Green Life Go Grains! rice and grains cooker. It is small, it fits easily into my cupboard when not in use. It is easy to clean and makes cooking all of my grains so much easier.
Green Life Go Grains Cooker
Once your grins are cooked, you can store them in a air tight container in your refrigerator for 5-6 days. Steel cut oats reheat nicely in the microwave each morning.
Add a side of cooked quinoa or millet to your dinner plate, add a little to your salad or soup. You can even use them to make a grain bowl for lunch or dinner.
Try a new whole grain
Take a look at the list of whole grains above. Have you tried them all? I doubt it. I certainly have not. I’d like to try them all. I’ve already found a few I really enjoy. Give a new grain a try!
Try this tasty and very healthy vegan quinoa chickpea minestrone soup. It is perfect to warm you up on a cold winter day. This soup also makes great leftovers. It is perfect for packed lunches.
Disclaimer: This post may contain affiliate links. I earn commission on qualified purchases at no additional cost to you.
1/2 a bunch of kale (about 4 stalks), stems removed and shredded
salt and pepper to taste
How to make quinoa chickpea minestrone:
In a large pot or Dutch oven sauté the onions, carrots and celery in the olive oil until slightly softened. Add the garlic and Italian seasoning and cook for another minute.
Next stir in the tomato sauce, diced tomatoes, zucchini, chickpeas and stock. Stir until well mixed. Bring to a boil. Add the quinoa then simmer partially covered for 20-25 minutes. Add additional stock if needed.
Finally add the lemon juice and kale. Simmer for 5 more minutes. Season with salt and pepper if desired.
2 – 14.5 ounce cans chickpeas (drained and rinsed)
2 Quarts vegetable stock
Juice of half a lemon
1/2 a bunch of kale (about 4 stalks), stems removed and shredded
salt and pepper to taste
DIRECTION
In a large pot or Dutch oven sauté the onions, carrots and celery in the olive oil until slightly softened. Add the garlic and Italian seasoning and cook for another minute.
Next stir in the tomato sauce, diced tomatoes, zucchini, chickpeas and stock. Stir until well mixed. Bring to a boil. Add the quinoa then simmer partially covered for 20-25 minutes. Add additional stock if needed.<br>Finally add the lemon juice and kale. Simmer for 5 more minutes. Season with salt and pepper if desired.<br>Serve with warm bread or crackers.
NOTES
As an Amazon associate, I earn from qualified purchases.
Use the flat side of a meat tenderizer to crush 3 candies per spoon. Crush the candies inside of a plastic bag. It’s best to do this on top of a plastic cutting board. Tap lightly, it’s just candy so it will not require much force. Place one whole candy in the top of the Silicone spoon mold, then add the crushed candy to the remainder of the mold.
Place the candy mold on top of a parchment lined sheet pan. Bake in the preheated oven for 10 minutes. Add additional crushed candy if needed, then bake for an additional 5-10 minutes.
Remove the mold from the oven and allow it to cool completely before removing the candy spoons.
Use the candy spoons to stir your hot chocolate to make peppermint hot cocoa.
Peppermint spoon gift idea:
In a cone shaped treat bag, add one serving of hot chocolate, a tablespoon of freeze dried marshmallows and top with a peppermint candy spoon. Tie of the top with a twist tie or ribbon. Place the cone in a cute festive mug. Add additional cookies or candy if desired. Be sure to add directions for making the serving of hot chocolate you included.
These hot cocoa bombs are so easy to make and make great gifts. Although they take some time to cool before you can package them, they only take about 10 minutes to prepare.
Disclaimer: This post may contain affiliate links. I earn commission on qualified purchases at no additional cost to you.
Preheat the oven to 250 degrees F. Fill the silicone mini muffin pan with the chocolate chips of your choice. Fill each cup level to the top with chips.
Half milk chocolate, half dark chocolate
Put the pan in the oven and bake for 8 minutes. Remove the pan and top each cup with mini marshmallows or crushed candy cane bits. Add both candy and marshmallows if desired. Press down slightly with the back of a spoon so the marshmallows and candy stick to the chocolate before it hardens.
Wait about 10 minutes, then press a Pirouline creme filled wafer into each cup. If the chocolate is still too melted to hold it in place, wait a few more minutes to insert the wafers.
Wait for the chocolate to harden, approximately 8-10 hours depending on the temperature of your home. You can speed up the cooling by placing the pan in the refrigerator or freezer, however your chocolate may turn slightly white on the surface. This will not harm the hot cocoa or change the flavor, but it may not look as nice.
Once hardened. Push up on the bottom of each cup to remove the hot cocoa bombs. They come out very easy.
After several attempts I have determined that the best way to smoke a turkey on a Traeger is to first brine and spatchcock the turkey. This is the best smoked turkey recipe!
Disclaimer: This post may contain affiliate links. I earn commission at no additional cost to you.
Please don’t skip this step if you plan to smoke your turkey. The brine with help to season your turkey and make it more tender. Most importantly it will help the turkey resist drying out, which can occur if you overcook it. Choose your favorite brine recipe, or use this recipe.
Place your thawed turkey in the brine, in the refrigerator, 12-24 hours prior to cooking.
How to Spatchcock a Turkey
Remove the neck. Place your turkey breast side down on a large cutting board or platter. Cut along both sides of the backbone with a poultry shears. Remove the backbone.
Flip the turkey over and press down until you hear a crack. The turkey should lie flat.
How to season your Turkey prior to smoking
Coat both sides of the turkey with the olive oil. Stuff the butter, rosemary leaves and smashed garlic cloves under the skin, on top of each breast.
How to Smoke a spatchcocked Turkey
Start by preheating your Traeger to 275 degrees F. Place the seasoned spatchcocked turkey directly on the grate. Insert the meat thermometer into one breast.
Smoke for 4 – 4.5 hours or until the meat thermometer reaches 165 degrees F in the breast.
Remove the turkey from the Traeger and allow it to rest for 15-30 minutes before carving.
Start by Brining your turkey. Choose your favorite brine recipe. Place your thawed turkey in the brine, in the refrigerator, 12-24 hours prior to cooking.<br>
Next Spatchcock your turkey. Remove the neck. Place your turkey breast side down on a large cutting board or platter. Cut along both sides of the backbone with poultry shears. Remove the backbone. then, flip the turkey over and press down until you hear a crack. The turkey should lie flat.
Preheat your Traeger to 275 degrees F. Place the seasoned spatchcocked turkey directly on the grate. Insert the meat thermometer into one breast. Smoke for 4 – 4.5 hours or until the meat thermometer reaches 165 degrees F in the breast.
Remove the turkey from the Traeger and allow it to rest for 15-30 minutes before carving.
NOTES
As an Amazon associate, I earn from qualified purchases.
Brining a turkey is an important step to enhance flavor and moisture. This brine will help make your turkey more moist, which will help make the meat more tender. Brining also helps the turkey stay moist even if you accidently overcook it. This brine will ensure your turkey is tender and flavorful.
Disclaimer: This post may contain affiliate links. I earn commission at no additional cost to you.
In an 8 quart stock pot, bring 2 quarts of water to a boil. Add the salt and stir until dissolved. Add the peppercorns, garlic and rosemary. Continue to simmer for 5 more minutes. Pour the remaining water, and cider into the 5 gallon food grade bucket. Add the salty water and remaining brine ingredients. Place the turkey into the brine. Put the bucket in the refrigerator for 12-24 hours.
When ready to cook the turkey remove it from the bucket, pat dry and prepare as desired. Now it is time to roast or smoke your turkey.
How long do you need to thaw a turkey?
Generally plan on 1 day for every 4-5 pounds of turkey. Your turkey is still safe to cook for 2 more days after fully thawed, so plan to thaw it one day early if you plan to brine your turkey.
In an 8 quart stock pot, bring 2 quarts of water to a boil. Add the salt and stir until dissolved. Add the peppercorns, garlic and rosemary. Continue to simmer for 5 more minutes. Pour the remaining water, and cider into the 5 gallon food grade bucket. Add the salty water and remaining brine ingredients. Place the turkey into the brine. Put the bucket in the refrigerator for 12-24 hours. When ready to cook the turkey remove it from the bucket, pat dry and prepare as desired. Now it is time to roast or smoke your turkey.
NOTES
As an Amazon associate, I earn from qualified purchases.
Why didn’t I think of this tasty idea sooner? This apple cranberry pie is sweet, tart and totally worth the calories! Try it for Thanksgiving or for any event this Fall.
Disclaimer: I earn commission on qualified purchases at no additional cost to you.
Place the cubed apples and cranberries into a large mixing bowl.
Add the sugar, tapioca, cinnamon and salt to the bowl. Mix until well coated.
Next prepare the crust. Press the bottom crust into the 9.5 inch Pyrex pie dish. Pour the fruit mixture into the pie dish. Top with slices of butter, then cover with the top crust.
Slit the top crust a few times. Crimp the edges with the handle of a butter knife.
Cover the edges of the crust with foil.
Bake the pie for 30 minutes, then remove the foil and bake for another 10 minutes to brown the edges. Remove the pie from the oven and place it on a cooling rack.
What kind of Apples are best for pie?
Any apple can be used for pies. I prefer McIntosh apples because they are soft and sweet.
Preheat the oven to 425 degrees F. Place the cubed apples and cranberries into a large mixing bowl. Add the sugar, tapioca, cinnamon and salt to the bowl. Mix until well coated. Next prepare the crust. Press the bottom crust into the 9.5 inch Pyrex pie dish. Pour the fruit mixture into the pie dish. Top with slices of butter, then cover with the top crust. Slit the top crust a few times. Crimp the edges with the handle of a butter knife. Cover the edges of the crust with foil. Bake the pie for 30 minutes, then remove the foil and bake for another 10 minutes to brown the edges. Remove the pie from the oven and place it on a cooling rack.
NOTES
As an Amazon Associate, I earn from qualified purchases.
This Creamy Coconut Curry Hubbard squash soup is an easy and delicious. It is a great vegan option for the holidays and is also great for packed lunches. Protein packed and healthy! Note: If you can’t find Hubbard squash you can also use pumpkin puree.
Disclaimer: This post may contain affiliate links. I earn commission at no additional cost to you.
Tools needed to make coconut curry Hubbard squash soup:
4 cups vegetable stock – find a recipe to make your own here.
1 15.5 ounce can of kidney beans, drained and rinsed
1 15.5 ounce can of Great Northern beans, drained and rinsed
2 14 ounce cans of diced fire roasted tomatoes
3 Cups of Hubbard squash puree – find the recipe here.
1 Cup unsweetened coconut milk
1 teaspoon smoked paprika
1/8 teaspoon cayenne pepper
1 teaspoon turmeric
2 Tablespoons curry powder
2 teaspoons chili powder
Salt and fresh ground pepper to taste
Fresh cilantro for garnish (optional)
How to make Coconut Curry Hubbard Squash Soup
In a large stockpot or Dutch oven sauté the diced onion in the olive oil until softened. Add the garlic and continue to sauté for 1 minute.
Add the vegetable stock, beans, tomatoes, squash, and coconut milk. Stir until well combined and bring to a simmer. Simmer for 10 minutes until warmed throughout. Add the seasonings and stir. Taste and add salt and fresh ground pepper if desired. Spoon into bowls, garnish with fresh cilantro and serve.
Can you use a different squash to make Hubbard Squash Soup?
Yes, if you can’t find Hubbard squash you can use butternut squash puree, or pumpkin puree. Find instructions for making pumpkin puree here. You can also use canned pumpkin puree, just make sure it is not sweetened or seasoned.
1 15.5 ounce can of kidney beans, drained and rinsed
1 15.5 ounce can of Great Northern beans, drained and rinsed
2 14 ounce cans of diced fire roasted tomatoes
3 Cups of Hubbard squash puree
1 Cup unsweetened coconut milk
1 teaspoon smoked paprika
1/8 teaspoon cayenne pepper
1 teaspoon turmeric
2 Tablespoons curry powder
2 teaspoons chili powder
Salt and fresh ground pepper to taste
Fresh cilantro for garnish (optional)
DIRECTION
In a large stockpot or Dutch oven sauté the diced onion in the olive oil until softened. Add the garlic and continue to sauté for 1 minute. Add the vegetable stock, beans, tomatoes, squash, and coconut milk. Stir until well combined and bring to a simmer. Simmer for 10 minutes until warmed throughout. Add the seasonings and stir. Taste and add salt and fresh ground pepper if desired. Spoon into bowls, garnish with fresh cilantro and serve.
NOTES
As an Amazon associate, I earn from qualified purchases.
Websites store cookies to enhance functionality and personalise your experience. You can manage your preferences, but blocking some cookies may impact site performance and services.
Essential cookies enable basic functions and are necessary for the proper function of the website.
Name
Description
Duration
Cookie Preferences
This cookie is used to store the user's cookie consent preferences.
30 days
These cookies are needed for adding comments on this website.
Name
Description
Duration
comment_author
Used to track the user across multiple sessions.
Session
comment_author_email
Used to track the user across multiple sessions.
Session
comment_author_url
Used to track the user across multiple sessions.
Session
These cookies are used for managing login functionality on this website.
Name
Description
Duration
wordpress_logged_in
Used to store logged-in users.
Persistent
wordpress_sec
Used to track the user across multiple sessions.
15 days
wordpress_test_cookie
Used to determine if cookies are enabled.
Session
Statistics cookies collect information anonymously. This information helps us understand how visitors use our website.
Google Analytics is a powerful tool that tracks and analyzes website traffic for informed marketing decisions.
Contains information related to marketing campaigns of the user. These are shared with Google AdWords / Google Ads when the Google Ads and Google Analytics accounts are linked together.
90 days
__utma
ID used to identify users and sessions
2 years after last activity
__utmt
Used to monitor number of Google Analytics server requests
10 minutes
__utmb
Used to distinguish new sessions and visits. This cookie is set when the GA.js javascript library is loaded and there is no existing __utmb cookie. The cookie is updated every time data is sent to the Google Analytics server.
30 minutes after last activity
__utmc
Used only with old Urchin versions of Google Analytics and not with GA.js. Was used to distinguish between new sessions and visits at the end of a session.
End of session (browser)
__utmz
Contains information about the traffic source or campaign that directed user to the website. The cookie is set when the GA.js javascript is loaded and updated when data is sent to the Google Anaytics server
6 months after last activity
__utmv
Contains custom information set by the web developer via the _setCustomVar method in Google Analytics. This cookie is updated every time new data is sent to the Google Analytics server.
2 years after last activity
__utmx
Used to determine whether a user is included in an A / B or Multivariate test.
18 months
_ga
ID used to identify users
2 years
_gali
Used by Google Analytics to determine which links on a page are being clicked
30 seconds
_ga_
ID used to identify users
2 years
_gid
ID used to identify users for 24 hours after last activity
24 hours
_gat
Used to monitor number of Google Analytics server requests when using Google Tag Manager