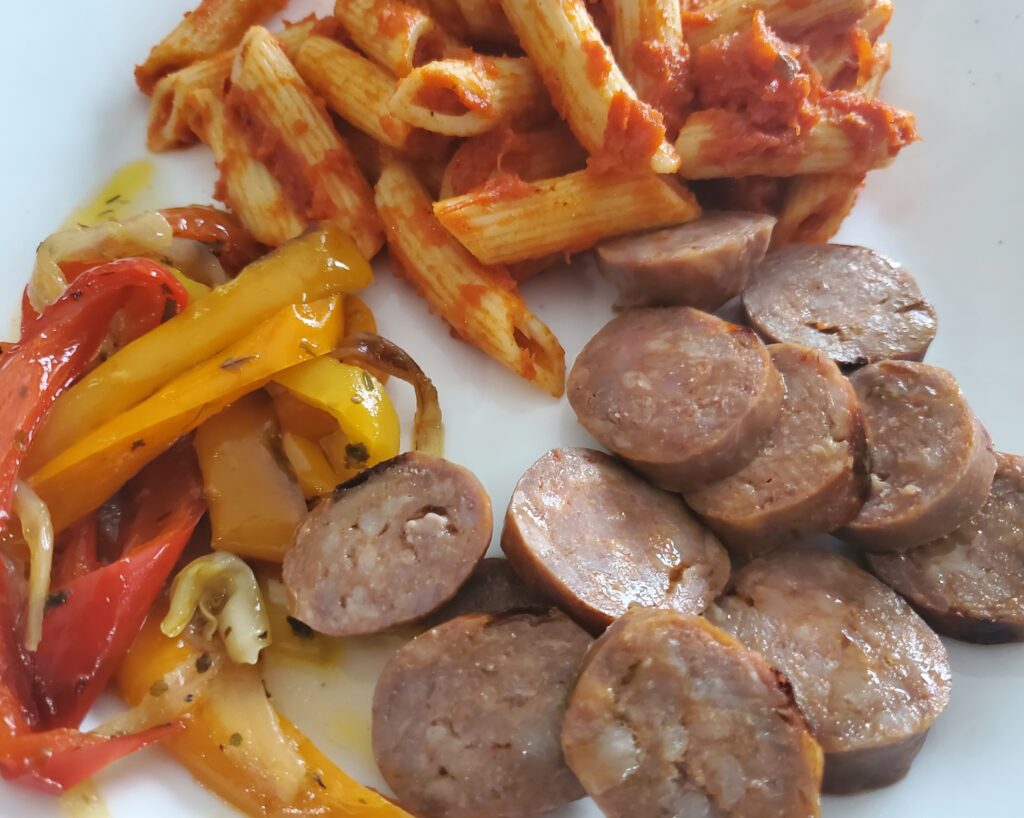
Try this amazing and easy sheet pan Italian sausage and peppers meal. Serve on a hoagie bun or with a side of pasta. Either way this is an easy mid week meal or a simple way to feed a crowd. Perfect for lunch or dinner.
Disclaimer: This post may contain affiliate links: I earn commission at no additional cost to you.
Sheet Pan Italian Sausage and Peppers Instructions:
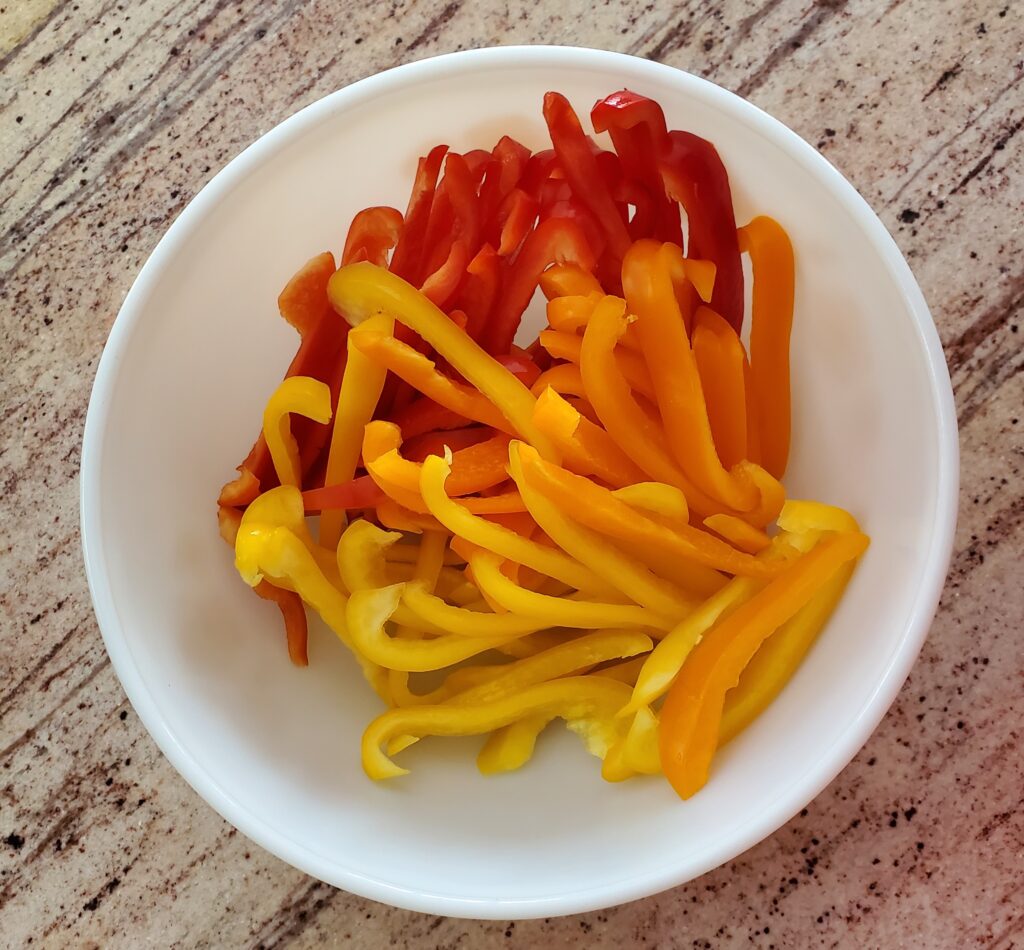
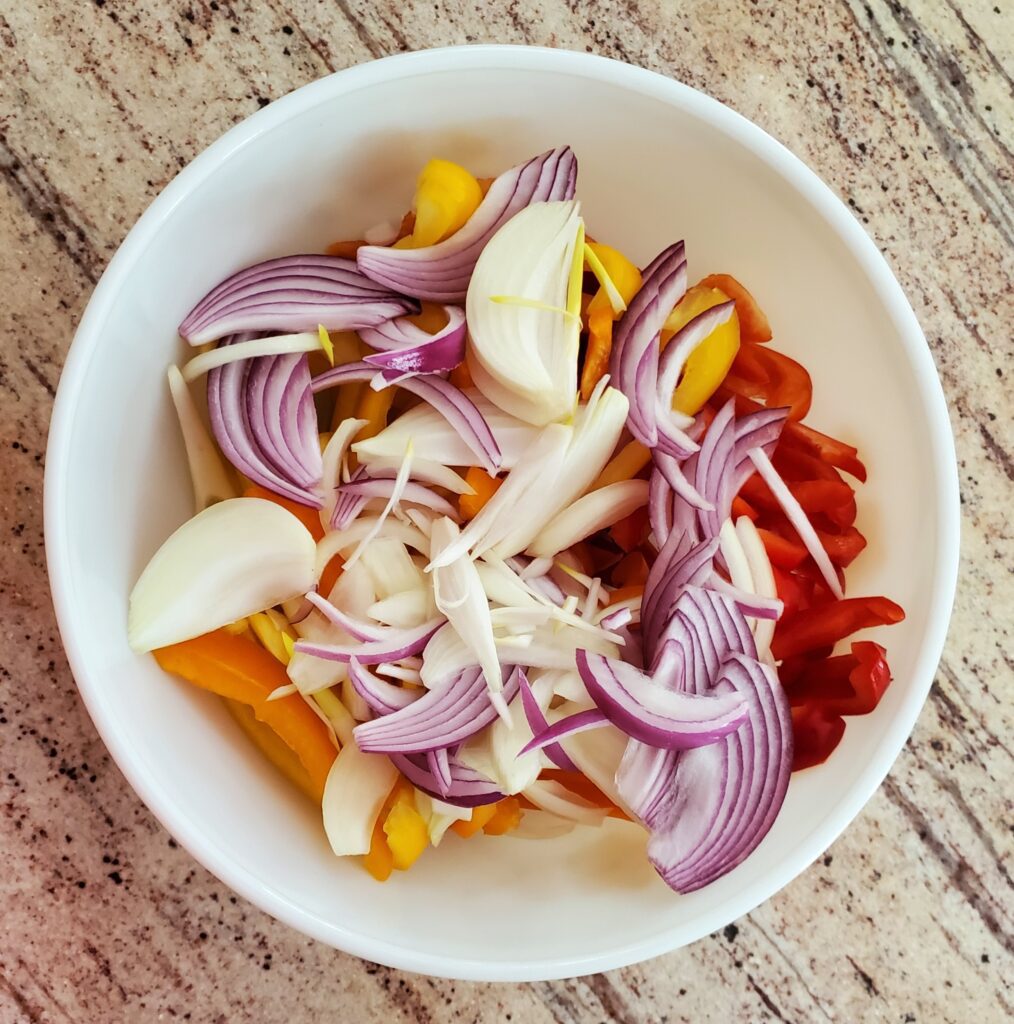
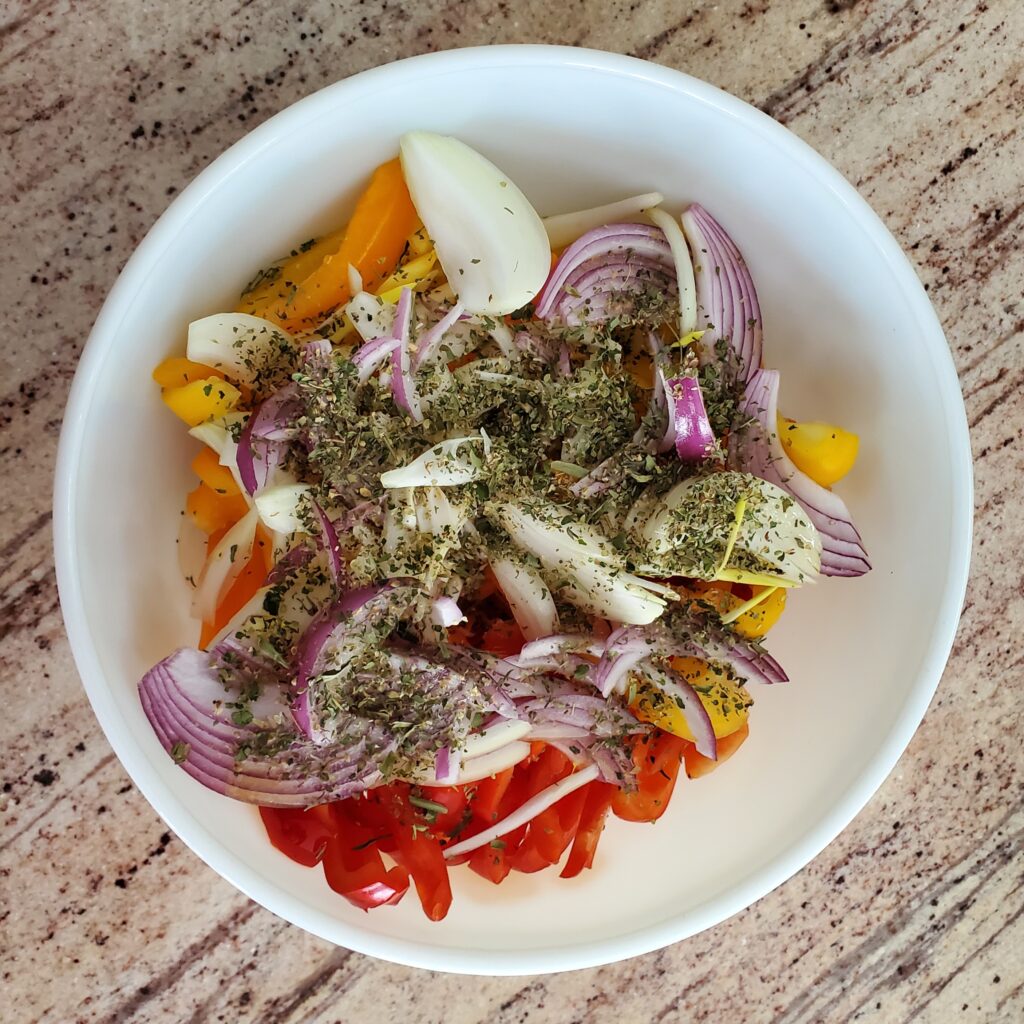
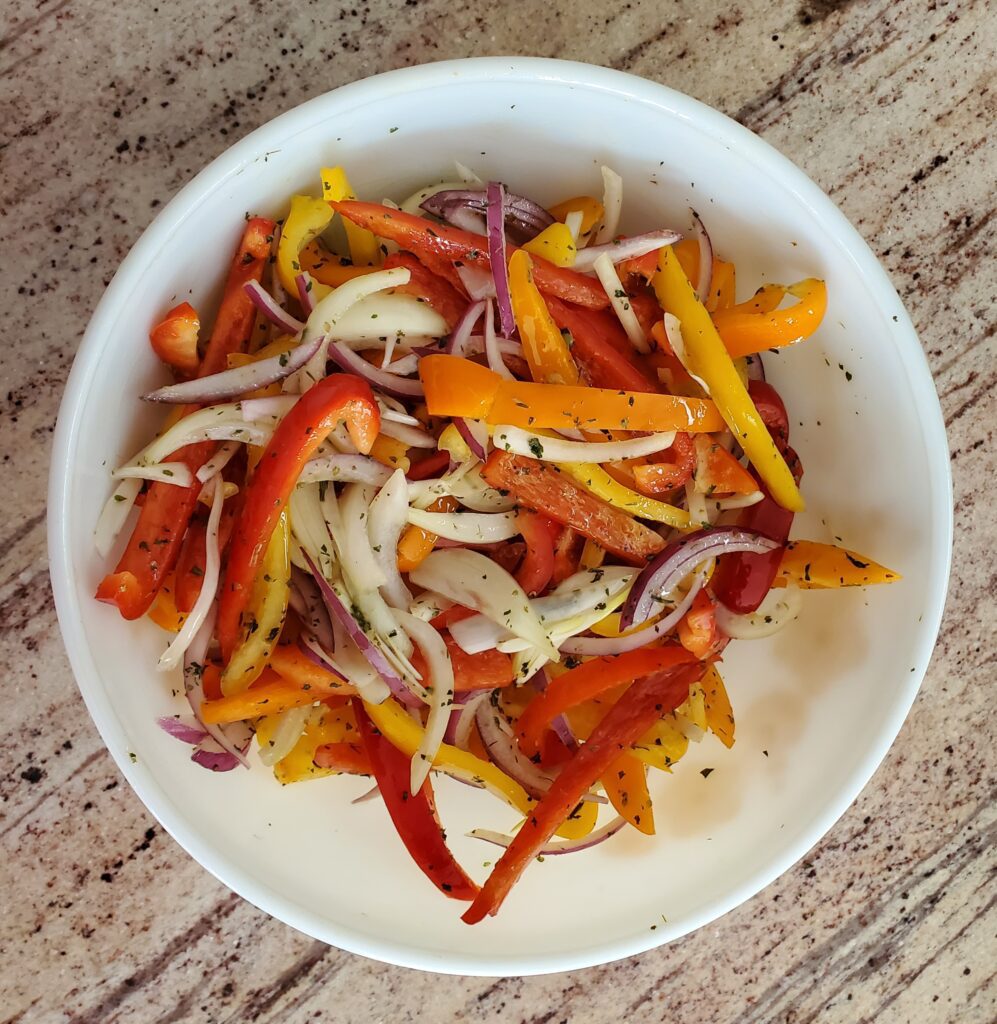
Start by tossing the peppers and onions with olive oil and Italian seasoning.
Sliced PeppersAdd Sliced OnionsAdd Italian SeasoningToss with Olive Oil
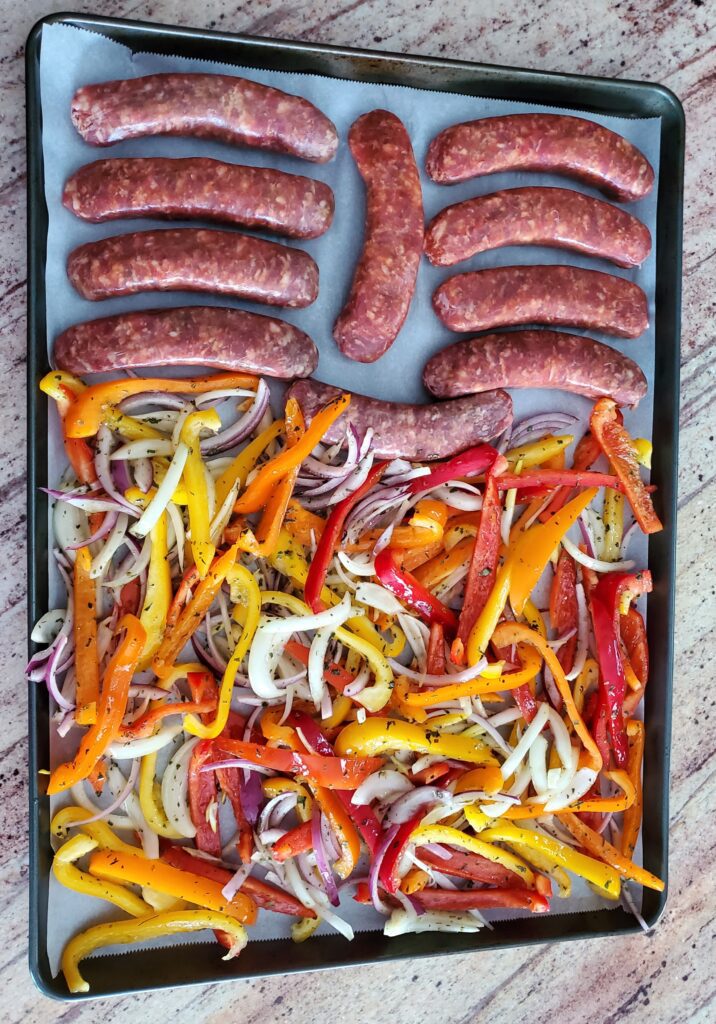
Line a sheet pan with parchment paper. Place the Italian sausages on one side of the sheet pan and the seasoned veggies on the other side.
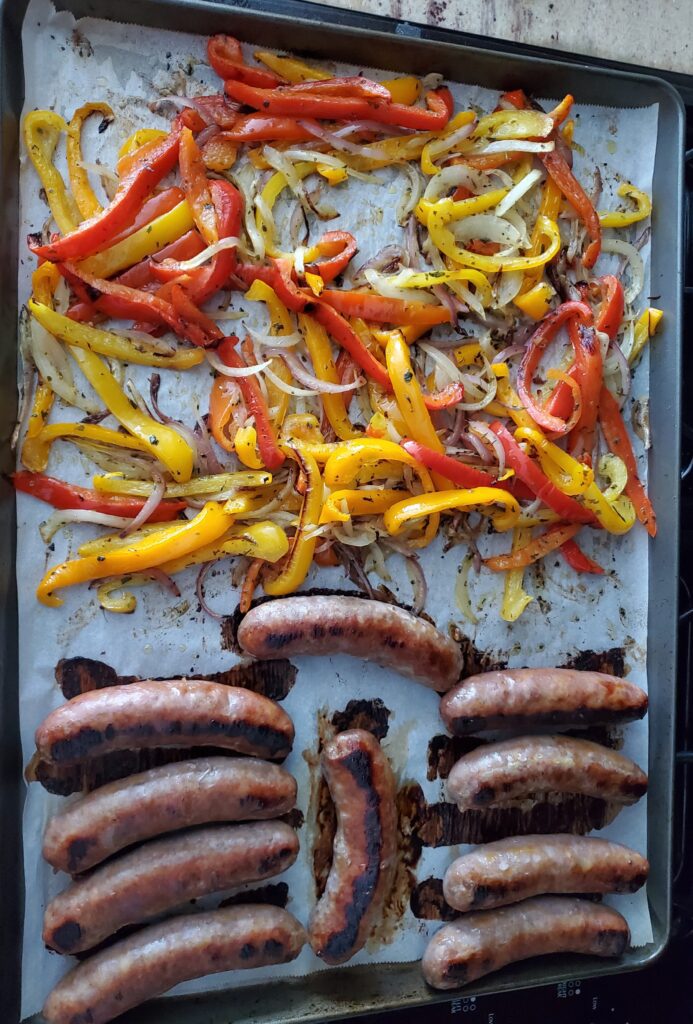
Preheat the oven to 375 degrees F. Bake the Sausages and veggies for 15 minutes then flip the sausages and toss the veggies. Bake for another 10-15 minutes or until the internal temperature of the sausages is 165 degrees F.
Start by tossing the peppers and onions with olive oil and Italian seasoning.
Line a sheet pan with parchment paper. Place the Italian sausages on one side of the sheet pan and the seasoned veggies on the other side.
Preheat the oven to 375 degrees F. Bake the Sausages and veggies for 15 minutes then flip the sausages and toss the veggies. Bake for another 10-15 minutes or until the internal temperature of the sausages is 165 degrees F.
NOTES
Serve on a hoagie bun or with a side of pasta.
More Easy Meals
Are you looking for a simple meal? You came to the right place. Try some of these easy mid-week recipes:
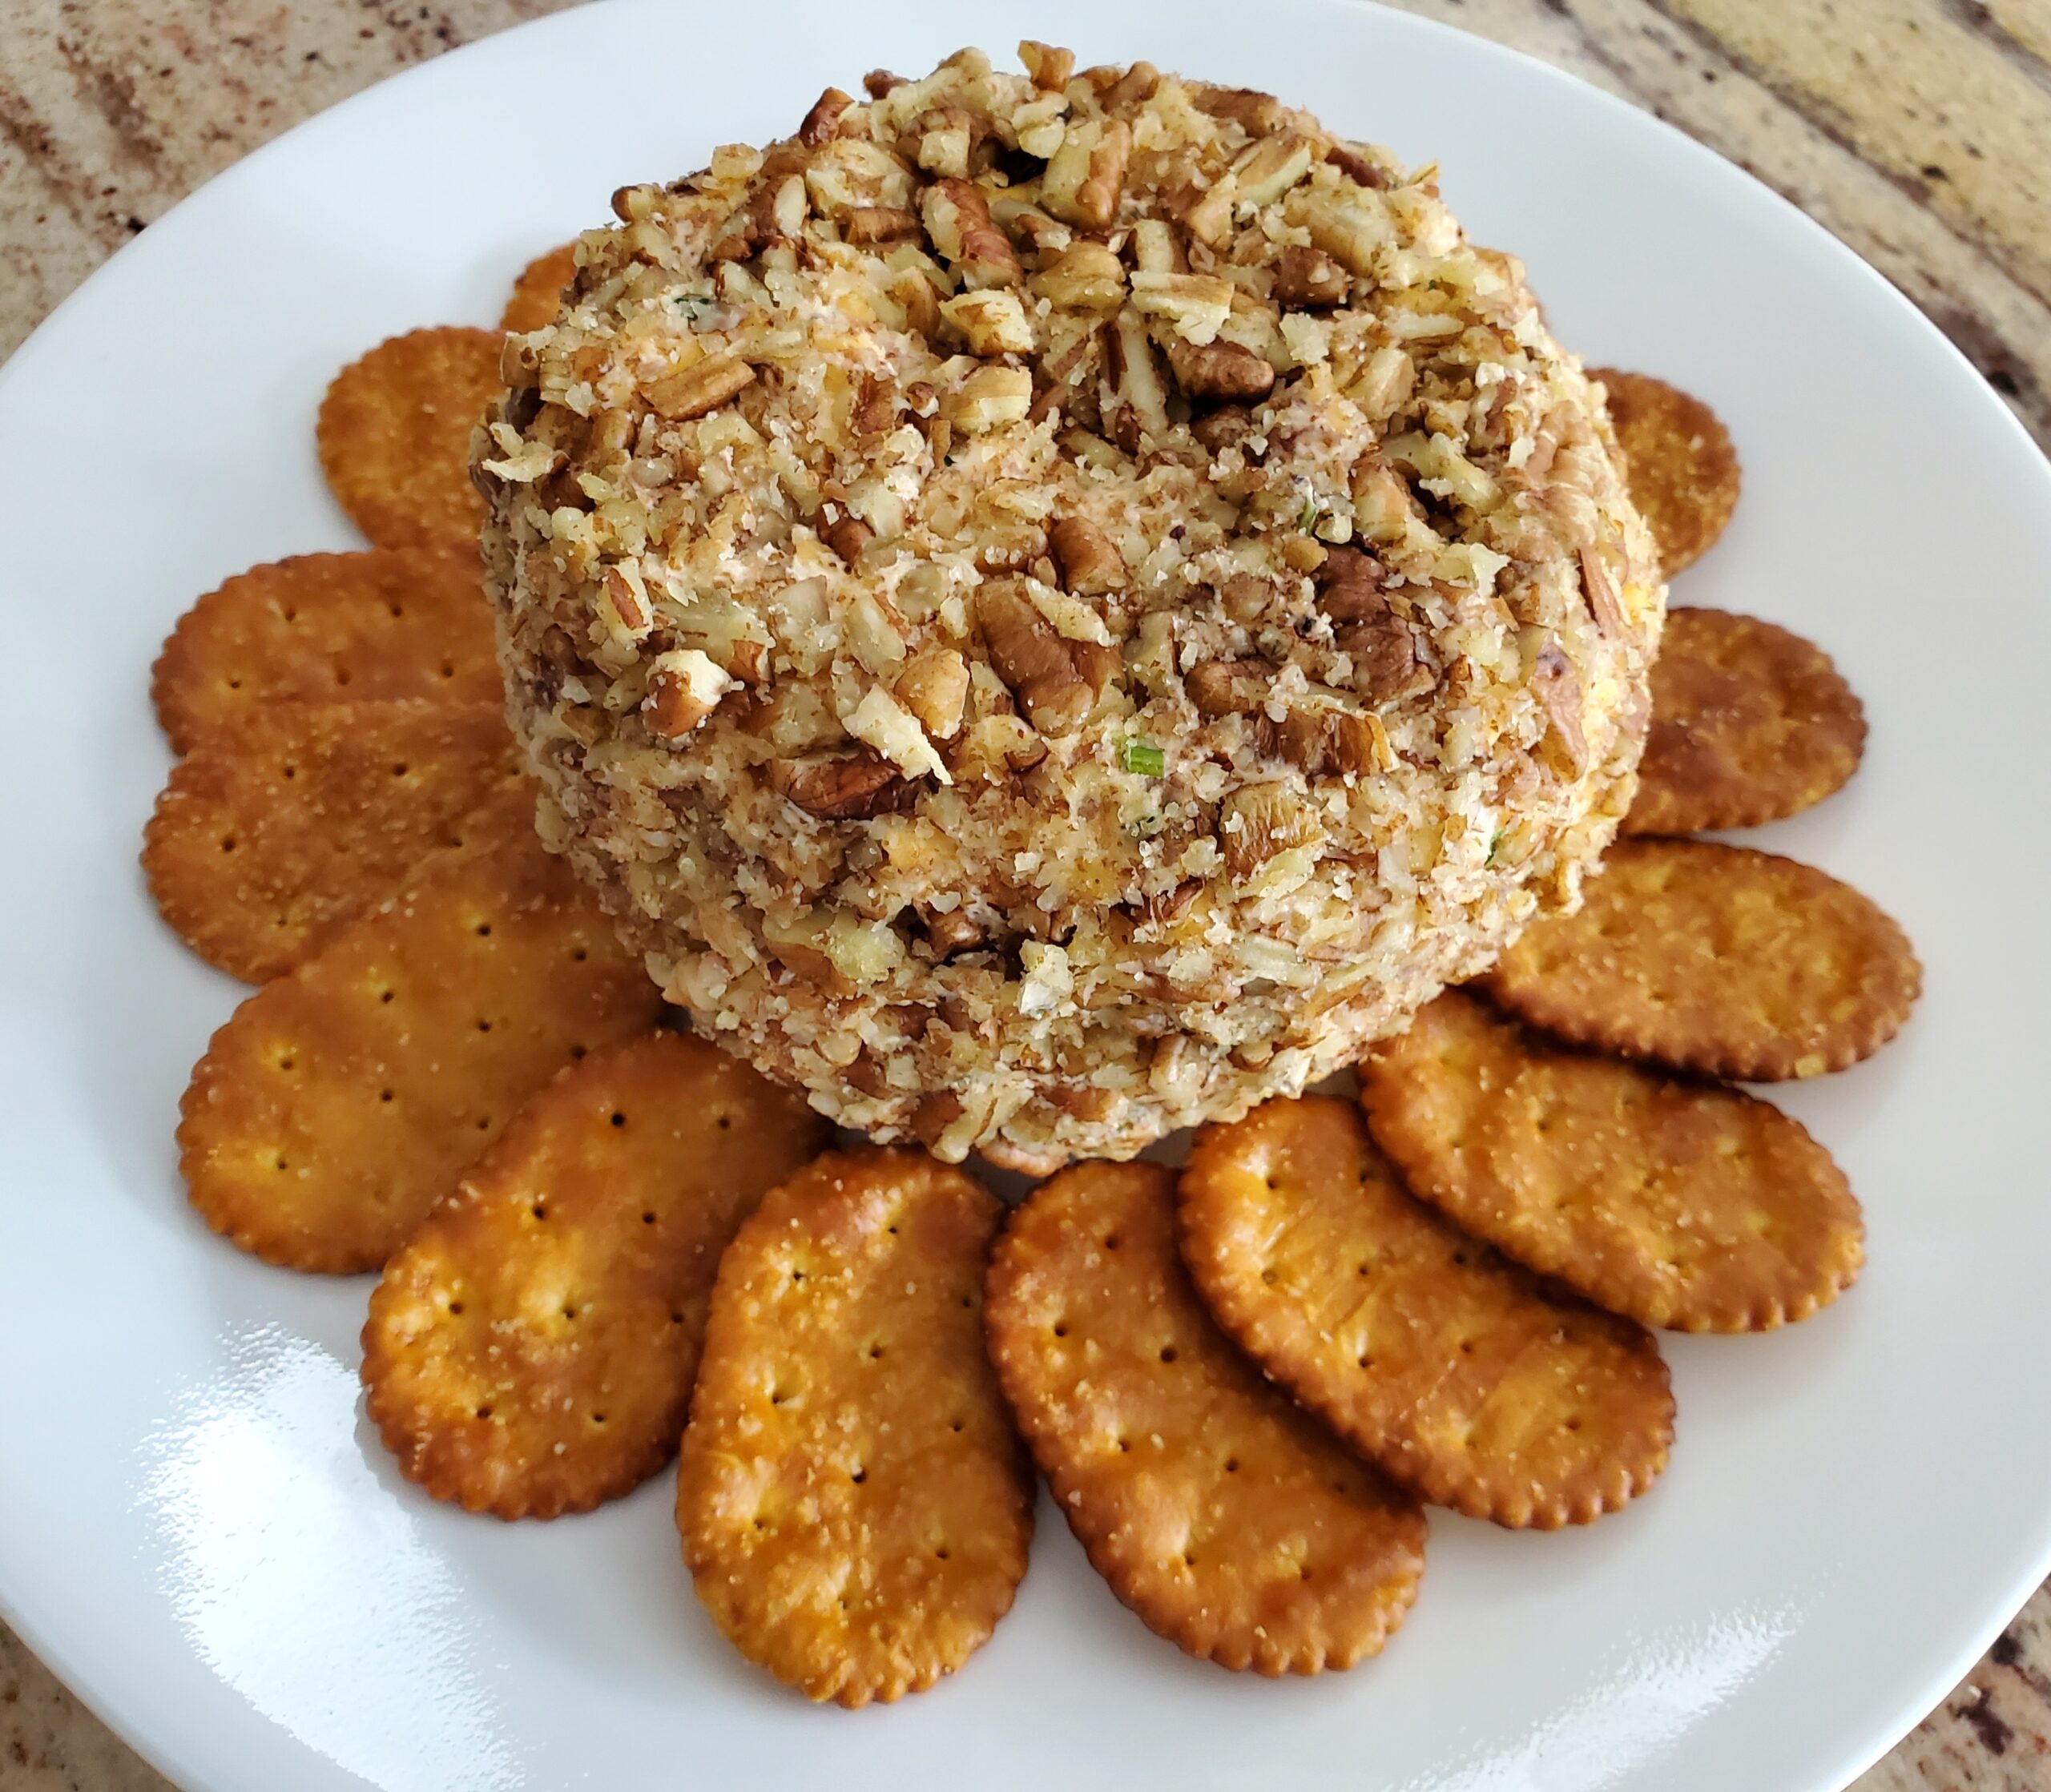
Next shape your cheese ball into a football shape. Add strips of white cheddar cheese to make the lace grip. Serve with crackers. You will also need a cheese spreader, or butter knife for serving.
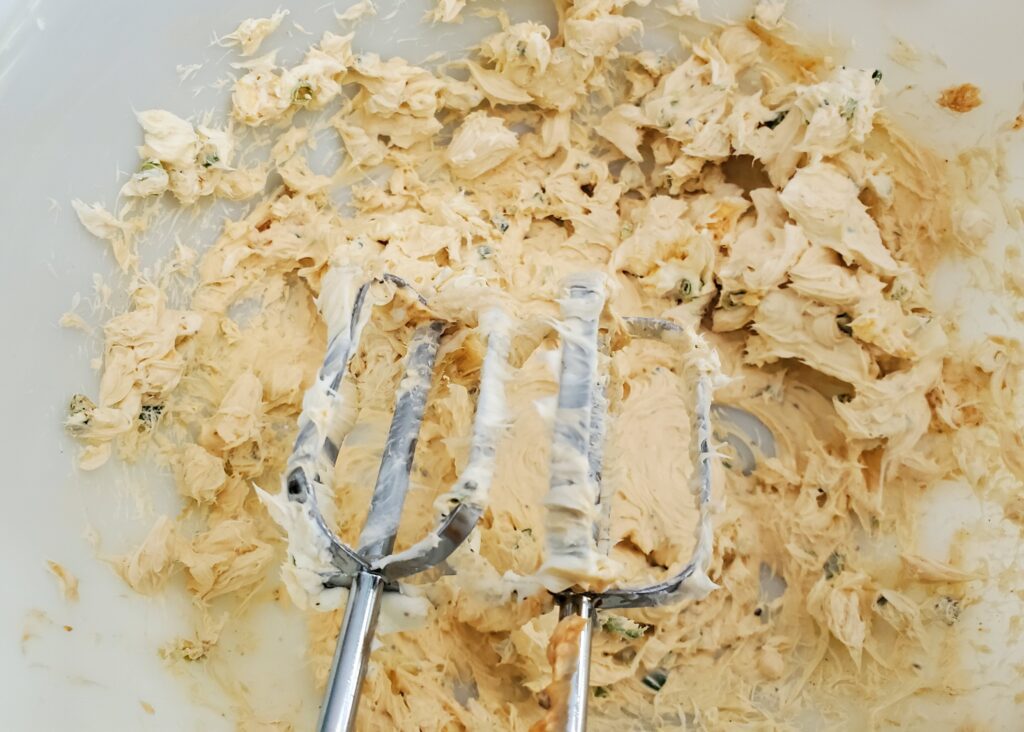
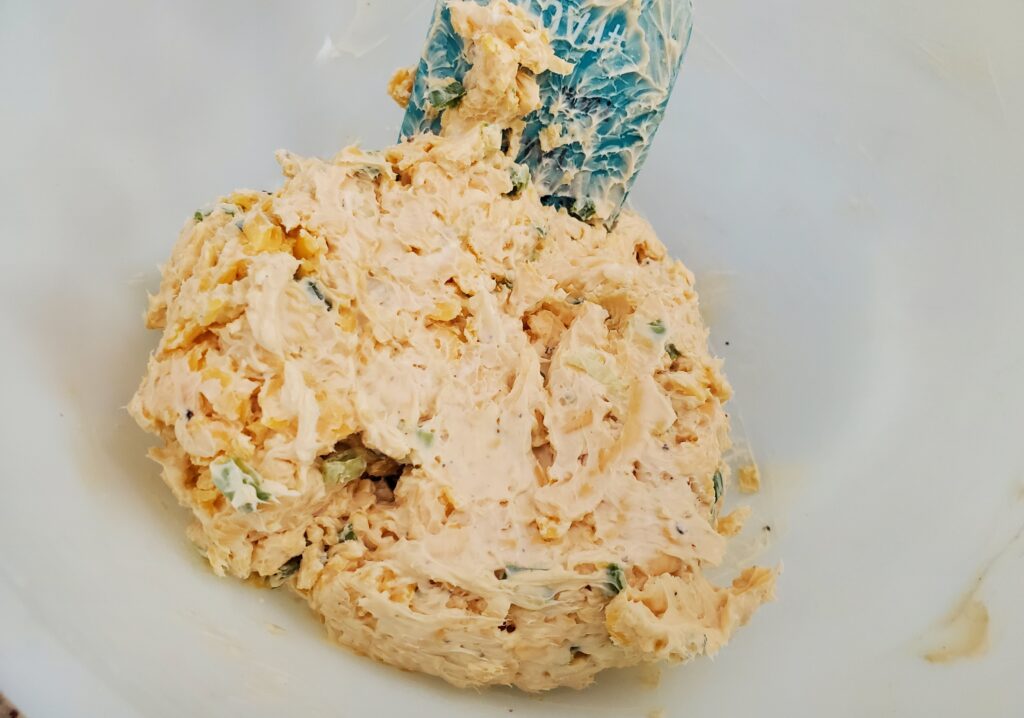
Place the softened cream cheese in a mixing bowl along with the garlic, onions, pepper and hot sauce. <br>Use a hand mixer to mix until well blended. Fold in the shredded cheese. Form the mixture into a ball. Roll the ball into the crushed pecans until well coated.<br>Refrigerate the ball for at least 1 hour before serving.
NOTES
As an Amazon Associate, I earn from qualified purchases.
This easy Thai meatballs recipe is a simple dinner that is sure to please. It is the perfect dish to serve with fried rice. These meatballs also make an awesome appetizer!
Disclaimer: This post may contain affiliate links. I earn commission on qualified purchases at no additional cost to you.
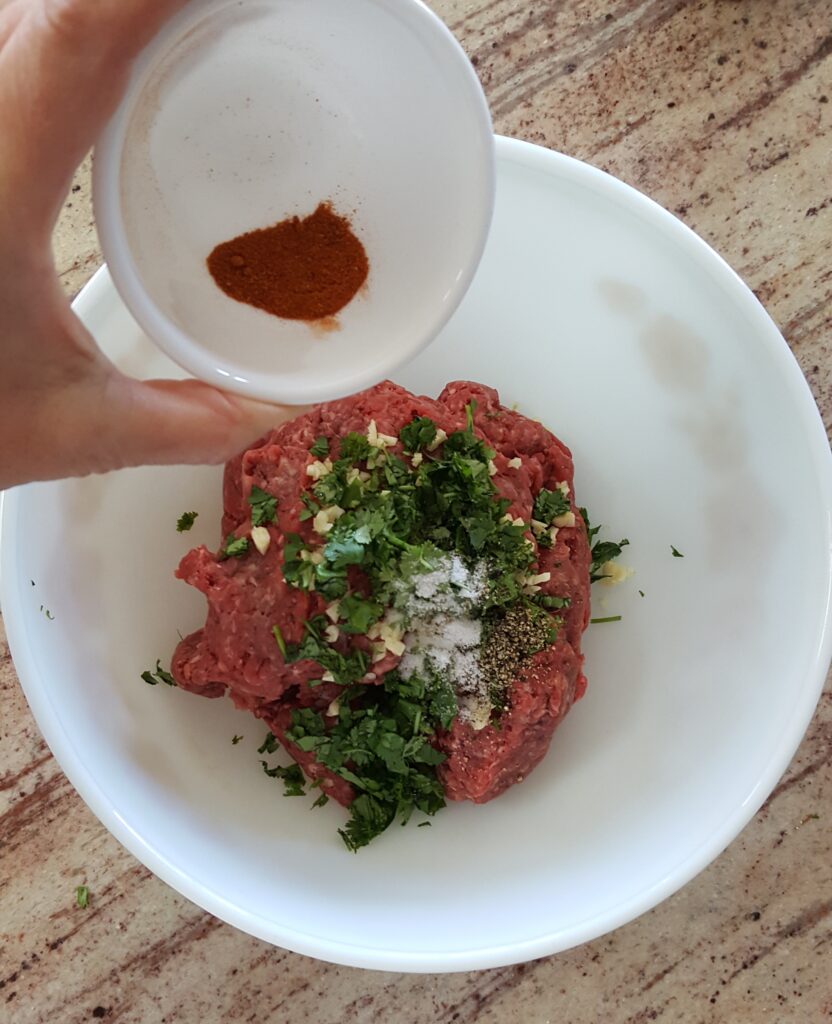
2 pounds ground beef (or ground meat of your choice)
5 garlic cloves, minced
4 Tablespoons Cilantro
1 teaspoon pepper
1 teaspoon salt
1/2 teaspoon cayenne pepper
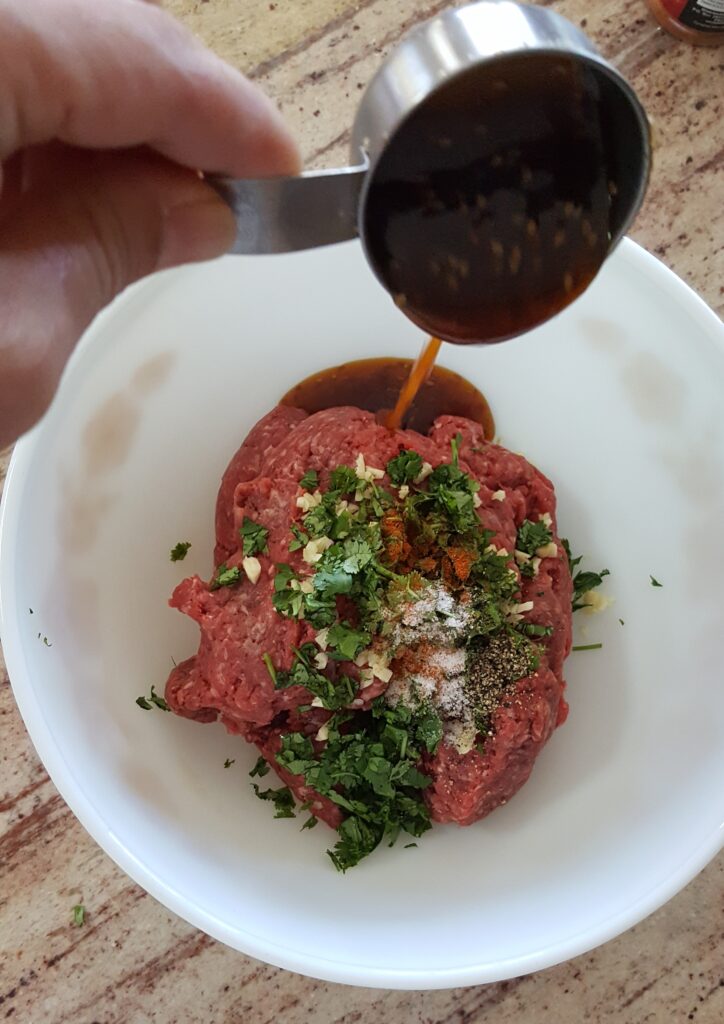
1/4 cup of the sauce
DIRECTION
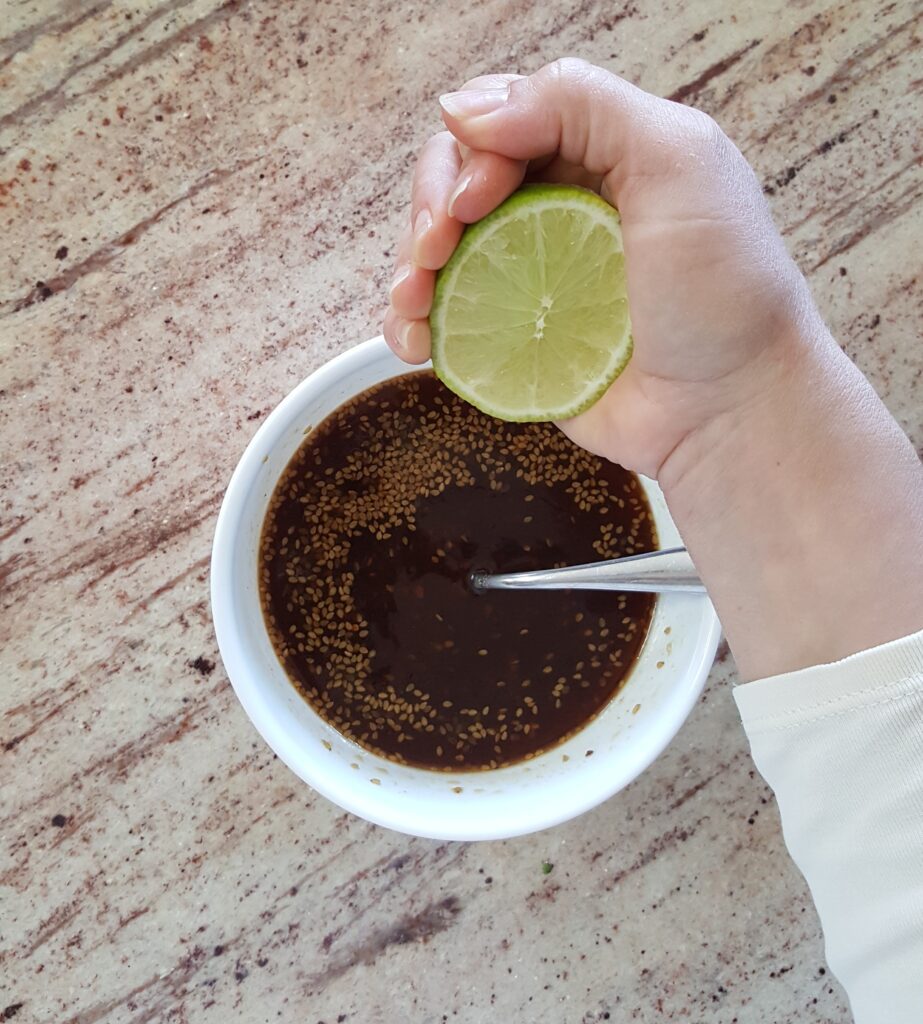
Start by making the sauce.
Mix the duck sauce, teriyaki sauce, lime juice and brown sugar until well blended.
Make the Meatballs
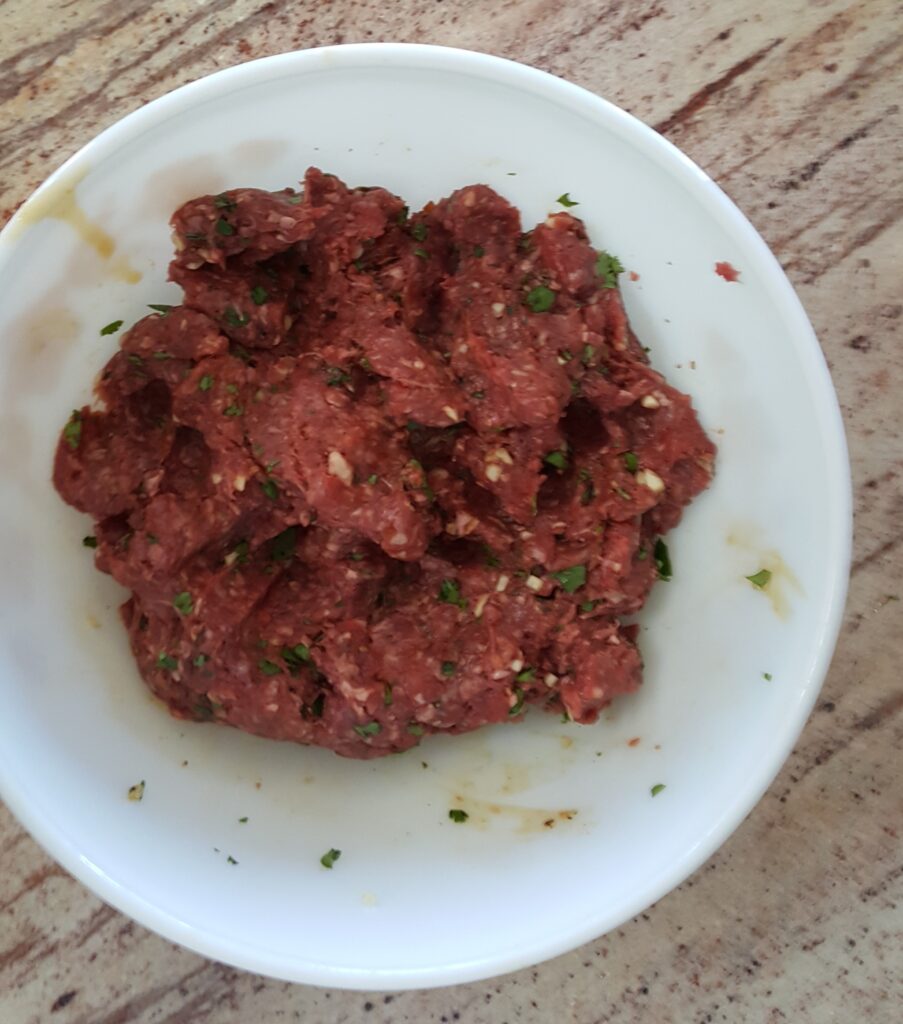
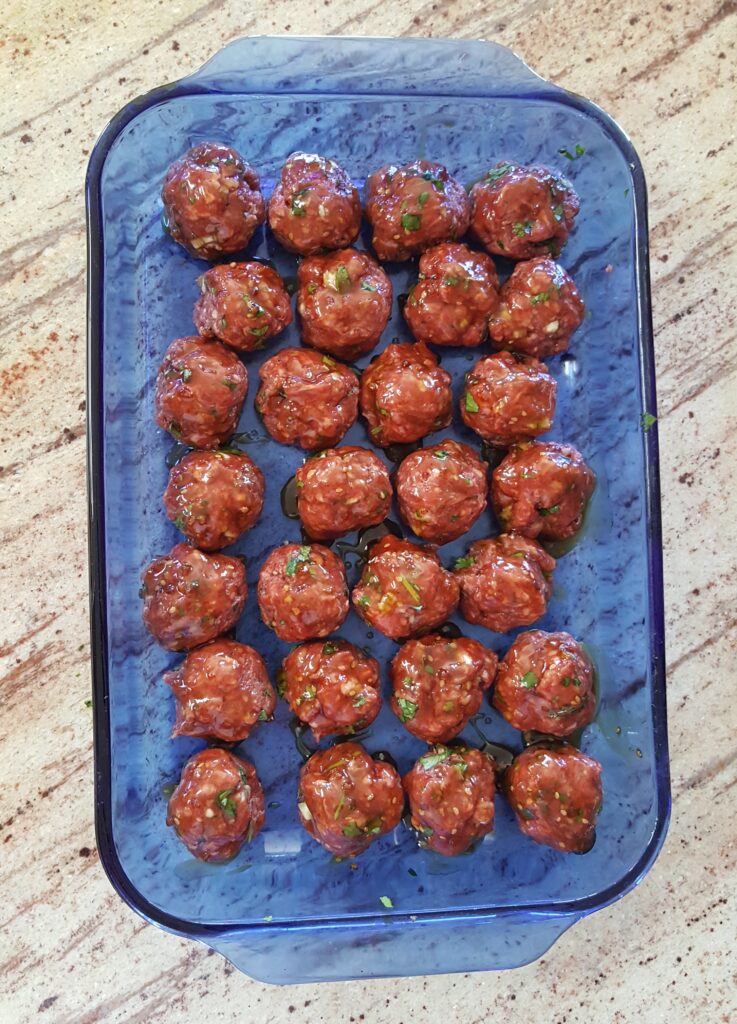
In a large mixing bowl combine the ground beef with garlic, seasonings and 1/4 cup of the sauce. Use your hands to mix until well combined. Form the meat mixture into 1 inch balls and place them into the 9 x13 inch Pyrex baking dish.
Bake the meatballs
Preheat the oven to 350 degrees F. Bake the meatballs for 30 minutes or until the internal temp reaches 165 degrees F. Meanwhile warm the remaining sauce in a saucepan until warm and bubbly, stirring occasionally. Serve the meatballs with the warm sauce.
NOTES
As an Amazon Associate, I earn from qualified purchases.
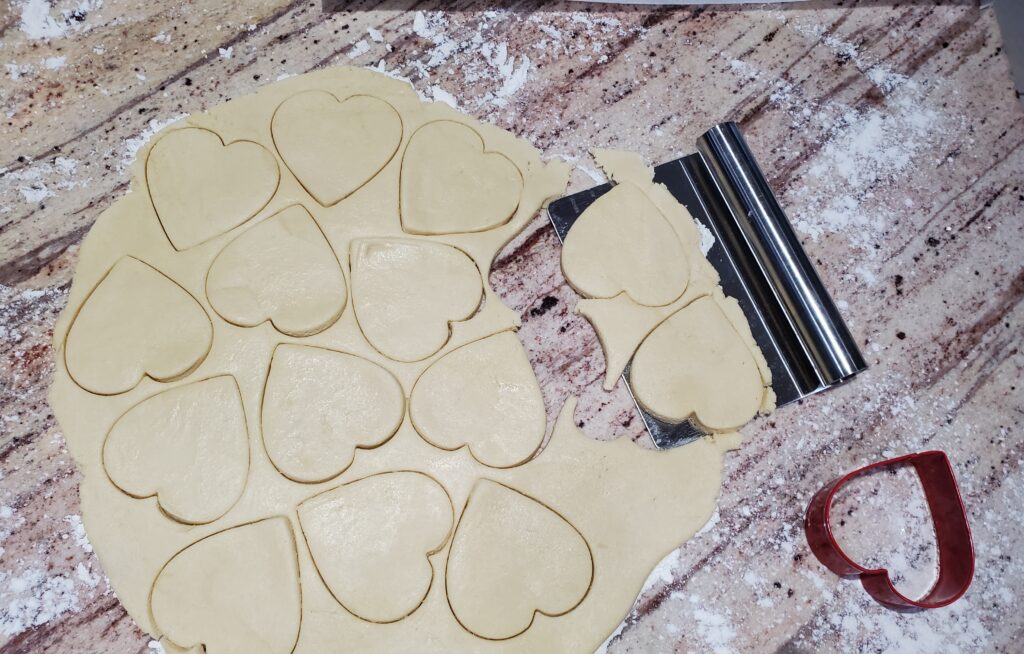
Sugar cookie cut outs are so much fun to decorate for many different holidays. This sugar cookie and royal icing recipe is perfect for any occasion. Just add your seasonal cookie cutter and color the icing any color you wish.
Disclaimer: This post may contain affiliate links. I ear commission at no additional cost to you.
First cream the butter, sugar and salt in a stand mixer using the paddle attachment. In a separate bowl lightly whisk the eggs and vanilla. Gradually add the eggs and vanilla to the butter mixture. Finally add the flour a little at a time, mix until the dough begins to pull away from the sides of the bowl.
Wrap the dough ball in plastic wrap and refrigerate for at least 2 hours before rolling it out.
Preheat the oven to 350 degrees F.
Remove the dough from the refrigerator. Roll the dough out on a lightly floured surface to about 1/4 inch thickness. Use the cookie cutter of your choice to cut out your cookies. Use a dough scraper if needed to transfer the cut outs to a parchment lined cookie sheet.
Transferring cookie cut outsCookies ready to bake
Bake the cookies for 8-12 minutes or until lightly browned.
Royal Icing Ingredients:
2 and 2/3 Cups Powdered Sugar
5 Tablespoons water
2 Tablespoon Meringue powder
How to make Royal Icing
Combine the meringue powder with the powdered sugar. Add the water and mix until combined. Whip the frosting using a stand mixer with the whisk attachment on high for 2-3 minutes. Store in an airtight container until ready to use.
Add water a couple drops at a time until the icing is the desired consistency. If you need to thicken the icing add a tablespoon of powdered sugar at a time until the icing is the desired consistency. Color as desired and place into piping bags or icing bottles. Use a thicker icing in the bags and a thinner icing in the bottles. This way you can line the edge of each cookie with the piping bags and fill the center with the bottles.
piping bagsicing bottles
How to make edible gold or silver paint:
To make the gold “paint” for Holiday sugar cookies you will need the following ingredients and tools:
In a small bowl add about 1 teaspoonful of the edible luster dust. Using a pastry brush mix in the vodka, 1 drop at a time until the mixture is about the consistency of paint. Use the “paint” to add a gold or silver pop to your cookies after the frosting is dry. The alcohol in the vodka will evaporate at room temperature so no alcohol will remain once the “paint” is dry.
First cream the butter, sugar and salt in a stand mixer using the paddle attachment. In a separate bowl lightly whisk the eggs and vanilla. Gradually add the eggs and vanilla to the butter mixture. Finally add the flour a little at a time, mix until the dough begins to pull away from the sides of the bowl. Wrap the dough ball in plastic wrap and refrigerate for at least 2 hours before rolling it out. Preheat the oven to 350 degrees F. Remove the dough from the refrigerator. Roll the dough out on a lightly floured surface to about 1/4 inch thickness. Use the cookie cutter of your choice to cut out your cookies. Use a dough scraper if needed to transfer the cut outs to a parchment lined cookie sheet. Bake the cookies for 8-12 minutes or until lightly browned.
To make the frosting
Combine the meringue powder with the powdered sugar. Add the water and mix until combined. Whip the frosting using a stand mixer with the whisk attachment on high for 2-3 minutes. Store in an airtight container until ready to use.
NOTES
Add water a couple drops at a time until the icing is the desired consistency. If you need to thicken the icing add a tablespoon of powdered sugar at a time until the icing is the desired consistency. Color as desired and place into piping bags or icing bottles.
As an Amazon Associate I earn from qualified purchases.
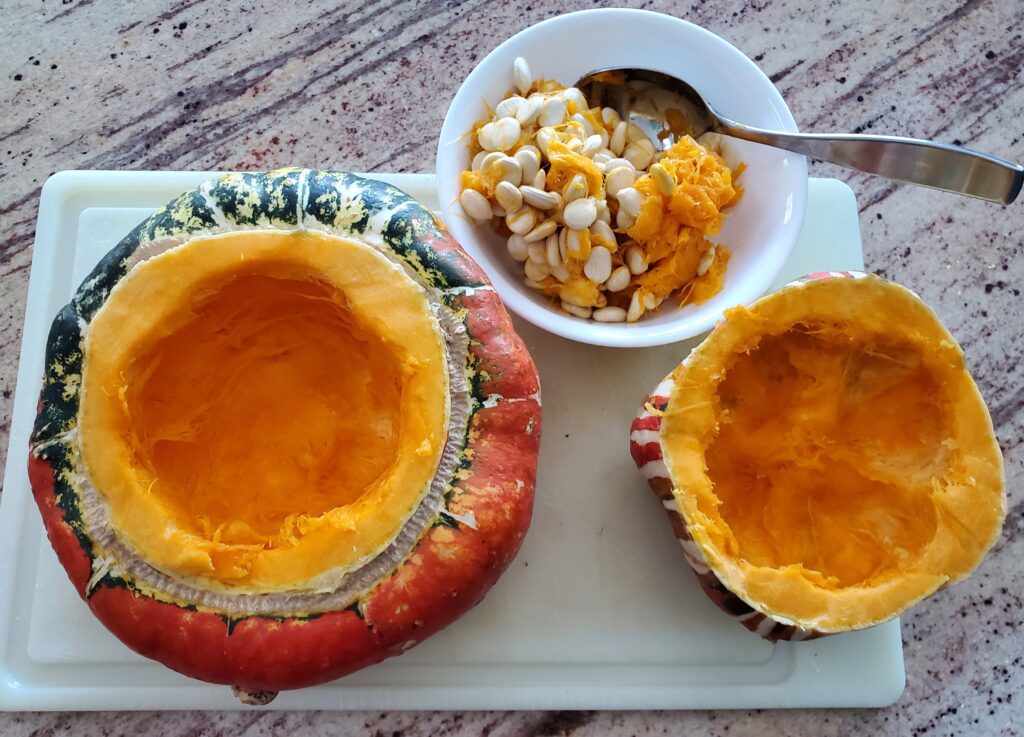
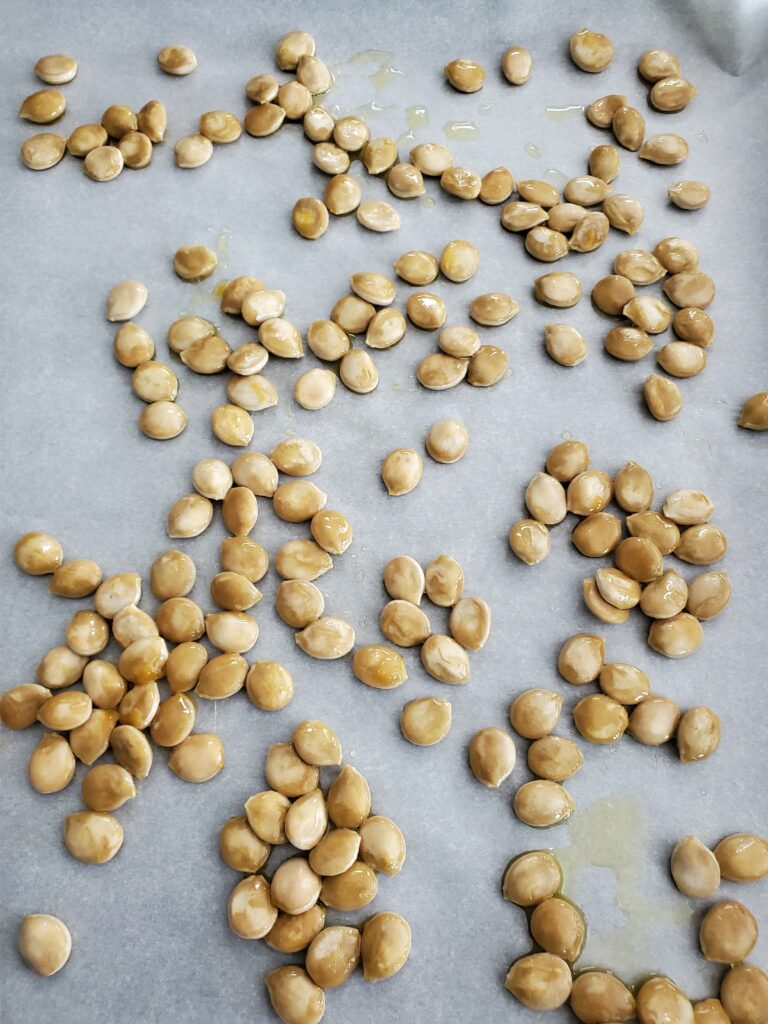
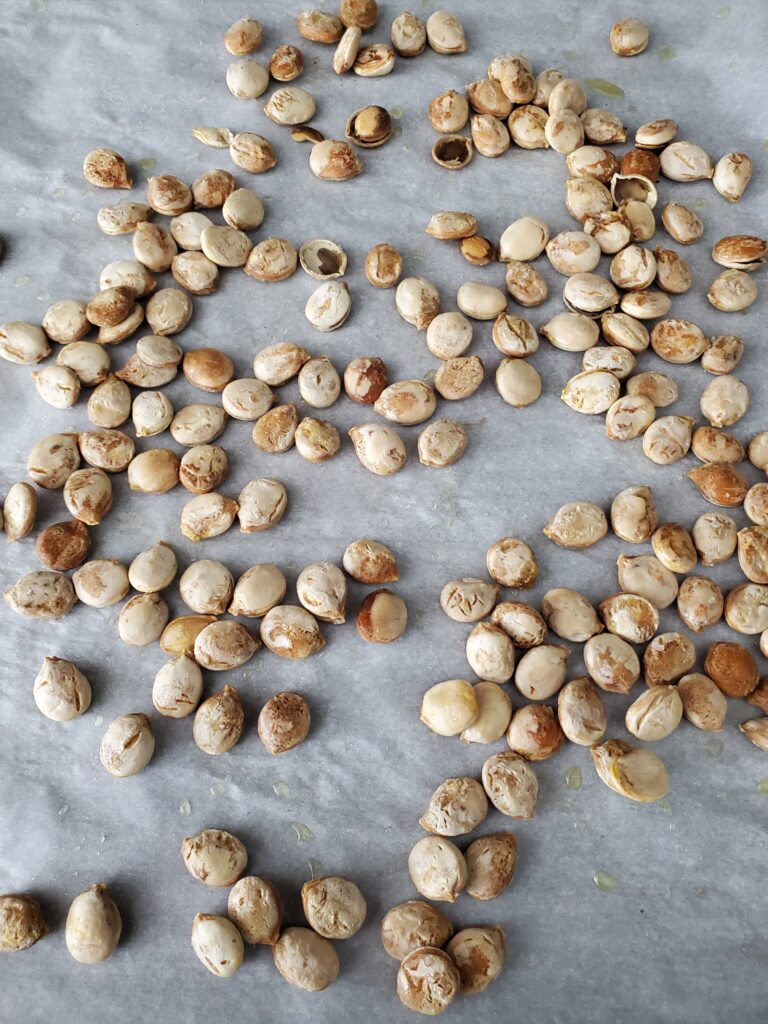
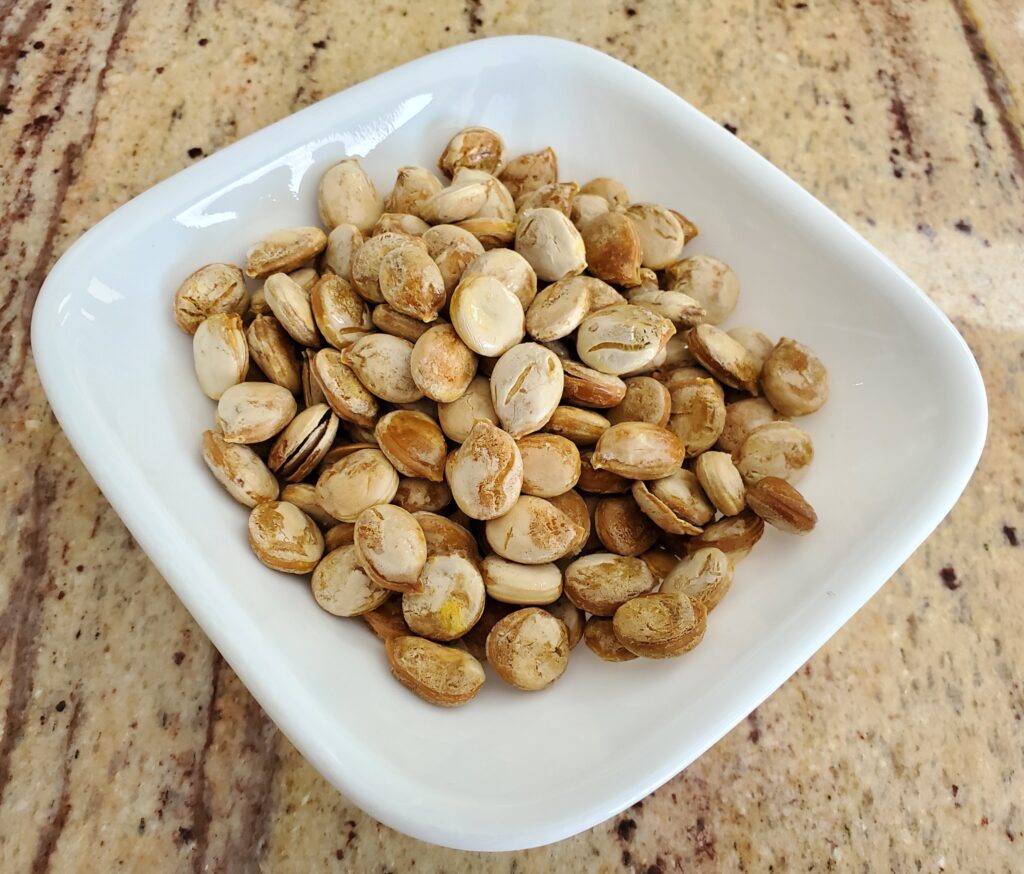
All squash seeds are edible and delicious. Don’t waste those tasty seeds when you roast your squash. This easy roasted turban squash seed recipe can be used for any squash seed.
Disclaimer: This post may contain affiliate links. I earn commission at no additional cost to you.
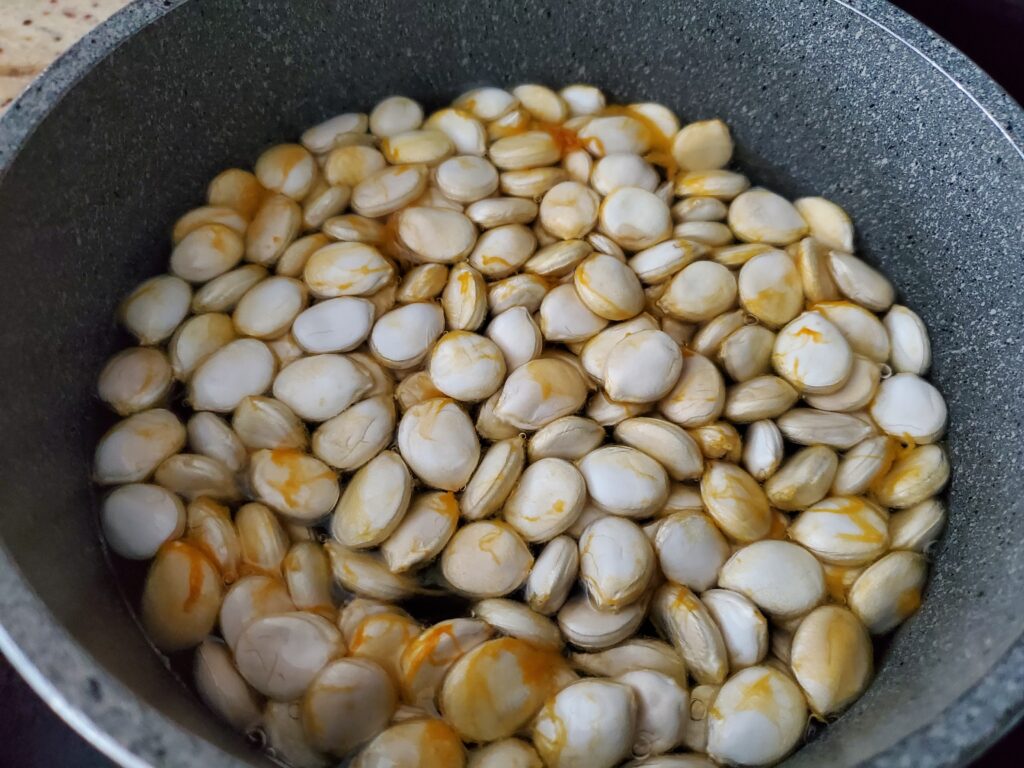
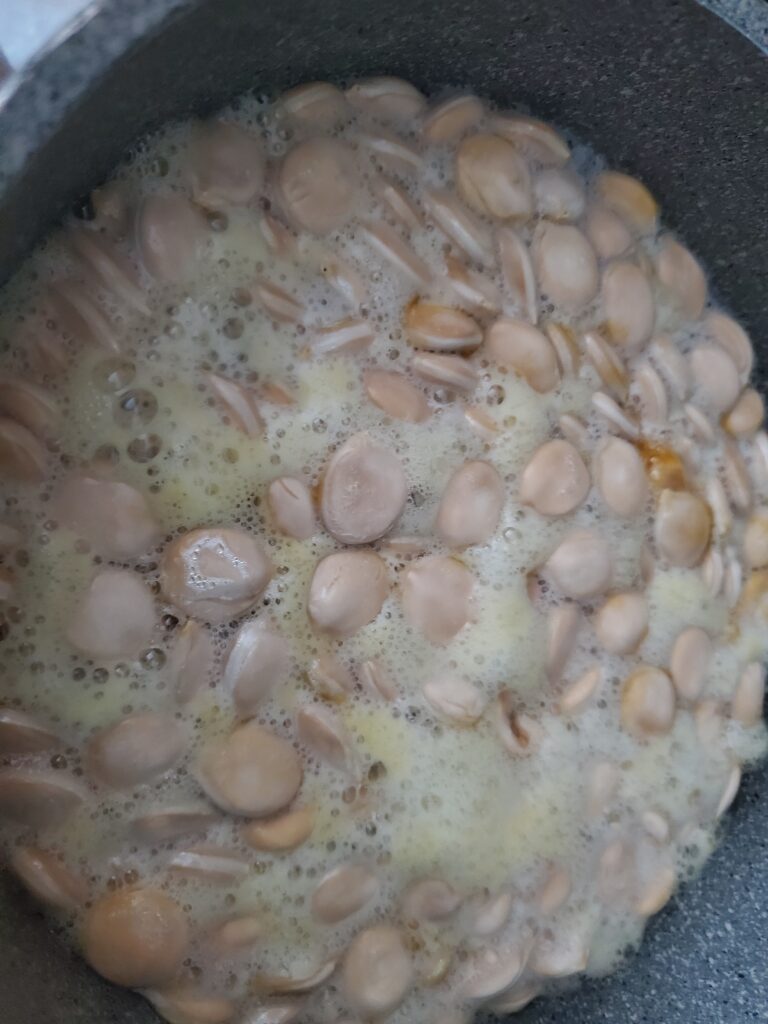
First clean the seeds thoroughly. Simmer the seeds in salty water for 10 minutes. Drain the water and dry the seeds.<br>Preheat the oven to 300 degrees F. Toss the seeds in olive oil and salt to coat. Place the seeds on a parchment lined sheet pan. Bake for 45 minutes.
NOTES
Some of the seeds will pop, it will sound like popcorn.
This recipe can be used for any squash seed.
As an Amazon Associate, I earn from qualified purchases.
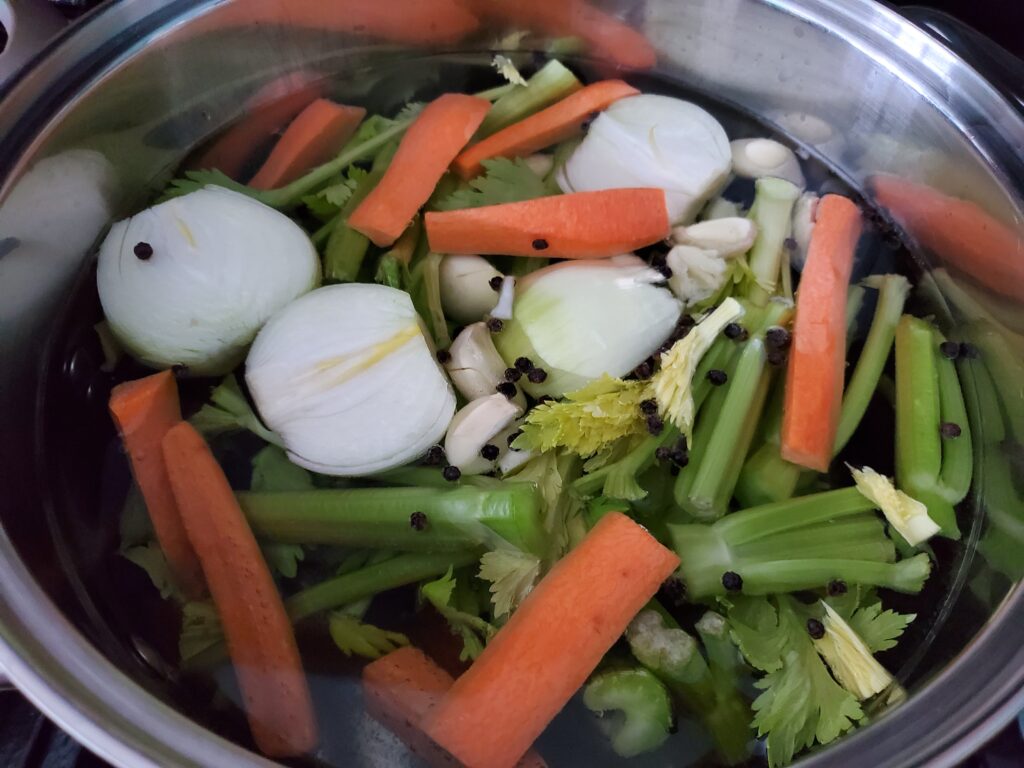
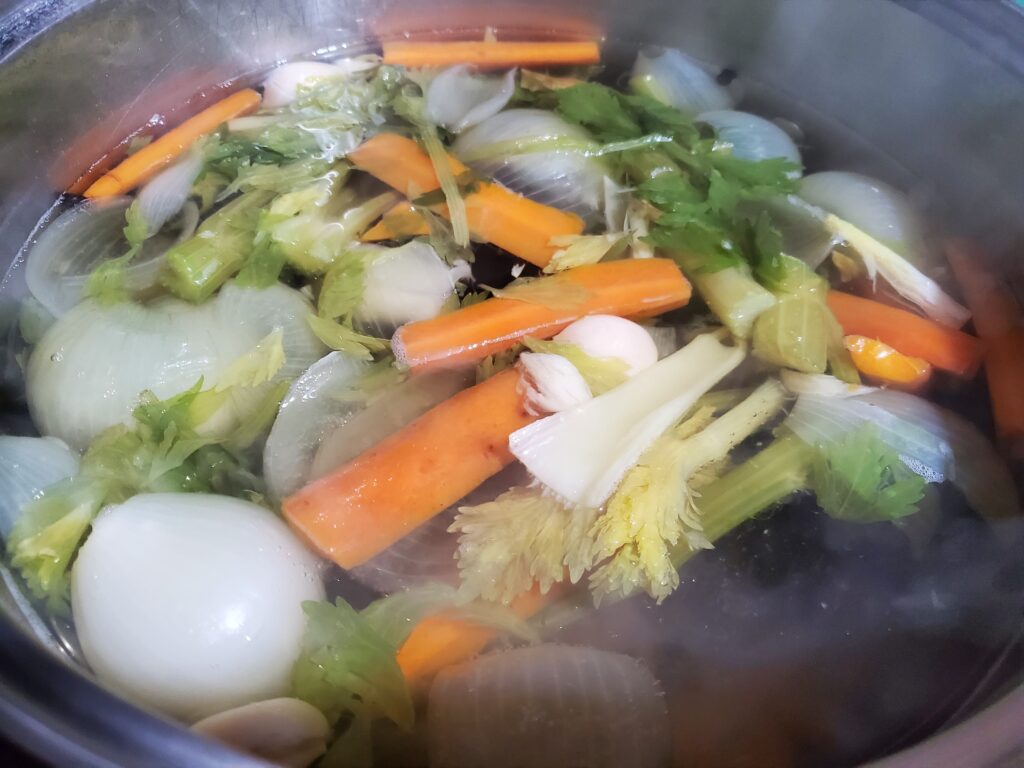
It’s so easy to make homemade vegetable stock with this recipe. It’s also a great way to use up some vegetable scraps that would normally be discarded. Surely homemade vegetable stock will save money. You can also choose to add flavors depending on what you plan to use it for.
Disclaimer: This post may contain affiliate links. I earn commission at no additional cost to you.
Souper Cube trays – Great for freezing extra stock in 1 cup servings.
Vegetable stock ingredients:
3 quarts of water
Leafy tops from one bunch of celery
1-2 large carrots, quartered
2 medium onions, peeled and halved
1 teaspoon whole peppercorns
5-6 garlic cloves, peeled and smashed
2 teaspoons sea salt
Fresh herbs of your choice (cilantro stems, a small bunch of thyme, parsley, green onion tops, a bay leaf etc…) Optional
How to make homemade vegetable stock:
Place all of the above ingredients in a large stock pot.
Bring to a boil. Reduce the heat and simmer for 1-2 hours.
Strain out and discard the vegetables. A mesh strainer works best to make a nice clear stock. Season as desired and use in your favorite recipes.
How to store vegetable stock
Store stock in an airtight container in the refrigerator for a few days. If not used in that time it can be frozen. If you use mostly 1 cup servings for your recipes you can freeze the stock in Souper Cube trays then transfer the 1 cup cubes into freezer bags for later use.
Recipes to use your vegetable stock:
Use this homemade vegetable stock in place of vegetable broth or vegetable stock in any recipe. Here are a few great ones to get you started.
Place all of the above ingredients in a large stock pot. Bring to a boil. Reduce the heat and simmer for 1-2 hours. Strain out and discard the vegetables. A mesh strainer works best to make a nice clear stock. Season as desired and use in your favorite recipes.
NOTES
As an Amazon associate, I earn from qualified purchases.
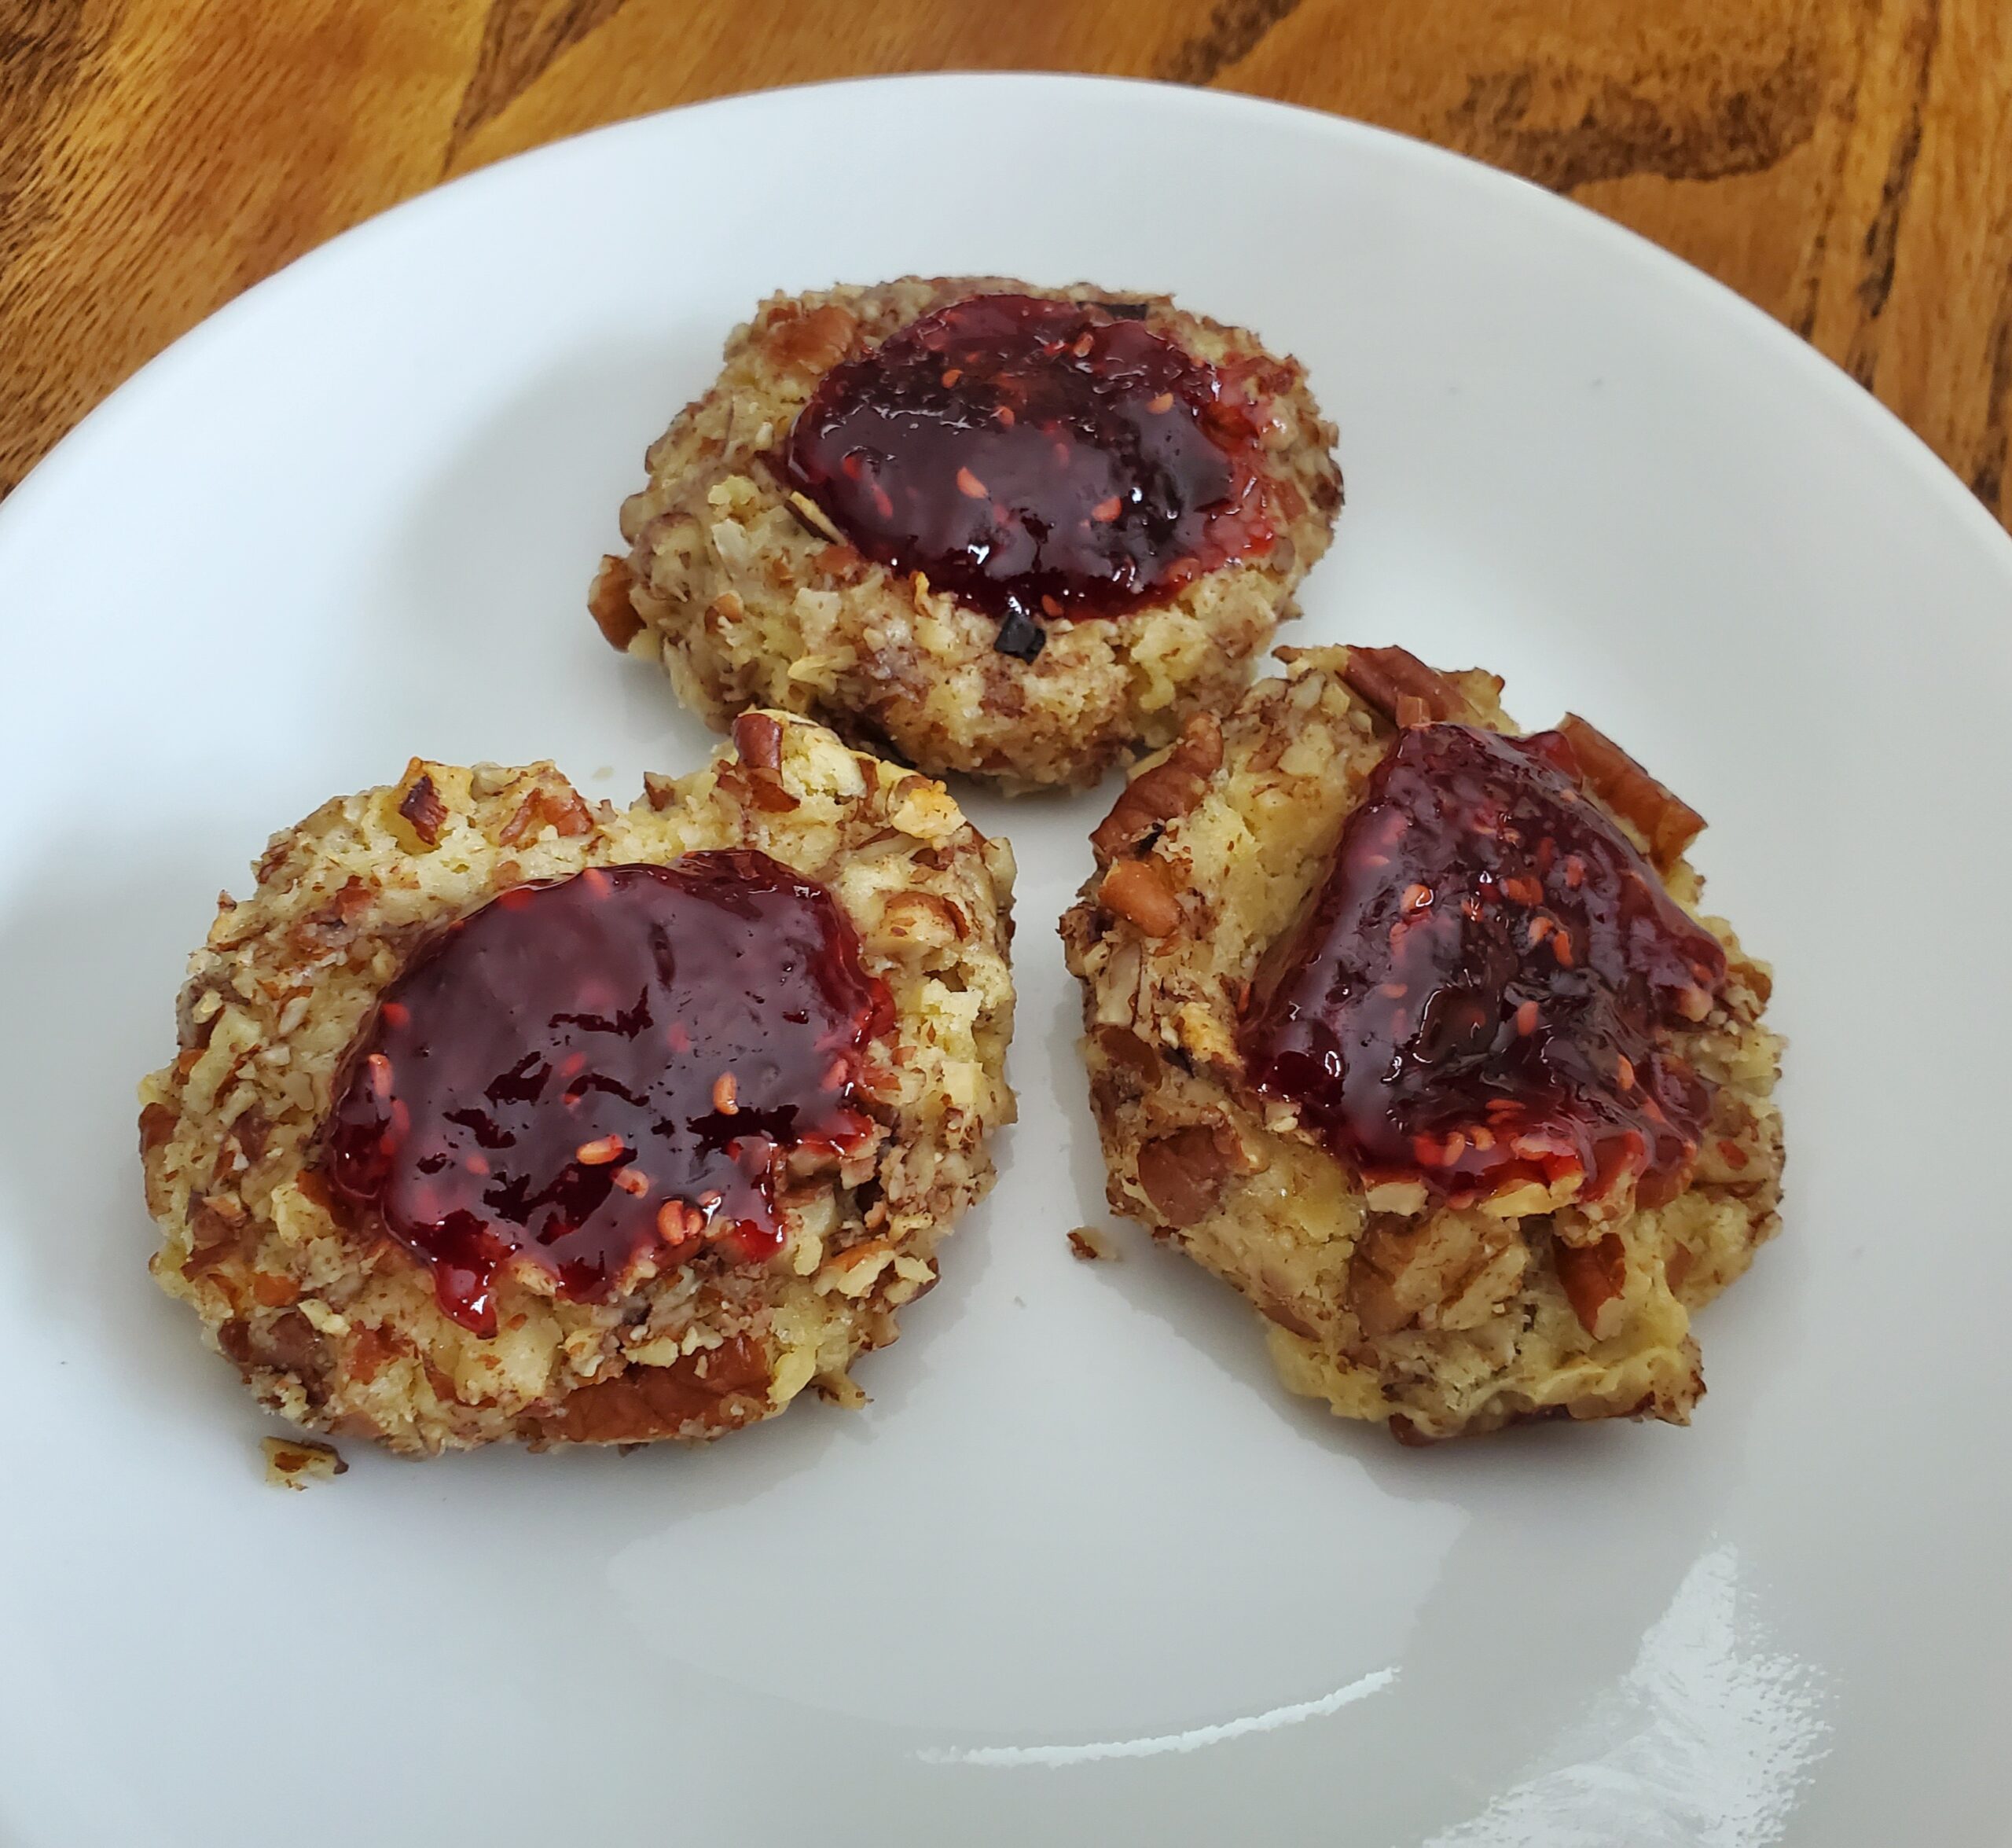
This thumbprint cookie recipe is a perfect cookie for any occasion. Buttery, nutty, crumbly perfection with sweet jam. You can choose any jam to fill the center, and any nut to coat the cookies. For this recipe I chose seeded raspberry jam and crushed pecans.
1 cup finely chopped pecans, or nut of your choice
1/2 cup seeded raspberry jam, or jam of your choice
Instructions:
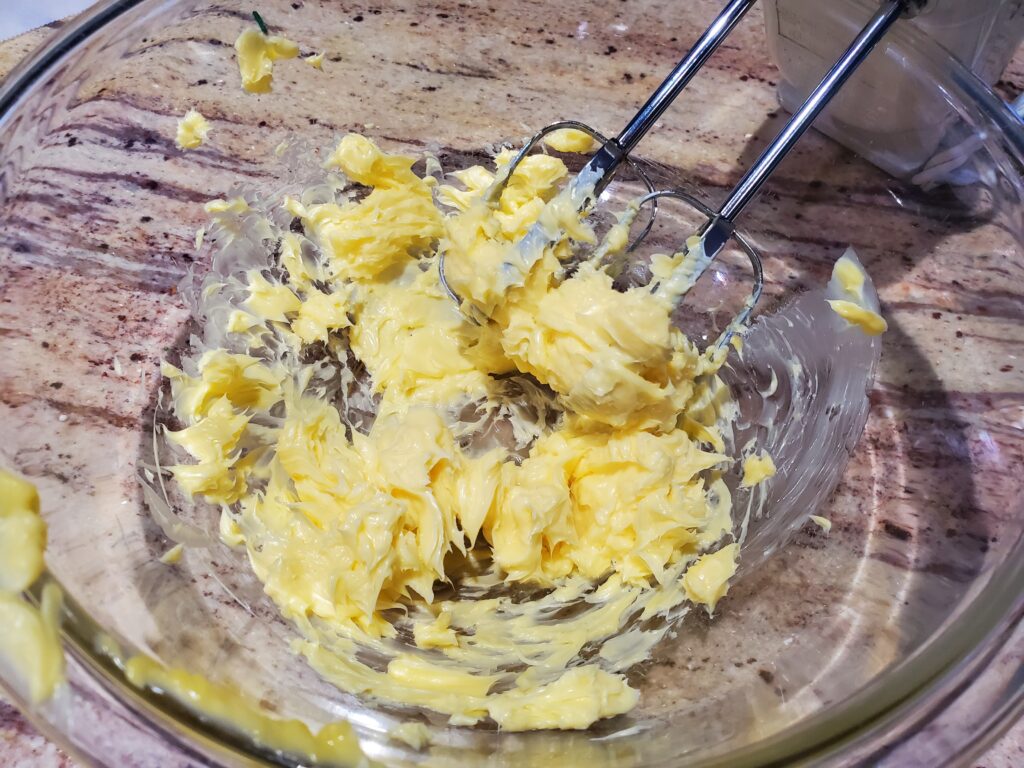
Start by beating the softened butter with an electric mixer in a large mixing bowl.
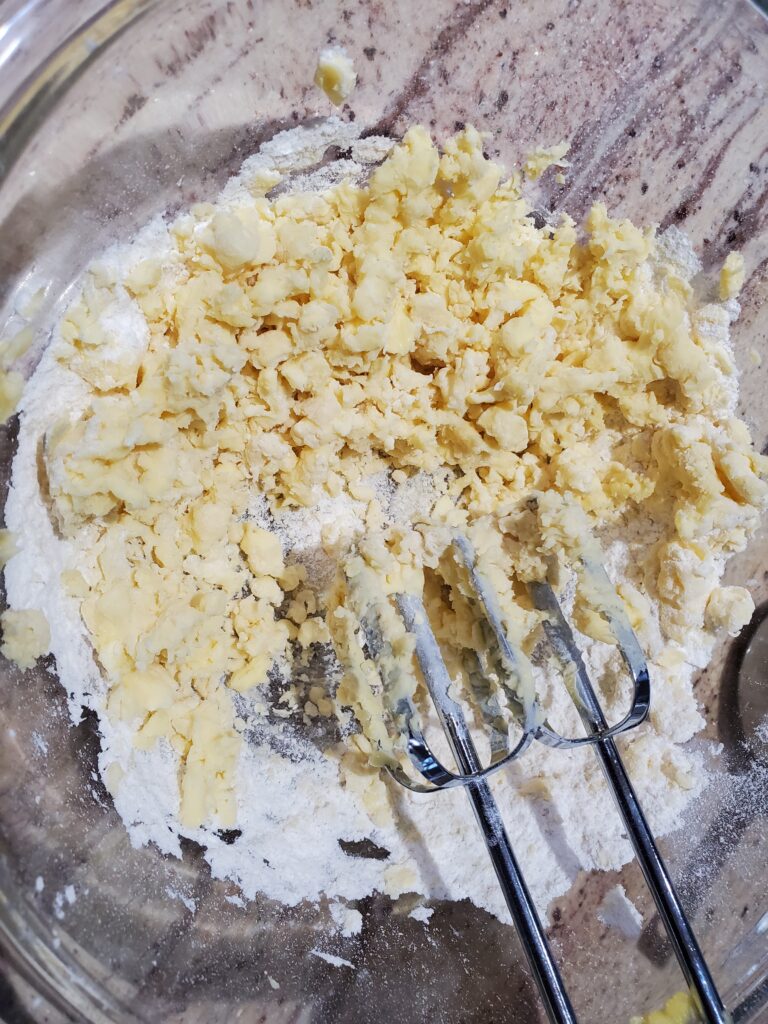
Add 3/4 cup of the flour to the butter.
Mix well, then add the sugar, egg yolks, and vanilla. Beat until thoroughly combined. add the remaining flour and mix. Cover and refrigerate the dough for at least 1 hour.
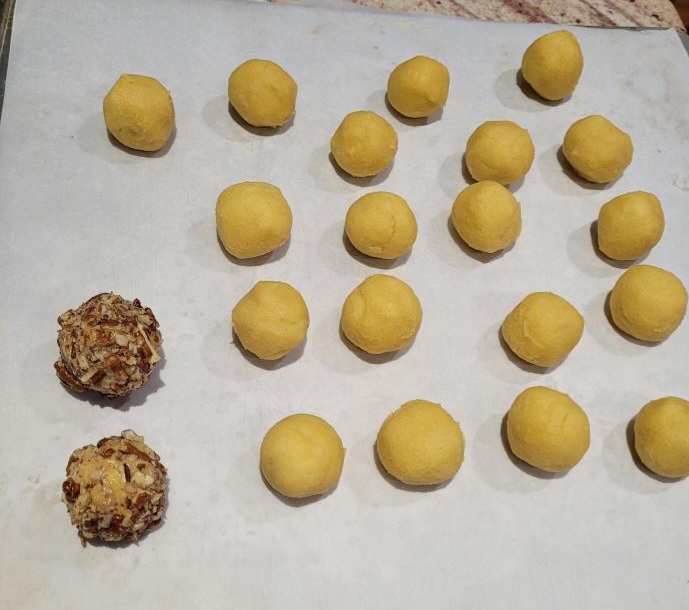
Remove the dough from the refrigerator. Shape into 1 inch balls.
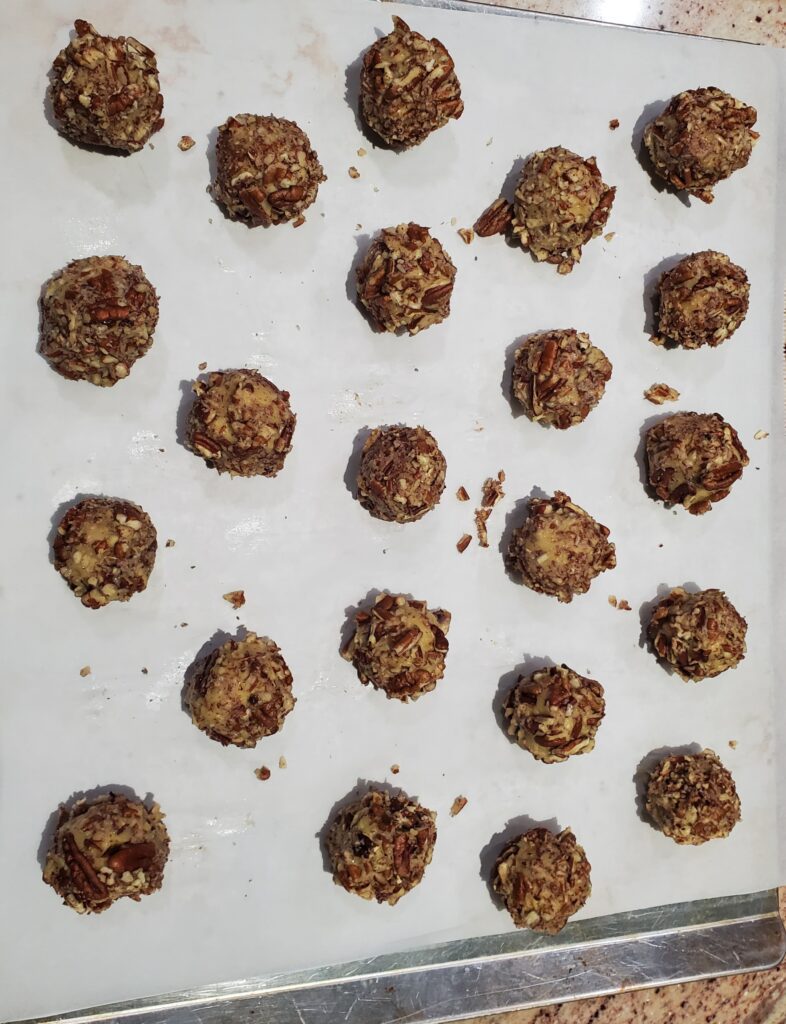
Roll each ball in the egg whites, then roll in the pecans to coat.
Place the balls on a parchment lined cookie sheet.
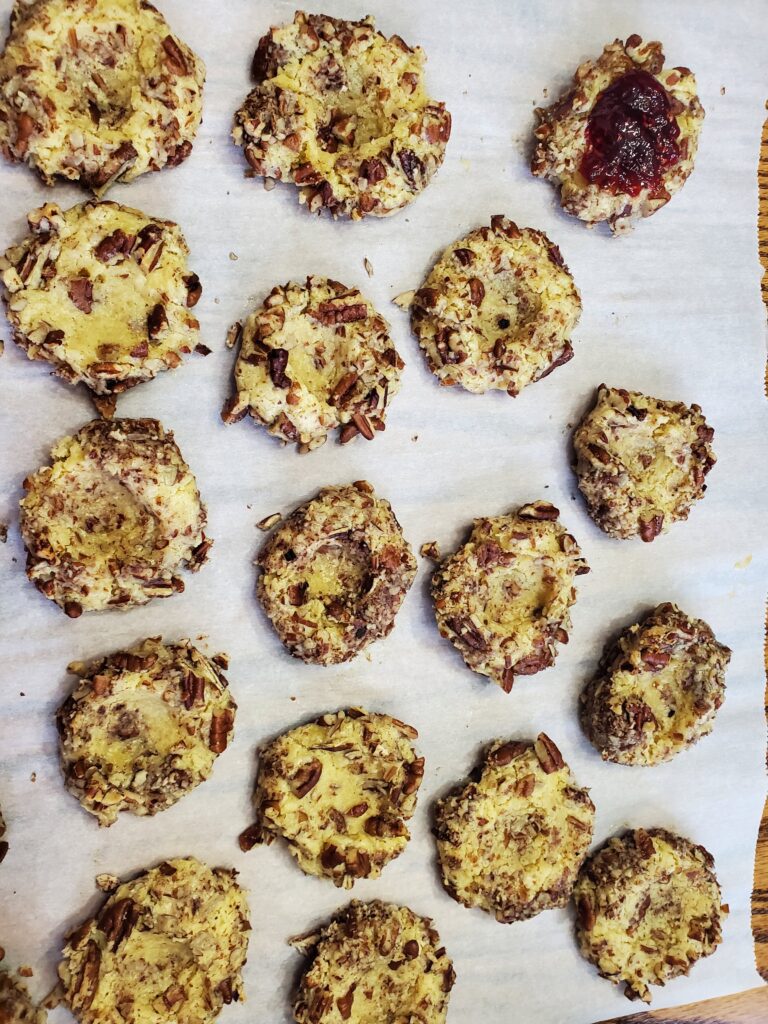
Make an indentation into the center of each cookie with your thumb.
Bake at 375 degrees F for 10-12 minutes or until the edges are lightly browned. Place the cookies on a wire rack to cool.
Right before serving, fill the indentation with jam of your choice.
1 cup finely chopped pecans, or nut of your choice
1/2 cup seeded raspberry jam, or jam of your choice
DIRECTION
Start by beating the softened butter with an electric mixer in a large mixing bowl. Add 3/4 cup of the flour to the butter. Mix well, then add the sugar, egg yolks, and vanilla. Beat until thoroughly combined. add the remaining flour and mix. Cover and refrigerate the dough for at least 1 hour.<br>Remove the dough from the refrigerator. Shape into 1 inch balls. Roll each ball in the egg whites, then roll in the pecans to coat. Place the balls on a parchment lined cookie sheet. Make an indentation into the center of each cookie with your thumb.<br>Bake at 375 degrees F for 10-12 minutes or until the edges are lightly browned. Place the cookies on a wire rack to cool.<br>Right before serving, fill the indentation with jam of your choice.
NOTES
As an Amazon Associate, I earn on qualified purchases.
If you love fried rice with your Chinese take-out you will love this homemade fried rice recipe. It is certainly better than take out. It’s so quick and easy to make at home and makes a perfect side for chicken, pork, shrimp or roasted vegetables.
Disclaimer: This post may contain affiliate links. I earn commission at no additional cost to you.
Use a mesh strainer to rinse the rice, then cook the rice according to package directions. 1 cup of uncooked rice makes approximately 2 cups of cooked rice. Set the rice aside.
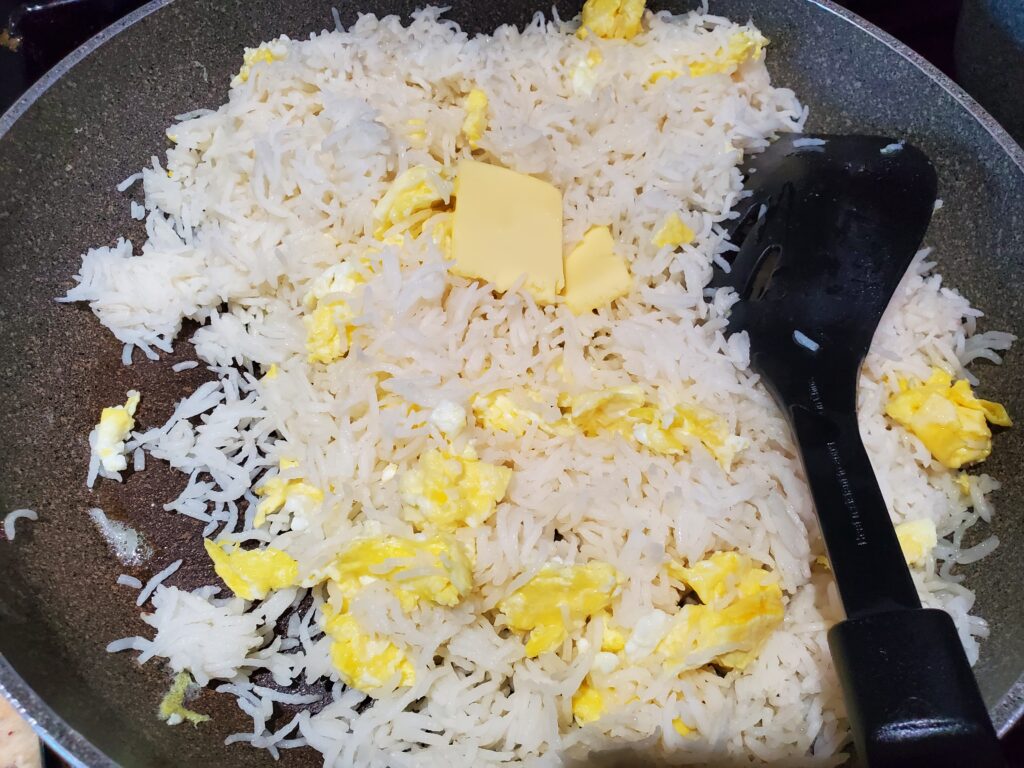
Meanwhile, sauté the onions in 1 tablespoon of butter. Remove the onions from the pan and set aside.
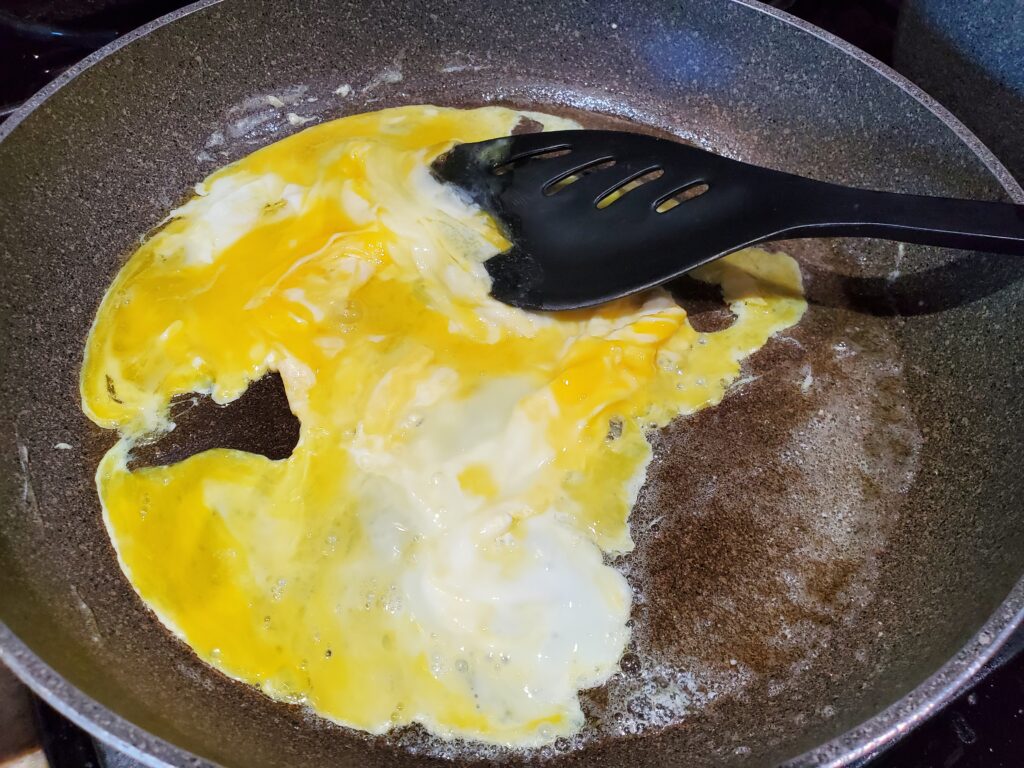
Use the same pan to scramble the eggs in 1 tablespoon of the butter.
Once the egg is cooked, add the rice and remaining butter. Toss to coat the rice with the butter and break up any clumps.
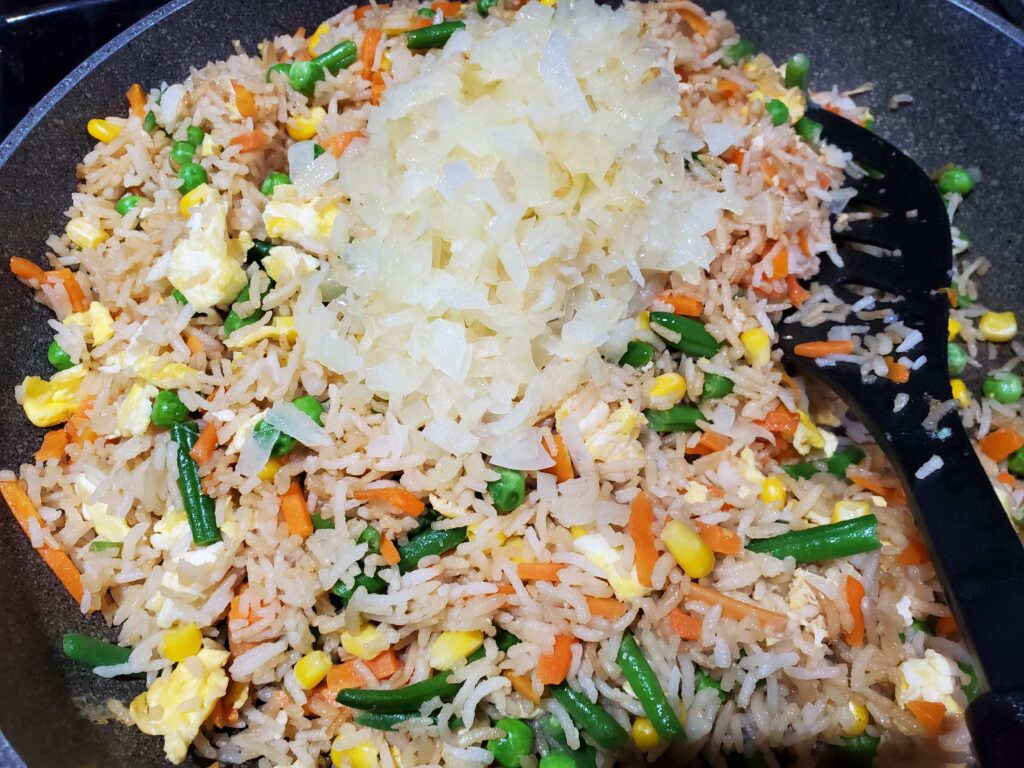
Add the soy sauce and sesame oil, continue to toss the rice until evenly coated with sauce. Add the mixed vegetables and toss until the vegetables are heated through. Return the onions to the pan and mix.
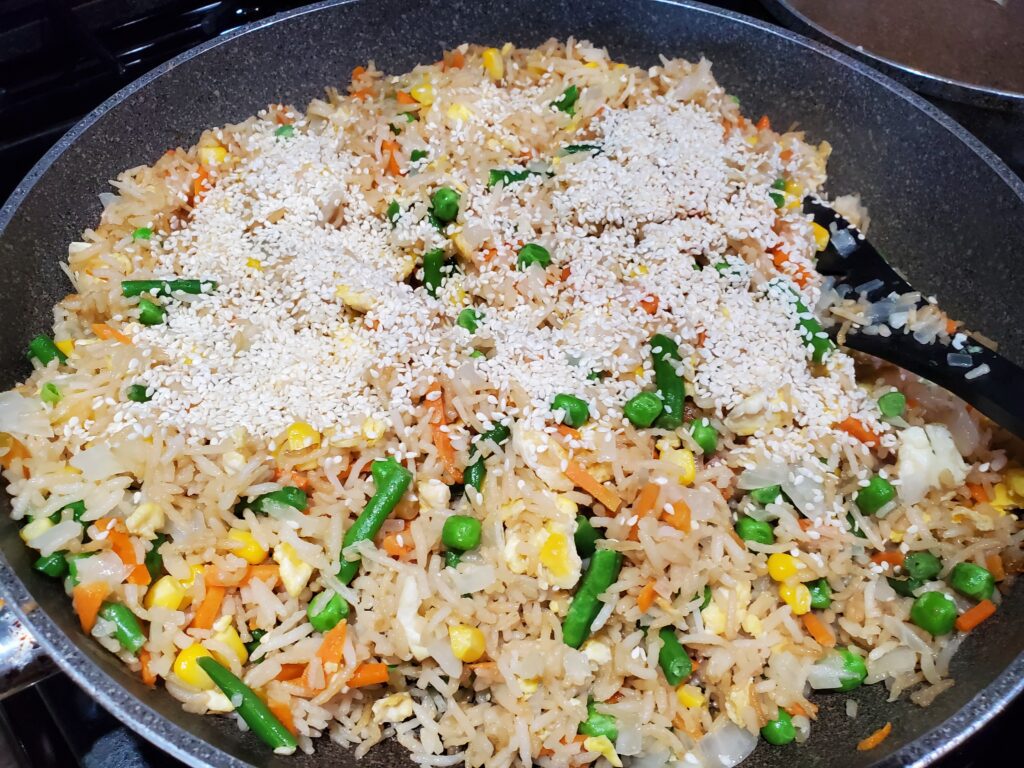
Finally add the sesame seeds and mix until well combined.
Serve with baked chicken, pork, beef, shrimp, or roasted vegetables.
Start by cooking the rice according to package directions. 1 cup of uncooked rice makes approximately 2 cups of cooked rice. Set the rice aside. <br>Meanwhile, sauté the onions in 1 tablespoon of butter. Remove the onions from the pan and set aside. <br>Use the same pan to scramble the eggs in 1 tablespoon of the butter. Once the egg is cooked, add the rice and remaining butter. Toss to coat the rice with the butter and break up any clumps. Add the soy sauce and sesame oil, continue to toss the rice until evenly coated with sauce. Add the mixed vegetables and toss until the vegetables are heated through. Return the onions to the pan and mix. Finally add the sesame seeds and mix until well combined.<br>
NOTES
As an Amazon Associate I earn on qualified purchases.
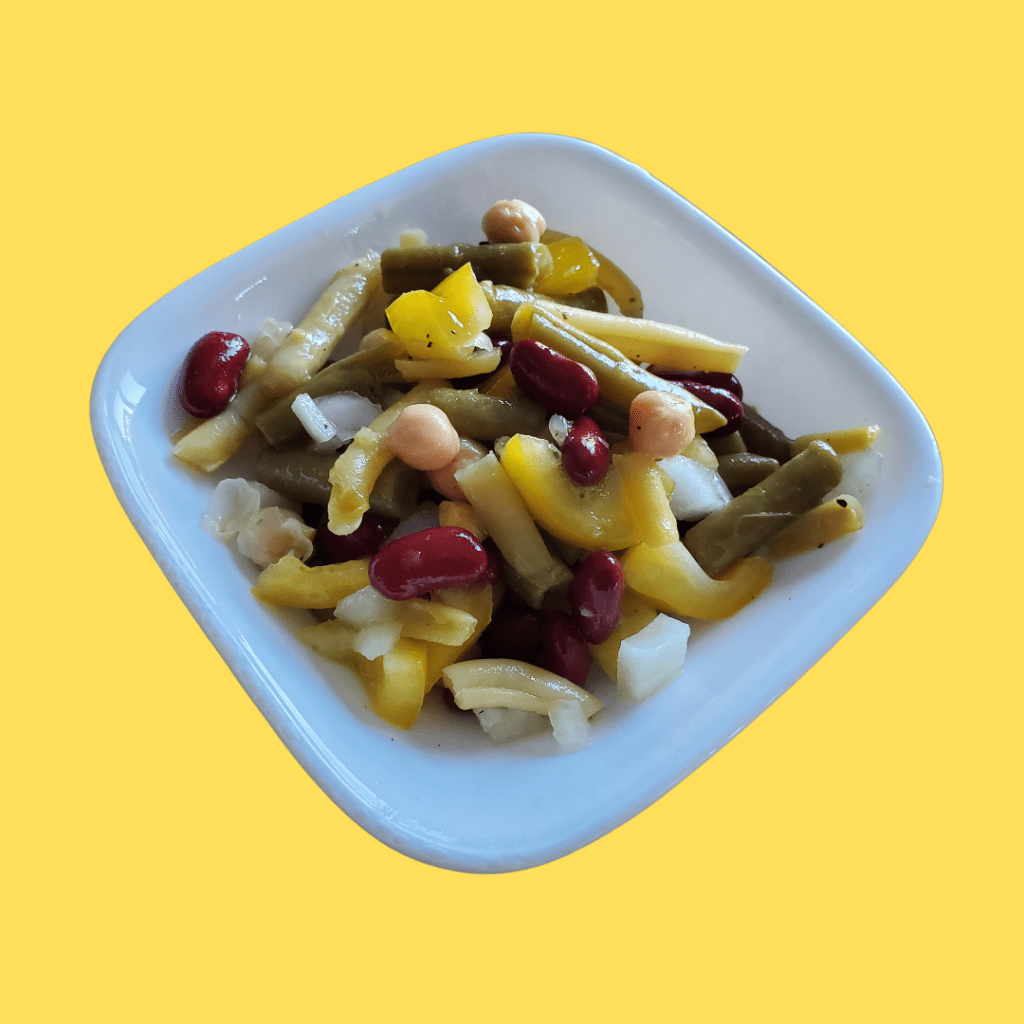
Beans are the most underutilized, economical superfood. This 4 bean salad recipe is not only simple and delicious, it is also low cost and very healthy. It is a perfect side for any meal, makes a tasty and healthy addition to packed lunches, and it is easy to take to a party.
Disclaimer: This post may contain affiliate links. I earn commission at no additional cost to you.
Four Bean Salad Ingredients:
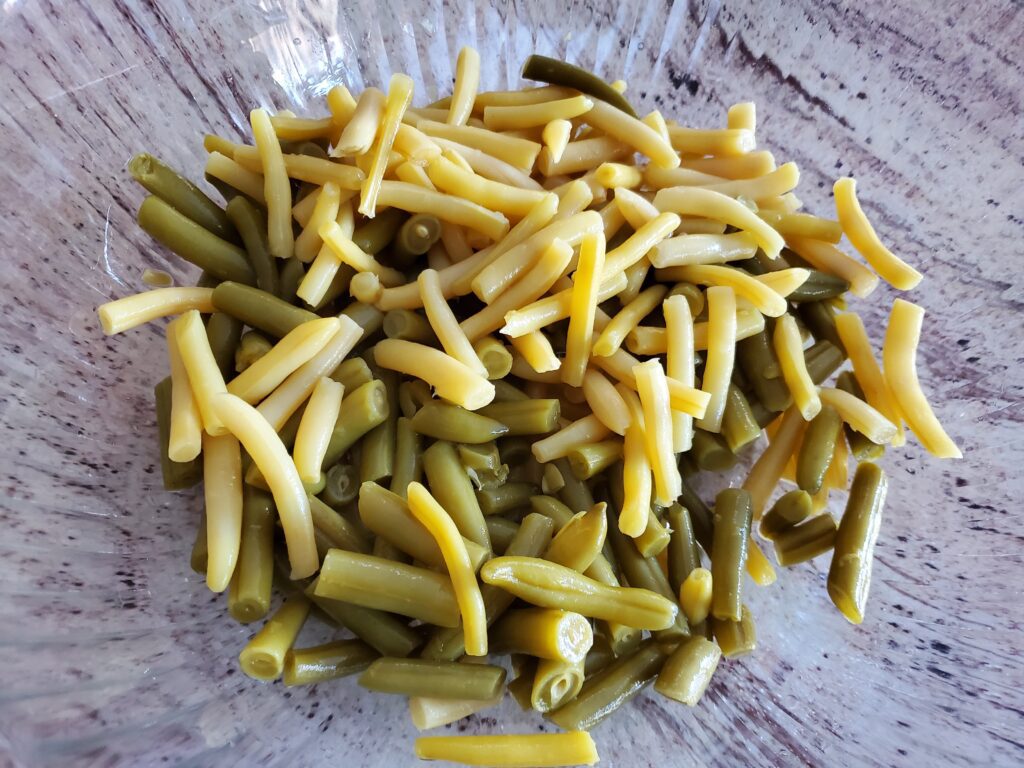
1 – 14.5 ounce can cut green beans, drained
1 -14.5 ounce can cut wax beans, drained
1 – 15.5 ounce can kidney beans, drained and rinsed
1 – 15.5 ounce can garbanzo beans, drained and rinsed
1 yellow bell pepper, diced
1 small onion, diced
1/2 cup seasoned rice wine vinegar
1/4 cup olive oil
Fresh ground pepper to taste
How to Make Four Bean Salad
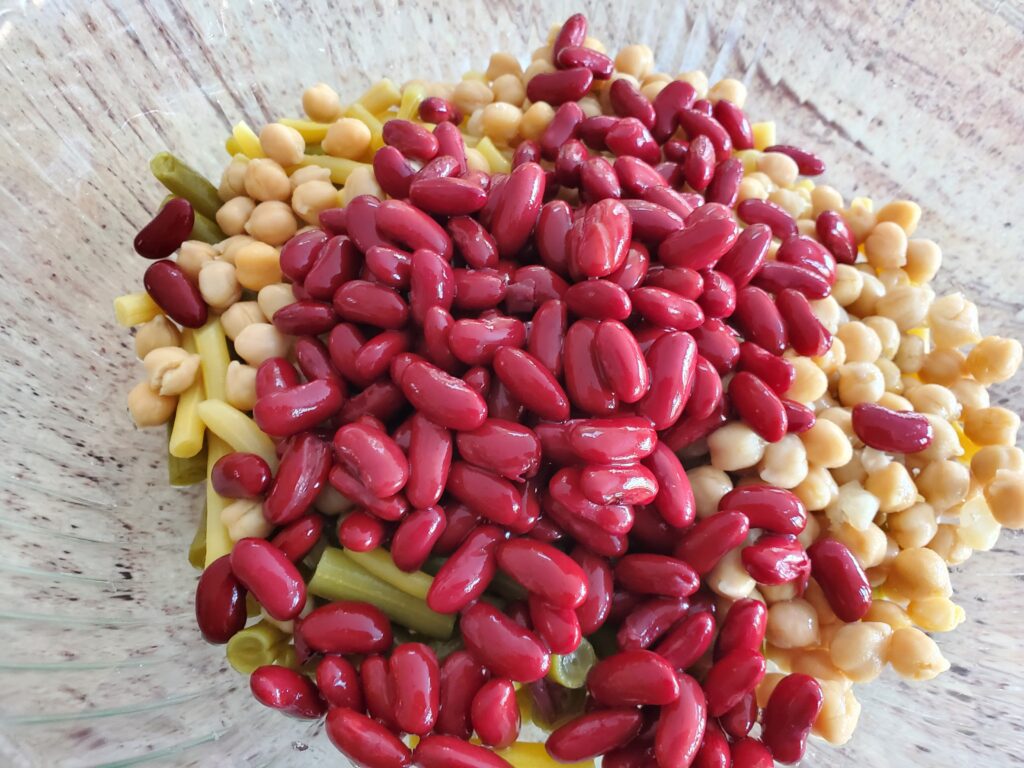
Open the green bean and wax bean cans, drain and place in a salad bowl.
Next, open the kidney bean and garbanzo bean cans, drain and rinse the beans. Add the kidney and garbanzo beans to the salad bowl.
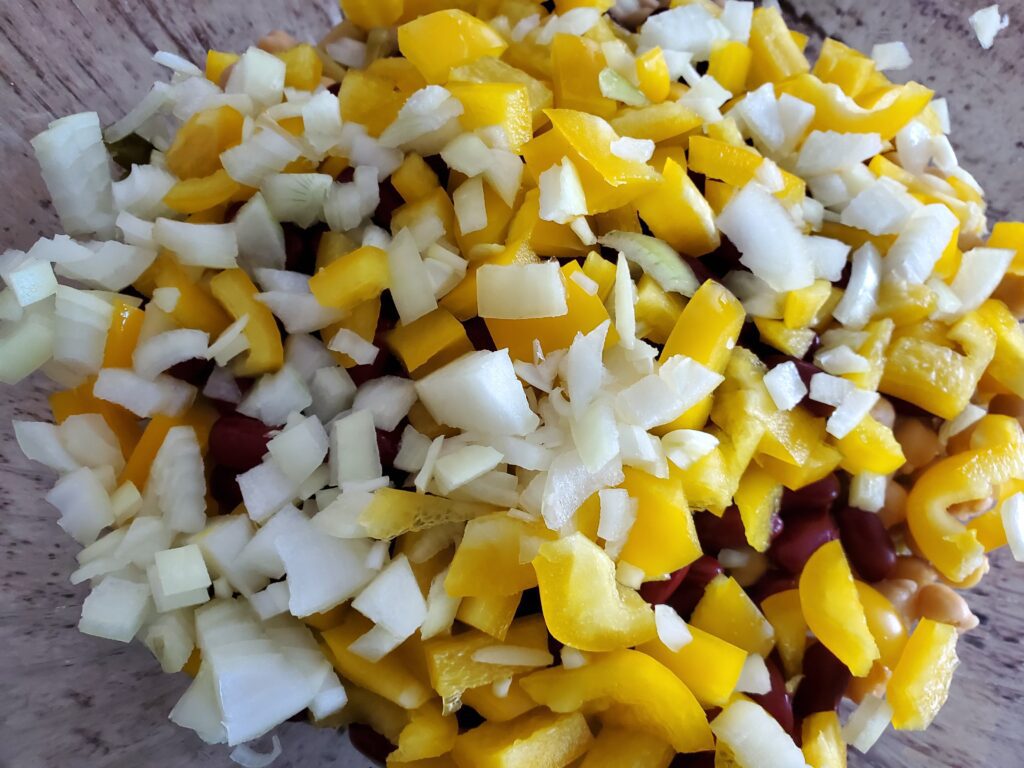
Dice the yellow pepper and onions. Add to the salad bowl.
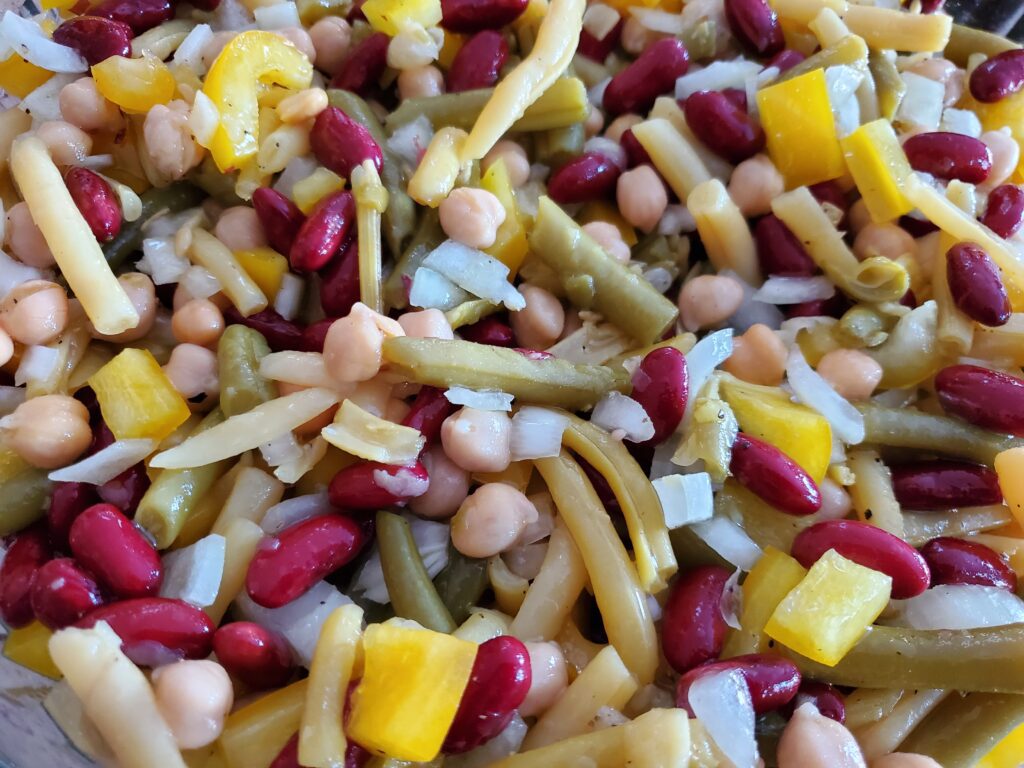
Add the dressing (recipe below), mix and refrigerate for at least one hour before serving. Mix well immediately before serving.
How to make 4 bean salad dressing:
Combine the seasoned rice wine vinegar with the olive oil. Add fresh ground pepper to taste. Mix and pour over the salad.
1 – 15.5 ounce can kidney beans, drained and rinsed
1 – 15.5 ounce can garbanzo beans, drained and rinsed
1 yellow bell pepper, diced
1 small onion, diced
1/2 cup seasoned rice wine vinegar
1/4 cup olive oil
Fresh ground pepper to taste
DIRECTION
Open the green bean and wax bean cans, drain and place in a salad bowl. Next, open the kidney bean and garbanzo bean cans, drain and rinse the beans. Add the kidney and garbanzo beans to the salad bowl.<br>Dice the yellow pepper and onions. Add to the salad bowl.<br>Add the dressing (recipe below), mix and refrigerate for at least one hour before serving. Mix well immediately before serving.
To make the dressing: Combine the seasoned rice wine vinegar with the olive oil. Add fresh ground pepper to taste. Mix and pour over the salad.
NOTES
As an Amazon Associate, I earn from qualified purchases.
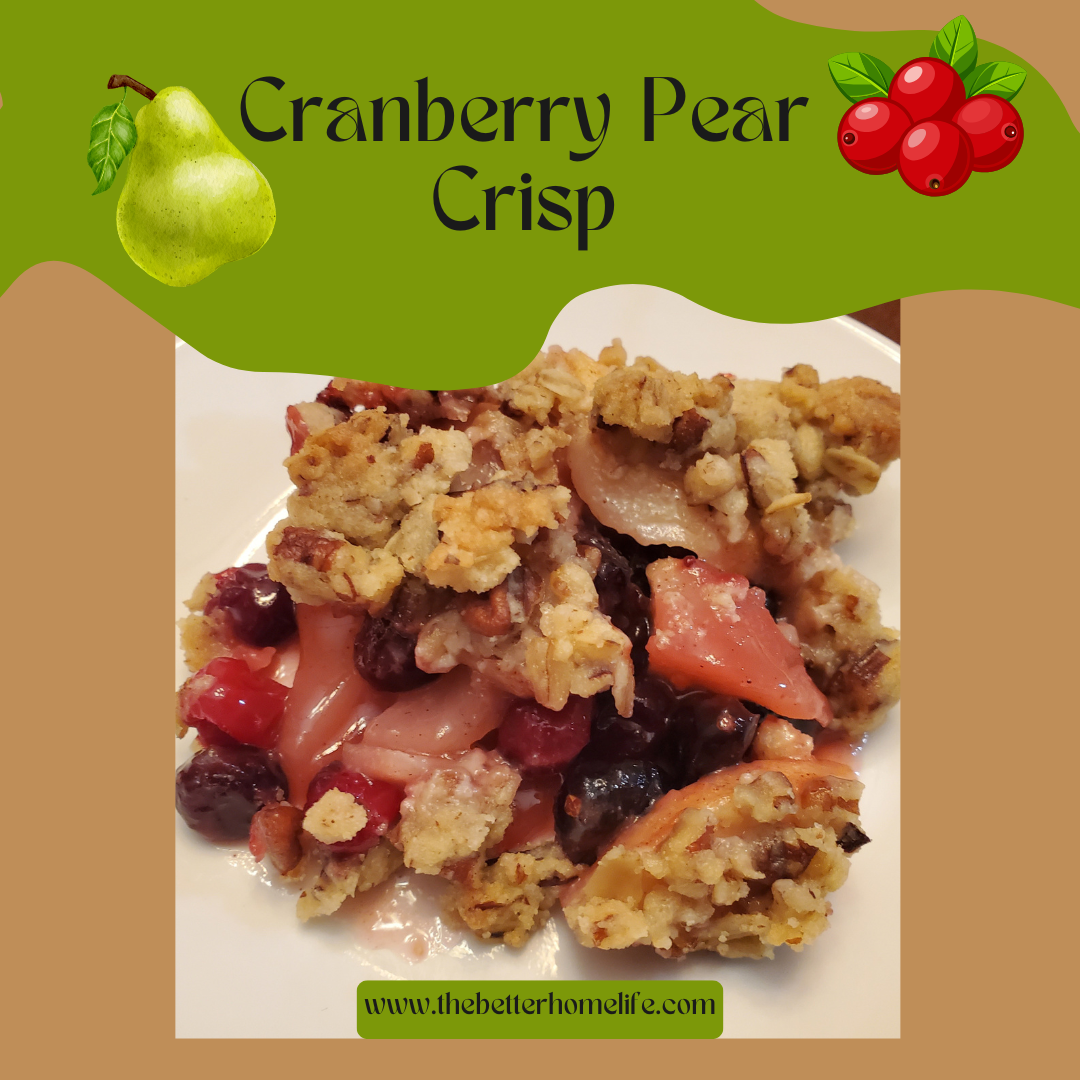
This pear cranberry crisp recipe really is easier than pie. A crisp, also known as a crumble or cobbler, is basically a crustless pie. The combination of sweet pears along with the tart cranberries is just right! Serve it at room temperature with a scoop of vanilla ice cream or homemade whipped cream.
Disclaimer: This post may contain affiliate links. I earn commission at no additional cost to you.
4 Bartlett Pears, peeled and sliced thin (1/4 inch slices)
1/2 teaspoon ground cinnamon
1/4 teaspoon fresh ground nutmeg
1 cup plus 2 tablespoons all-purpose flour
1 cup chopped pecans
1/3 cup rolled oats
1/4 teaspoon salt
1/2 cup butter (1 stick), melted
How to Make Pear Cranberry Crisp
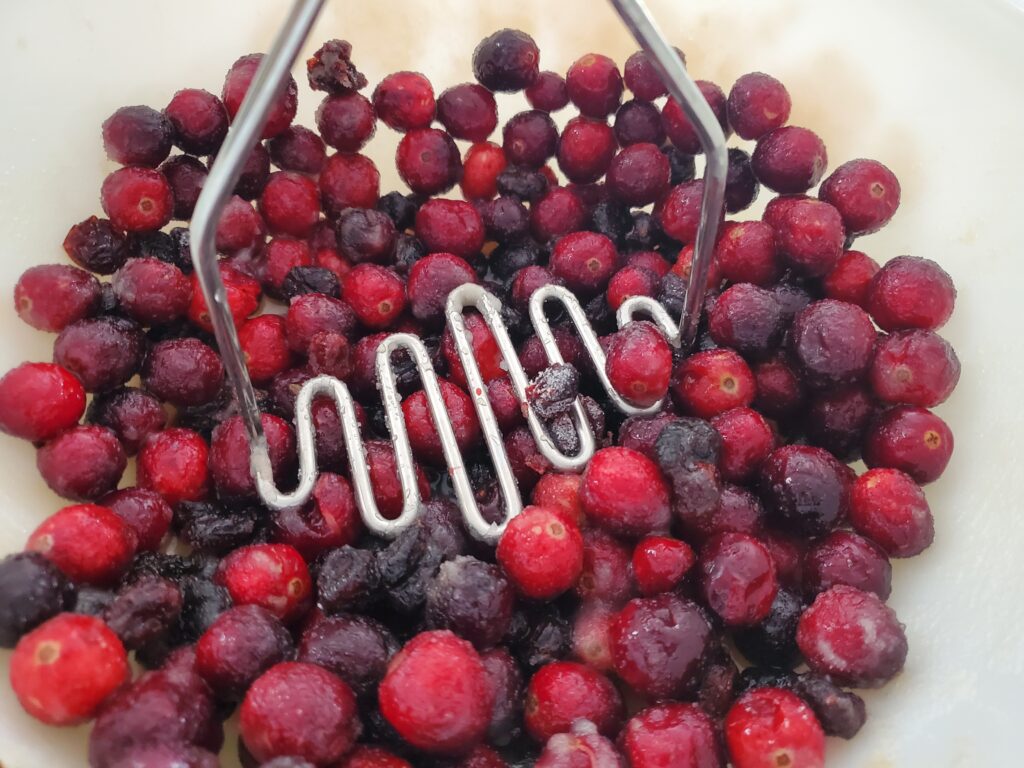
First preheat the oven to 375 degrees F. Combine the fresh and dried cranberries in a large mixing bowl with 1 cup of the sugar, 2 tablespoons of water and the vanilla. Use a potato mashed to lightly crush some of the cranberries.
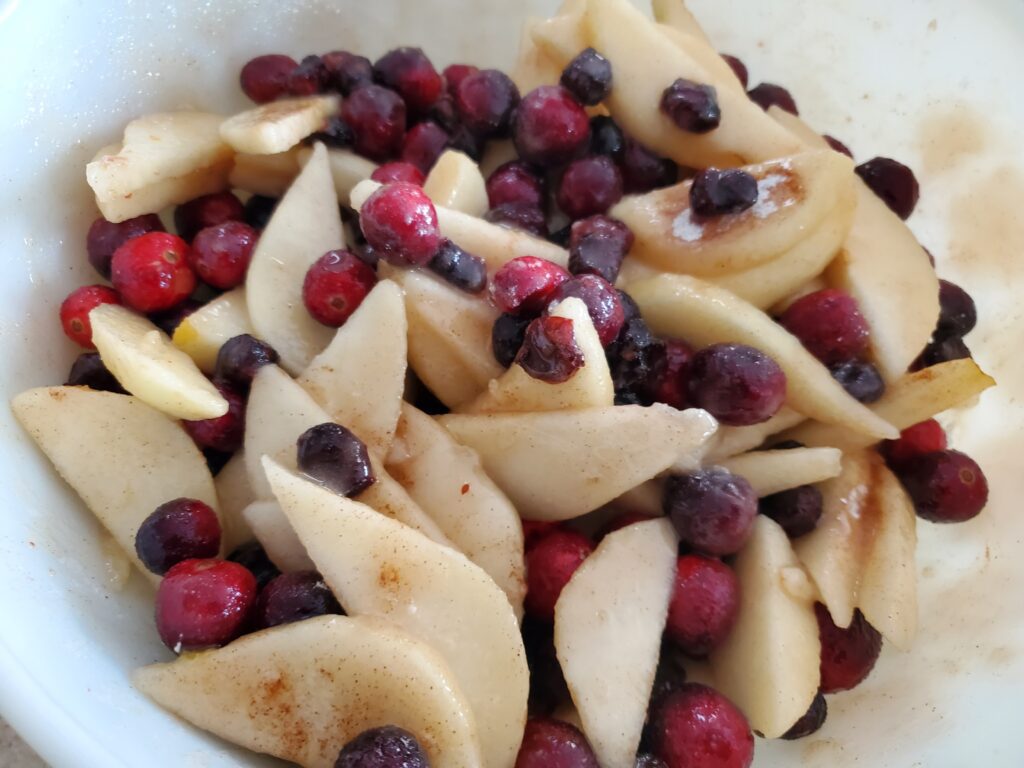
Add the pears, cinnamon, nutmeg and 2 tablespoons of the flour and toss.
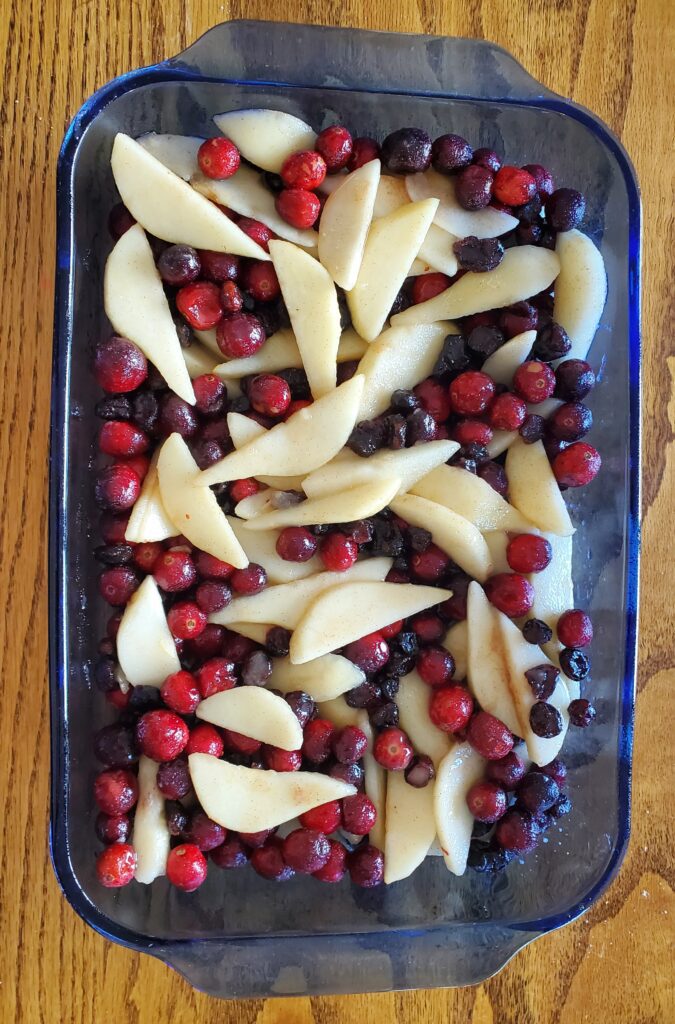
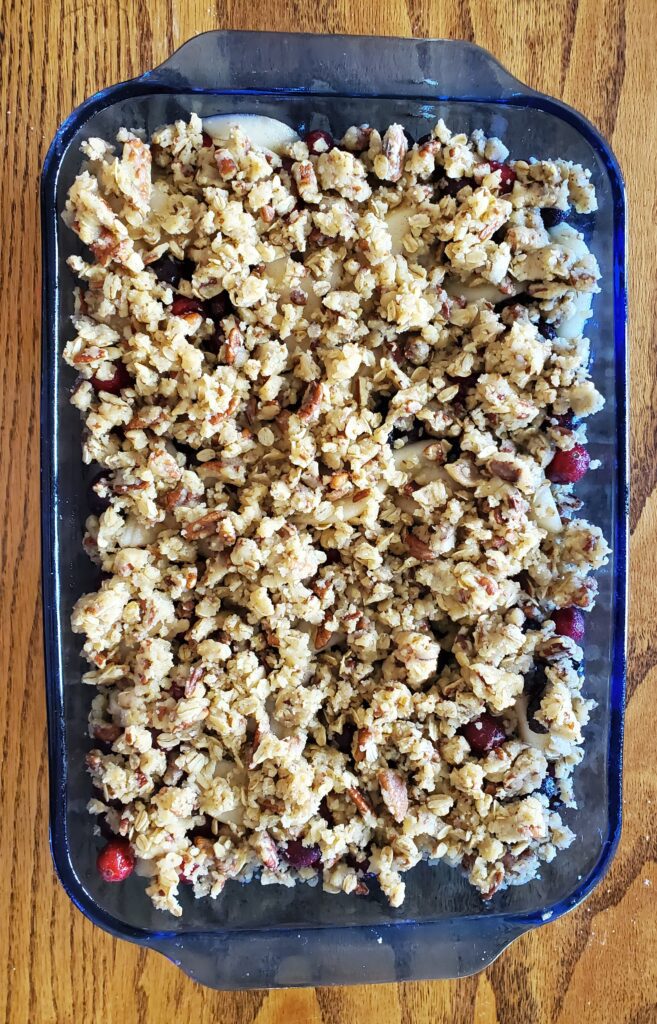
Transfer this mixture to a greased 9×13 inch Pyrex baking dish.
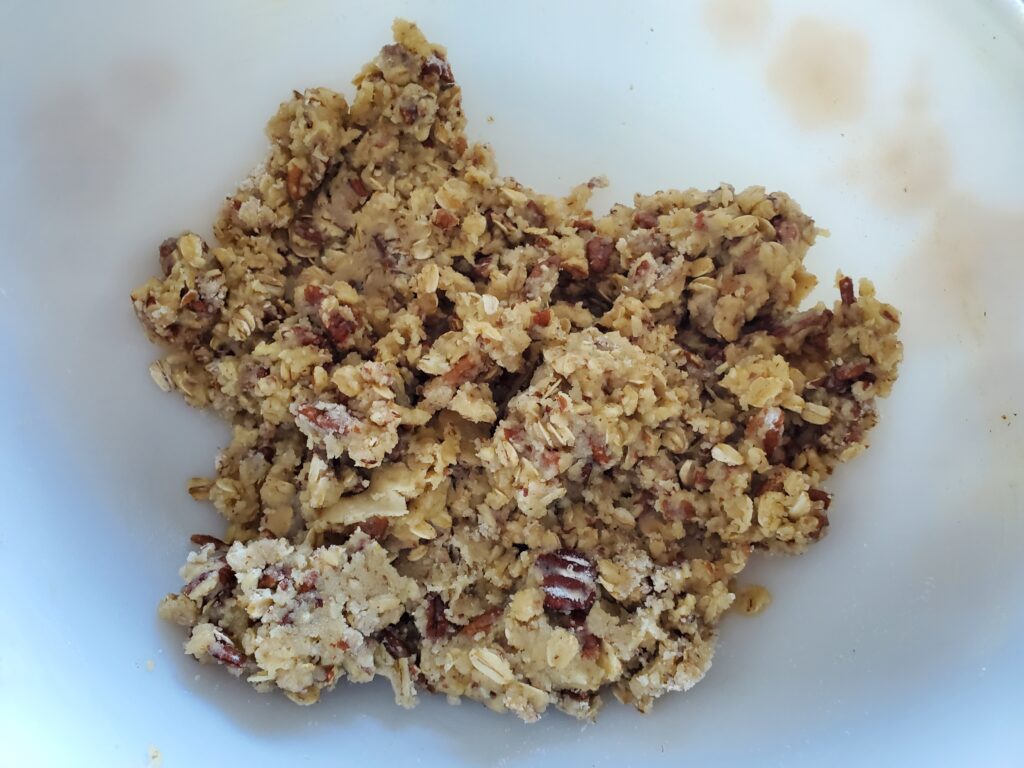
Next make the crumble topping. Mix the remaining 1 cup of flour and 1/2 cup of sugar with the pecans, oats and salt.
Then pour the melted butter over the mixture and mix.
Use your fingers to pull small clumps of the topping placing them evenly on top of the fruit mixture.
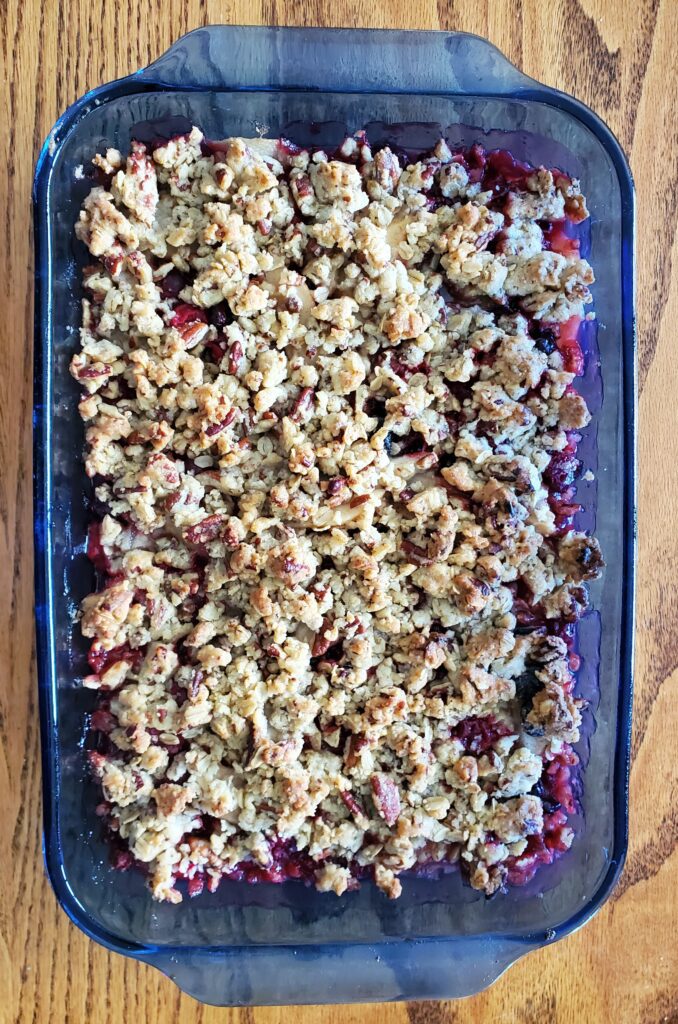
Bake until the fruit is warm and bubbly and the topping is golden brown, approximately 40 minutes.
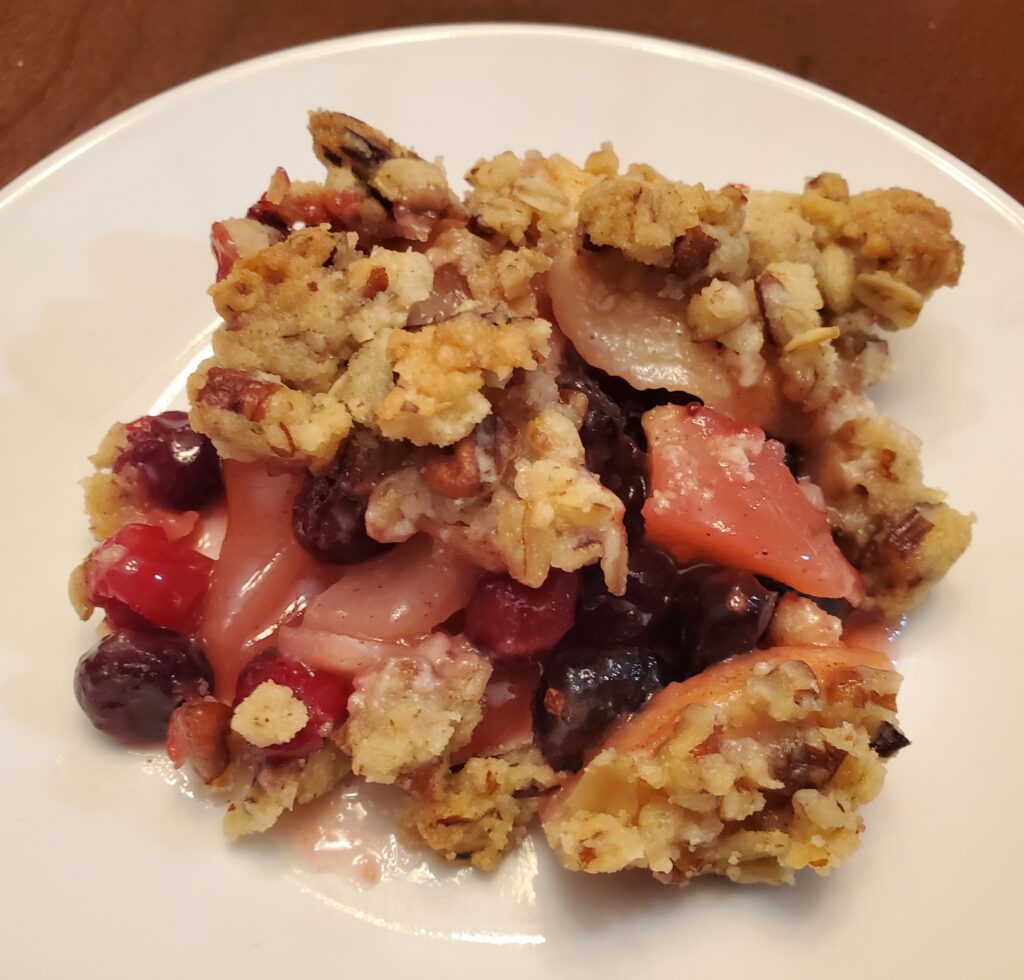
Serve warm or at room temperature. Add a side of vanilla ice cream or homemade whipped cream if desired.
Websites store cookies to enhance functionality and personalise your experience. You can manage your preferences, but blocking some cookies may impact site performance and services.
Essential cookies enable basic functions and are necessary for the proper function of the website.
Name
Description
Duration
Cookie Preferences
This cookie is used to store the user's cookie consent preferences.
30 days
These cookies are needed for adding comments on this website.
Name
Description
Duration
comment_author
Used to track the user across multiple sessions.
Session
comment_author_email
Used to track the user across multiple sessions.
Session
comment_author_url
Used to track the user across multiple sessions.
Session
These cookies are used for managing login functionality on this website.
Name
Description
Duration
wordpress_logged_in
Used to store logged-in users.
Persistent
wordpress_sec
Used to track the user across multiple sessions.
15 days
wordpress_test_cookie
Used to determine if cookies are enabled.
Session
Statistics cookies collect information anonymously. This information helps us understand how visitors use our website.
Google Analytics is a powerful tool that tracks and analyzes website traffic for informed marketing decisions.
Contains information related to marketing campaigns of the user. These are shared with Google AdWords / Google Ads when the Google Ads and Google Analytics accounts are linked together.
90 days
__utma
ID used to identify users and sessions
2 years after last activity
__utmt
Used to monitor number of Google Analytics server requests
10 minutes
__utmb
Used to distinguish new sessions and visits. This cookie is set when the GA.js javascript library is loaded and there is no existing __utmb cookie. The cookie is updated every time data is sent to the Google Analytics server.
30 minutes after last activity
__utmc
Used only with old Urchin versions of Google Analytics and not with GA.js. Was used to distinguish between new sessions and visits at the end of a session.
End of session (browser)
__utmz
Contains information about the traffic source or campaign that directed user to the website. The cookie is set when the GA.js javascript is loaded and updated when data is sent to the Google Anaytics server
6 months after last activity
__utmv
Contains custom information set by the web developer via the _setCustomVar method in Google Analytics. This cookie is updated every time new data is sent to the Google Analytics server.
2 years after last activity
__utmx
Used to determine whether a user is included in an A / B or Multivariate test.
18 months
_ga
ID used to identify users
2 years
_gali
Used by Google Analytics to determine which links on a page are being clicked
30 seconds
_ga_
ID used to identify users
2 years
_gid
ID used to identify users for 24 hours after last activity
24 hours
_gat
Used to monitor number of Google Analytics server requests when using Google Tag Manager