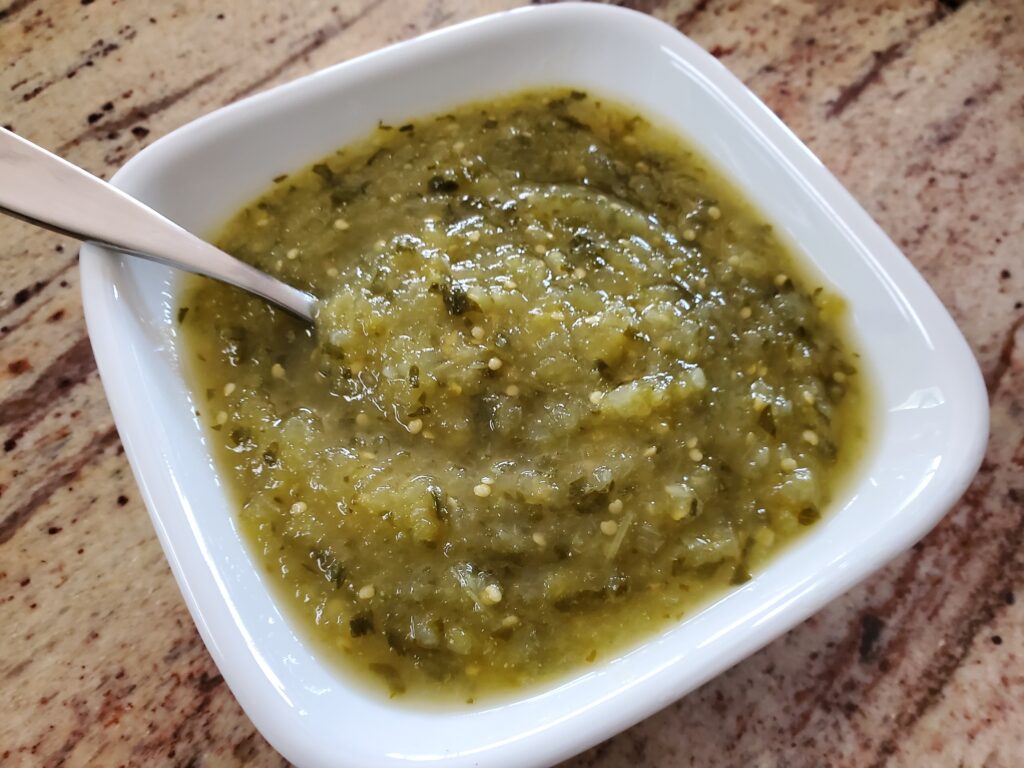
Tomatillo salsa or Salsa Verde is a green salsa made with fresh tomatillos. It is a tangy sauce that can be used as a dip for chips, a taco topping or a sauce for fish or chicken. This is my favorite tomatillo salsa recipe. It’s so simple! Here’s how to make tomatillo salsa.
Disclaimer: This post may contain affiliate links. I earn commission at no additional cost to you.
What tools do you need to make tomatillo salsa?
A food processor, A mini processor will work for this recipe.
A saucepan
A chef’s knife
cutting board
Tomatillo Salsa Ingredients:
1/2 pound tomatillos
1-2 jalapeños
1/2 onion, quartered
1/4 teaspoon cumin
2 tablespoons chopped fresh cilantro
salt to taste
Tomatillo Salsa Instructions:
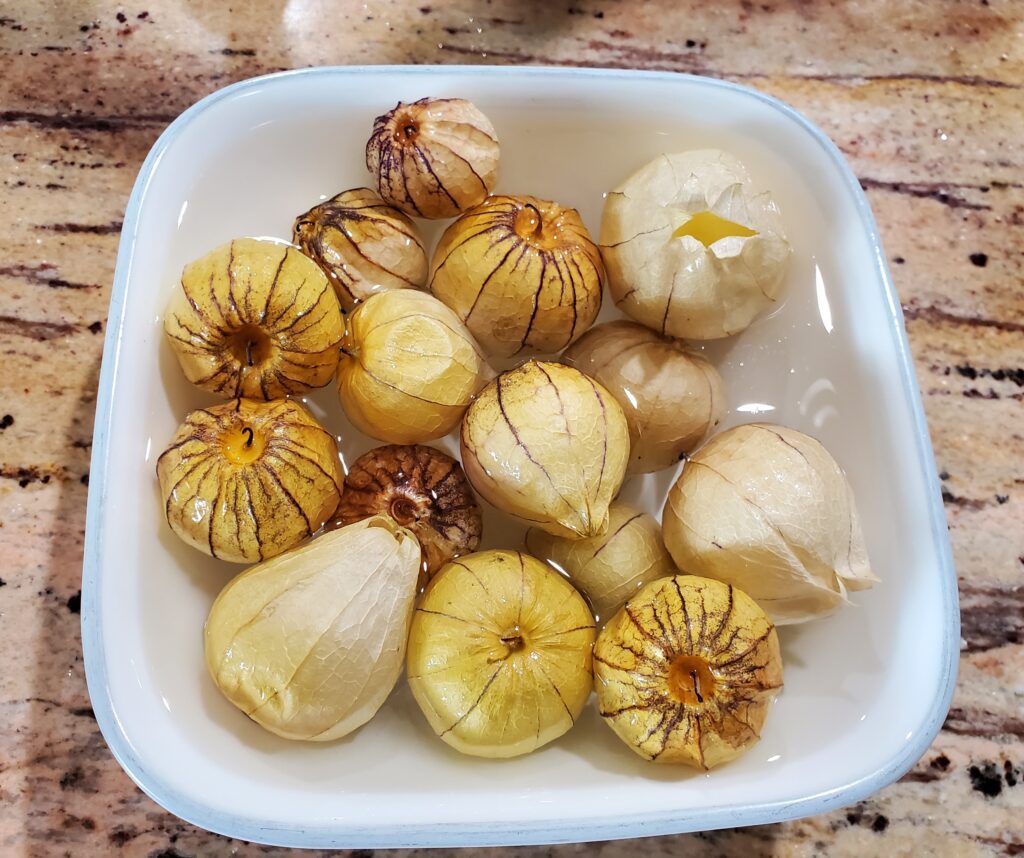
First remove the husks from the tomatillos, it is easier to remove them if you soak them in water first.
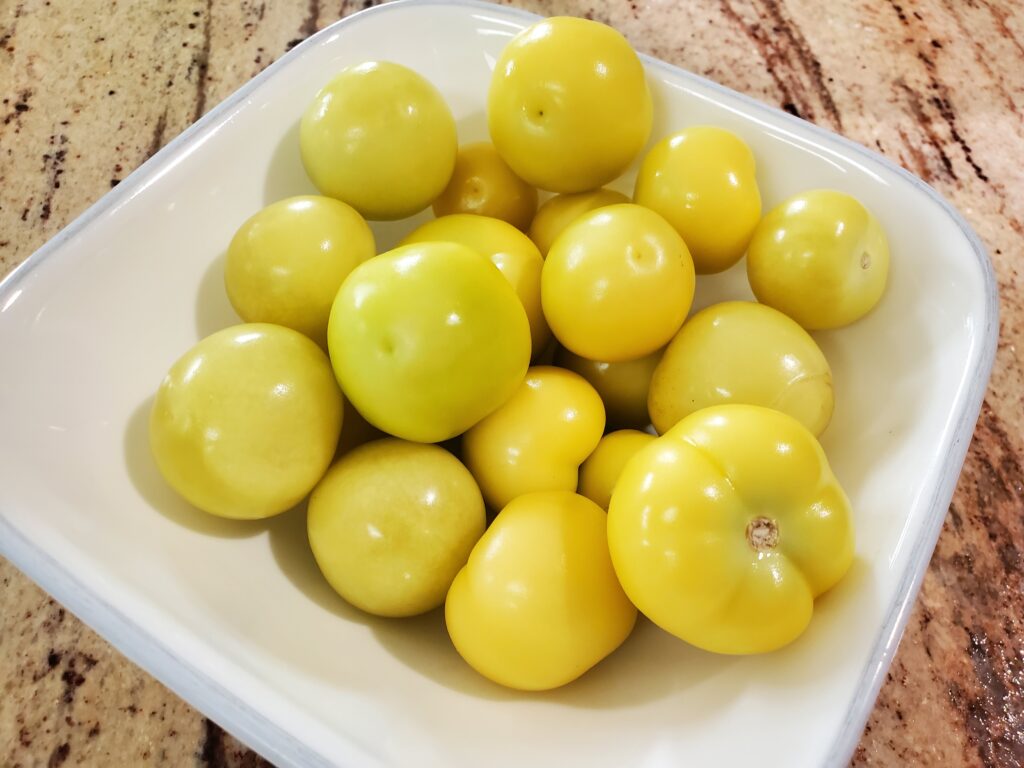
Soak the TomatillosHusks Removed
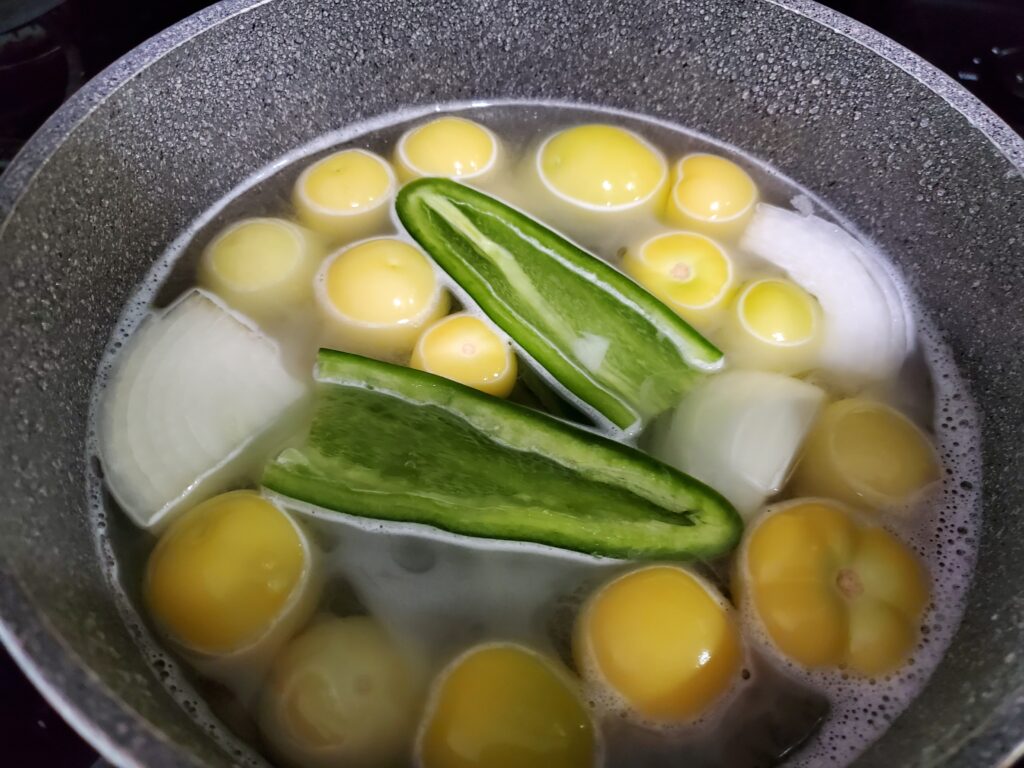
Remove the stems and seeds from the Jalapeños. Peel and quarter the onion. Rinse the cilantro and remove the stems.
Place the whole tomatillos, jalapeños, and onions in a saucepan. Cover with water and boil for 5 minutes.
Drain off the water and transfer the vegetables to the food processor. Add the remaining ingredients and process until smooth.
You can find them at most grocery stores, farmer’s markets, or you can grow your own. They can even grow in a pot! Fresh tomatillos are firm with tight fitting husks.
Whether you are expecting your first child or getting ready to send one off to college, it is important to have a home thermometer. A thermometer is the most basic health screening device you can have to determine if you or your child needs to see a doctor. What is the best thermometer for home use? Here are some tips from a pharmacist on how to choose the right thermometer for your home.
Disclaimer: This post may contain affiliate links. I earn commission at no additional cost to you.
Disclaimer: This article is intended to help you choose the right thermometer for home use, the intent is not to help you determine if your family member has a fever that needs medical attention. If you are looking for that information I’d recommend this site.
Digital multi-use thermometer – Can be used for all ages, the rectal route is most accurate for infants. Can be used orally, rectally, or under the arm.
Mercury thermometer – Should be disposed of due to toxicity. For safe disposal check out this site.
Pacifier thermometer – Not recommended due to low accuracy.
Forehead strip thermometer – This is the type often found in first aid kits. Decent for screening, but also not recommended due to low accuracy.
Which thermometer is most accurate?
The digital rectal thermometer is most accurate for infants and toddlers.
A digital oral thermometer and the digital tympanic thermometer are also accurate if used properly. The digital oral thermometer must be kept under the tongue inside a closed mouth until it beeps. This is why itis not recommended for younger children who may not keep it under their tongue and may not be able to follow directions to keep their mouth closed.
The digital temporal thermometer is considered an acceptable alternative for screening for fever. Some studies have shown that it could be off by 1 degree F.
Easy to use – always follow manufacturer specific instructions for where to point it and how far away from the forehead you should hold it.
Non-invasive – Some models even have a quiet mode, so you can use it while your child is sleeping.
Other uses – You can use some models to measure the temperature of bath water and food.
Cons:
May not be as accurate as the rectal, tympanic or oral route depending on the age of the child. It is still a great screening tool. You could always repeat with another more accurate method.
Outside weather conditions can affect the reading, so you should wait at least 15 minutes after being outside in hot or cold conditions before taking a temperature.
Anything on the forehead, including sweat can affect the reading.
Cost – Although the price has come down quite a bit, these thermometers are more expensive than the digital multi-use thermometers.
User error – Make sure you follow the manufacturer specific instructions.
Outside weather conditions can affect the reading, so you should wait at least 15 minutes after being outside in hot or cold conditions before taking a temperature.
Not recommended for babies under 6 months old.
User error is possible. Make sure to read the instructions that come with thermometer.
Can be used orally, rectally or under the arm (axillary).
It is the most accurate option for infants when used rectally. If you have an infant it is best to purchase one with a short probe to prevent over insertion.
Cons:
Although inexpensive, you may need to purchase two if you plan to use one rectally. You should not use the same thermometer rectally and orally. If you use the thermometer rectally, it should remain a rectal use only thermometer. Label it, “for rectal use only”.
The oral route is only accurate over age 4.
You could get an inaccurate reading orally if the person is so congested they have to breath through their mouth. The mouth must remain closed.
You should wait at least 15 minutes after consuming hot or cold beverages before taking an oral temperature.
The axillary route is not as accurate.
The rectal route requires a lubricant such as petroleum jelly
What thermometer is best based on age of family members?
Birth to 6 months: A digital rectal thermometer. The rectal route is the most accurate in this age group. This thermometer has a stopper to ensure you will not insert it too deep. A Digital temporal thermometer is reasonable to use for screening in this age group. It is less accurate, but it is great for determining if you should take a rectal temperature. Some models can also be used to help parents measure safe food and bath water temperatures.
Kids 4 and up: A Digital multi-use thermometer is really all you need if everyone in your family is over four years old. It would be nice to have an alternative for the younger children, since they may not be able to keep their mouth closed for an accurate reading if they are really congested. The Digital tympanic thermometer, is the next most accurate for this age group. A Digital temporal thermometer is reasonable to use for screening in this age group.
Adults: A Digital multi-use thermometer is really all you need if everyone in your family is an adult. Therefore, it is a great one to get when your teen leaves for college.
As an Amazon associate, I earn from qualified purchases.
Mao (pronounced mow) is a fun card game I learned from my son. He didn’t teach me the game, because discussing the rules is forbidden. I had to learn like most new players, by playing and watching and learning. This is why the game is also a prank. Some people love it! Others will hate the game. If you love games and puzzles this is a great game for you! Here’s how to play Mao!
What do you need to play Mao?
Just one regular deck of cards for every 2-3 players. It does not matter if the decks are missing cards. This is a great game to play for any deck of cards that is missing a card or two. It also does not matter if the backs of all of the cards match. Jokers should be removed from the decks, but can be set aside for use when new ules are created. More on this later.
You also need at least one player that knows how to play the game. I will teach you most of the rules. The other rules will be posted in an alternate location. It would be most fun if you had a second person read those rules, so you will each get a feel for what a new player will experience, because that is part of the fun!
Mao can be played with 2 or more players, but it is best to have at least 3 players. If you are new to the game, recruit a good sport to be your third player. They will not read any of the rules and will have to learn from you and the second player who will read the other half of the rules. So Fun!!
What is it like to learn Mao?
My first experience with Mao was like this:
Son: “Mama, want to play a new card game?”
Me: “Sure, I’d love to”
Son: Deals out 7 cards to each player, and places the remaining deck in the center of the table. “Are you ready?”
Me: “No, I don’t know how to play.”
Son: “See, that’s the thing about Mao, you are not allowed to talk about the rules. Are you ready?”
Me: “yes” hesitantly
Son: Flips over the top card on the deck. States: “Mao begins”
Me: “Can I touch my cards now?”
Son: Throws a card from the top of the deck at me, says “talking”
Play began with no talking. I watched other players follow suit or play a card with the same number. E.g.: If a 3 of spades was played, the next player played another spade or a 3 of any suit.
Sometimes players drew cards. Sometimes they drew and said “thank you”. When I drew and said “thank you” a card from the top of the deck was handed to me for talking. Confusion began.
After a few rounds I was able to pick up on the basic rules, and some of the extra rules.
What are the basic rules of Mao?
No talking is allowed and the rules must never be discussed. Talking during play will result in receiving an extra card from the top of the deck. Any player can give this card to the person who is talking, stating “talking”.
The dealer deals 7 cards to each player. Players cannot touch the cards until the dealer sets the remaining deck in the center, flips over the top card and states “Mao begins”
The object of the game is to be the first person to get rid of all of your cards.
The player to the left of the dealer starts play by playing any card of the same suit or any card of the same number or face. E.g.: Jack on jack, 3 on 3 or spade on a spade.
If a player does not have a playable card, they have to draw a card from the top of the deck. If it is playable they can play it, if not they must add it to their hand. Once the card is added to their hand this should signal the next player’s turn.
Mao Special Card Rules:
Some cards have special requirements. Here I’ll give you half of the special cards. It would be more fun to have a second person read the other half of the rules. Find the other half here.
Note: These special card rules have some regional variability. If you are playing with someone from a different area, you might want to verify that you are playing with the same rules before play starts. This variation could really confuse new players.
Fives
When you play a five: play reverses, similar to a reverse in UNO. If a player plays out of turn because they do not know this rule, any other player can take a card off the top of the deck, give it to the player who played out of turn. If they do this they should say “playing out of turn”. (The card played out of turn should also be returned to the player) This is called carding. If the player who should play does not know this rule, they will not know it is now their turn. In this case, any player can take a card off the top of the deck give it to the player who should play and say “taking too long”. Hopefully they will catch on and play a card. Play then continues in reverse.
Queens
If you play a Queen, you must physically make a salute gesture. This is called saluting the queen. If a player fails to salute the queen, any player can take a card of the top of the deck, give it to that player and state “failure to salute the queen”.
Number of cards remaining
If a player is down to 2 cards in their hand, they must say “approaching Mao”. Failure to do so could result in any player giving them a card from the top of the deck and saying “failure to say approaching Mao”.
If a player is down to 1 card in their hand they must say “Mao”. Failure to do so could result in any player giving them a card from the top of the deck and saying “failure to say Mao”.
How conflict is resolved in Mao
In any game where talking is not allowed there is most certainly going to be confusion over rules. If a player believes another player has done something outside of the rules and needs to clarify, they can call a “Point of Order”. During a point of order rules may be clarified. Talking is allowed. The Point of order should be ended quickly once the dispute is resolved. It ends when someone states “Point resolved”. Play continues.
Ending the game of Mao
This is the most fun part of Mao. When someone wins, gets rid of their cards first. They get to make up a new rule. The only stipulations for the new rule is that the new rule cannot contradict an existing rule and it has to be explained in one sentence. The one sentence rule just keeps the new rule from being too complicated.
Here are some examples of new rules:
Play a Jack and you have to boogie, aka dance in your chair. Failure to due so will result in a card for “failure to boogie”.
A Joker is placed next to the discard pile. When you play a 2 you must discard another card on the joker, aka: feeding the joker. Failure to do so will result in a card for “failure to feed the joker”.
These new rules keep the game new and interesting for all players. This way the game is always changing and fun for everyone. It’s always a puzzle!
Funny Mao Rules
As an Amazon Associate, I earn from qualified purchases.
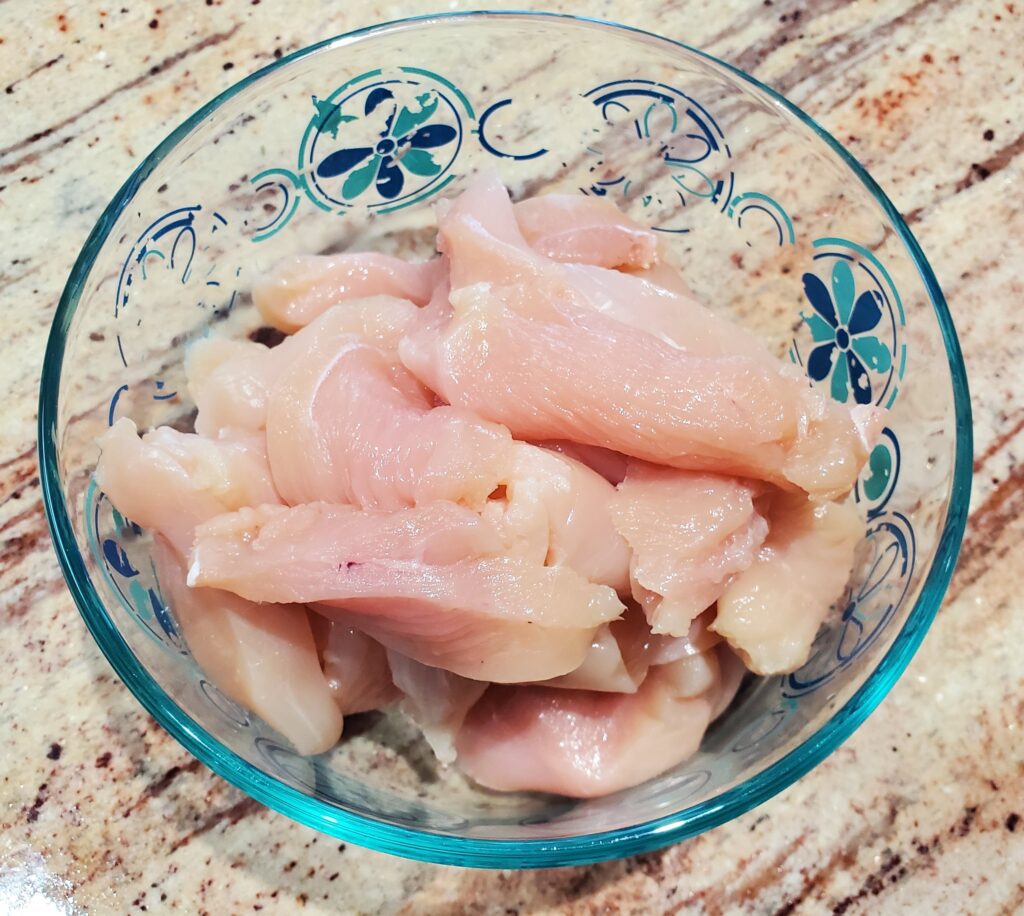
Trim the chicken breasts and cut into 1/2 inch strips. This is best accomplished with kitchen shears.
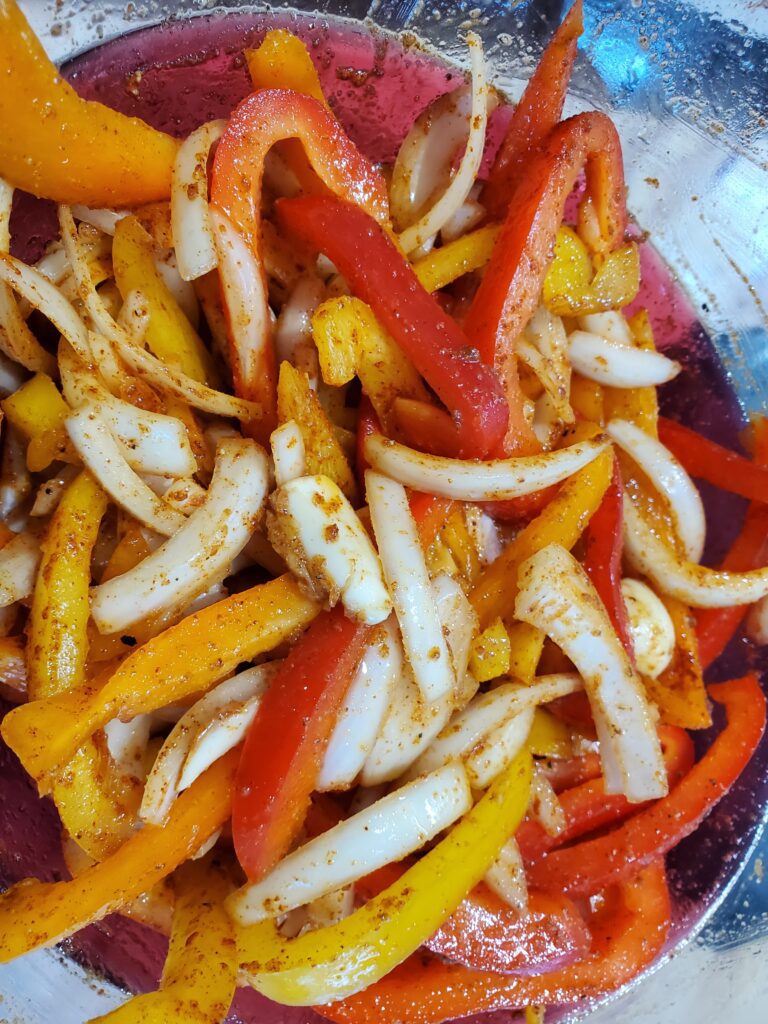
Use a chef’s knife to slice the bell peppers and onions into 1/8- 1/4 inch strips.
Peel and smash the garlic cloves.
Sliced peppers, onions and crushed garlic.
Drizzle the olive oil over the chicken and vegetables.
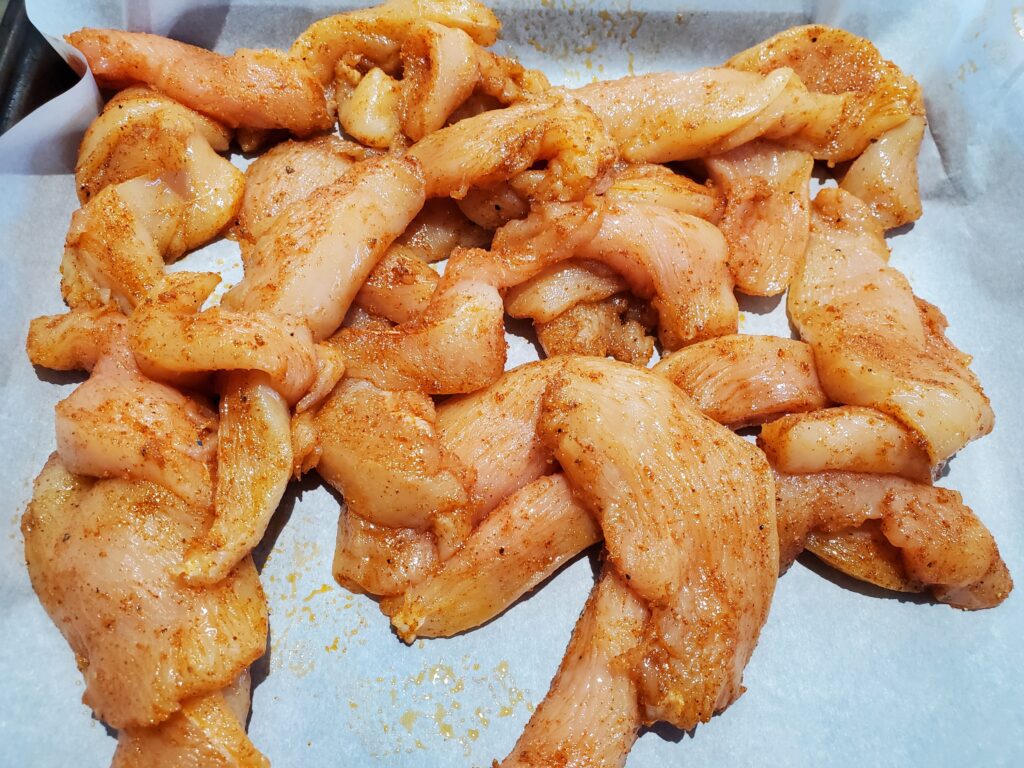
Mix the chili powder, paprika, cumin, garlic powder, onion powder, oregano, cayenne pepper, salt and pepper in a bowl.
Sprinkle the seasoning mixture over the chicken and vegetables.
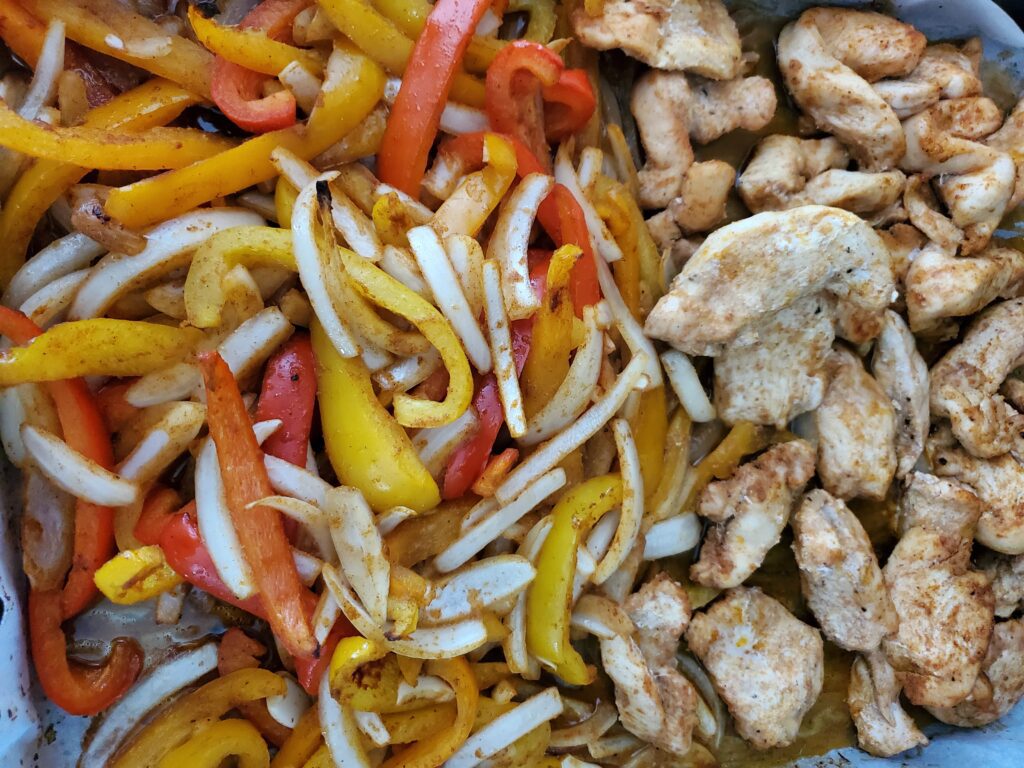
Seasoned chickenSeasoned Veggies
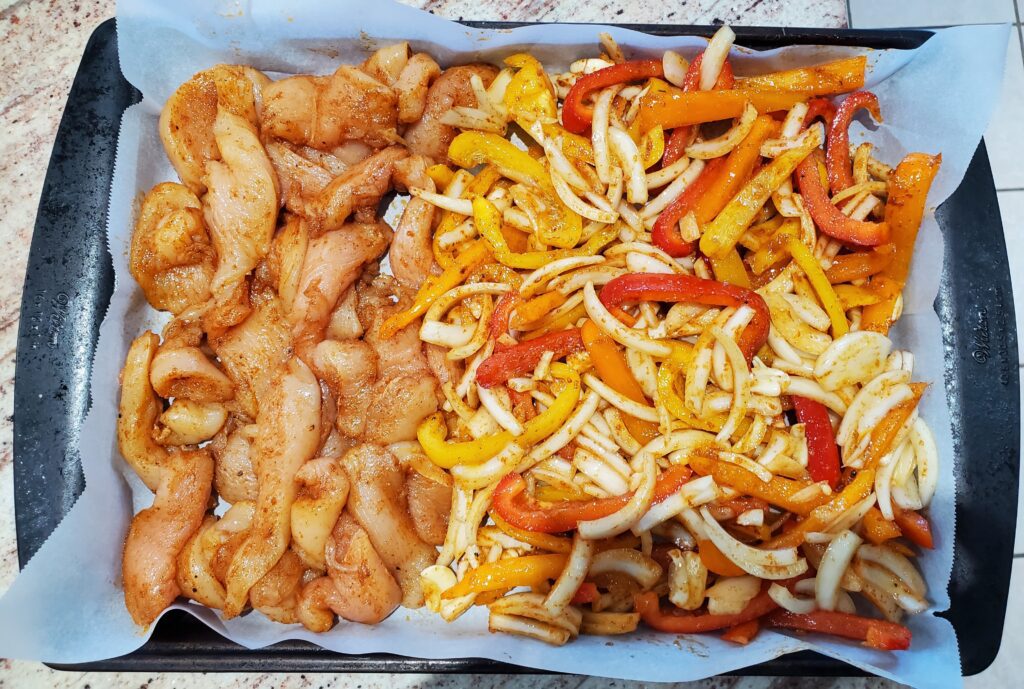
Arrange the seasoned chicken and vegetables on a parchment lined sheet pan.
Preheat the oven to 425 degrees F. Bake the chicken and vegetables for 15-20 minutes flipping after 10 minutes. Check the internal temperature of the chicken to ensure it is at least 165 degrees F.
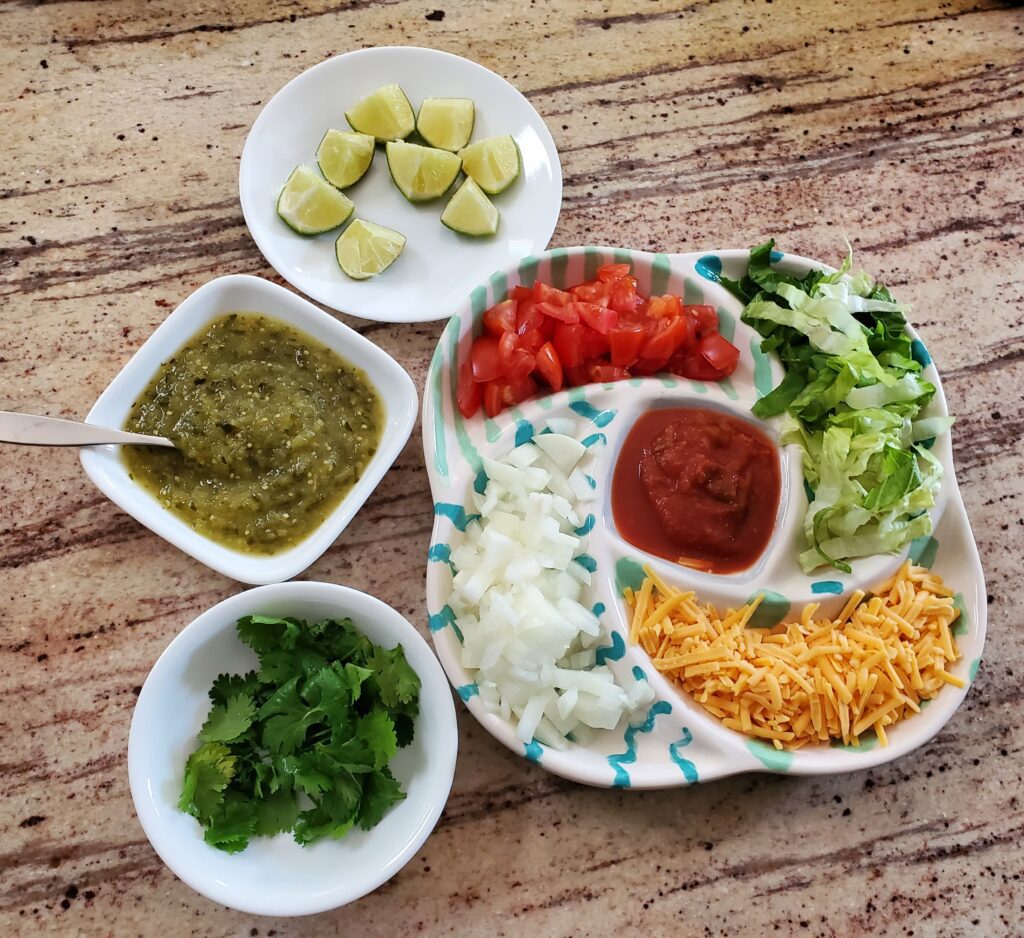
Once the chicken has reached an internal temperature of 165 degrees F, remove it from the oven and squeeze some lime juice over the chicken and veggies. Sprinkle some fresh cilantro over the chicken and veggies.
Serve with warm tortillas and your favorite fajita toppings.
Sourdough discard hamburger buns are a great way to use up some of your discard. They are so tasty! These hamburger buns are made with whole wheat flour and bread flour, the perfect mix! These buns are also great for pulled pork sandwiches. Both taste great with the everything bagel topping!
Disclaimer: This post may contain affiliate links, I earn on qualified purchases at no additional cost to you.
What tools do you need to make Sourdough discard hamburger buns?
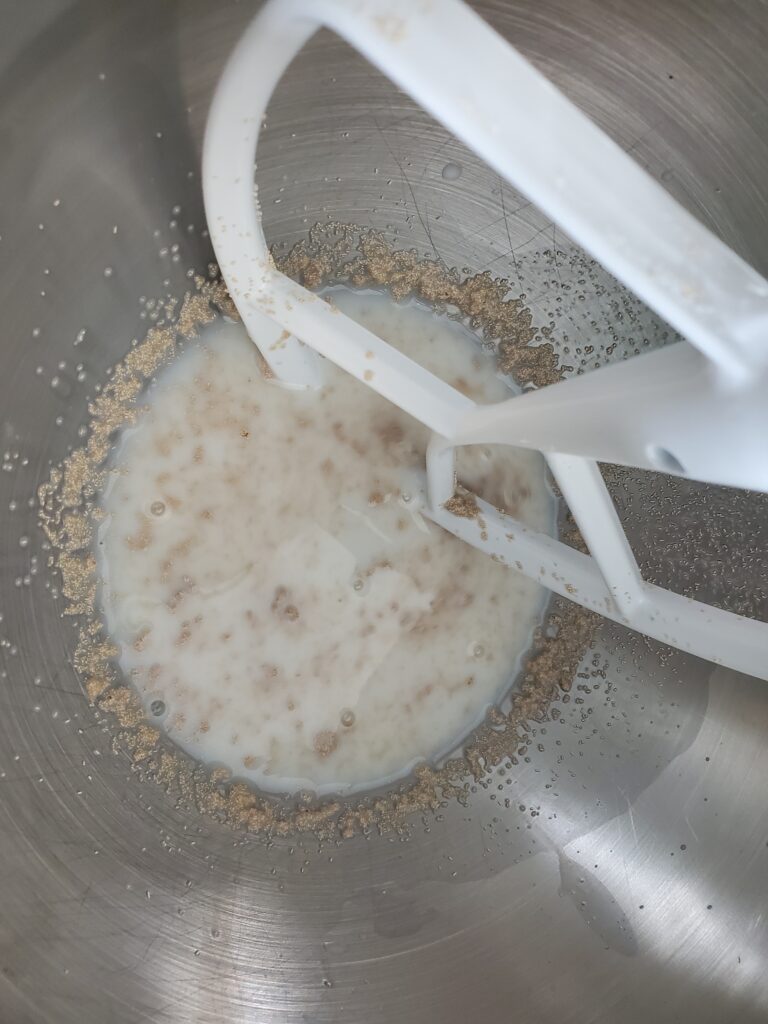
First combine the warm milk, sugar and yeast in the stand mixer bowl. Mix to dissolve the sugar.
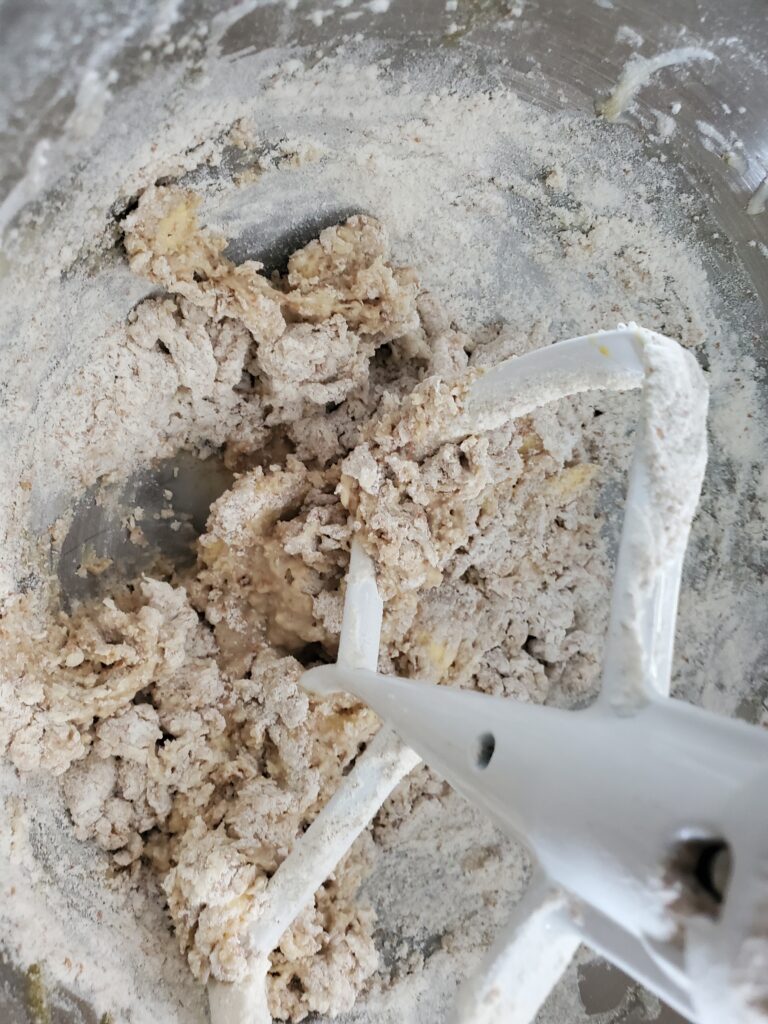
Next add the flours, salt, discard butter and egg yolk. Use the paddle attachment for the stand mixer to incorporate these ingredients. You may have to use a rubber scraper to scrape the sides of the bowl.
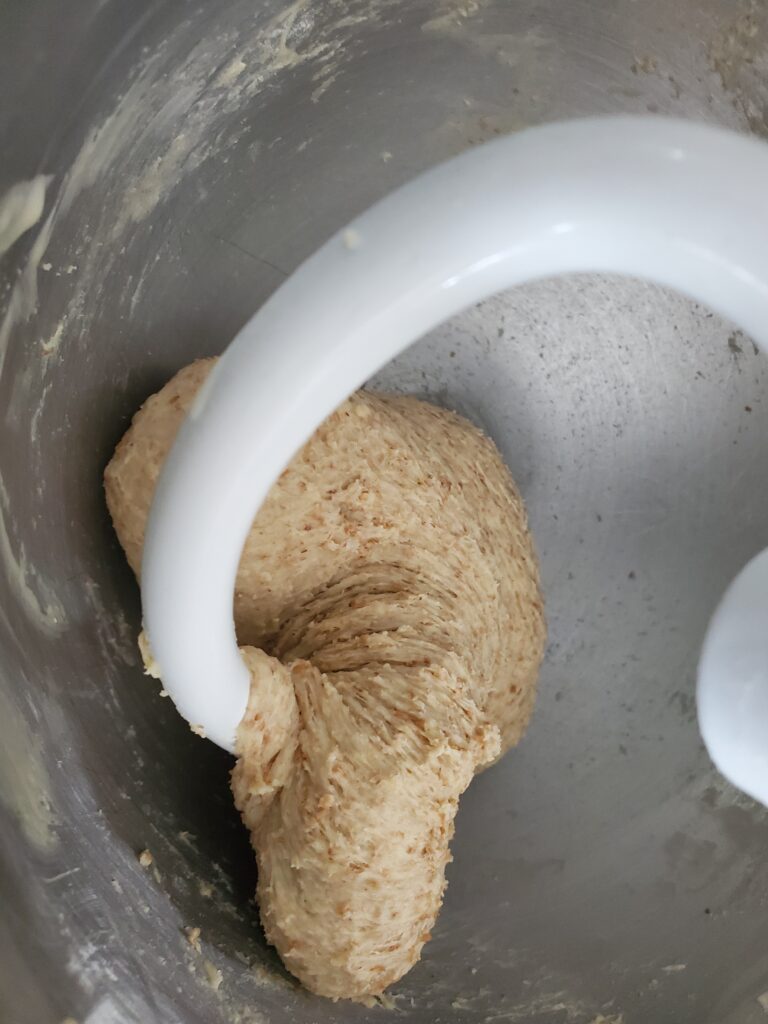
Swap out the paddle for a dough hook and knead the dough for ~7 minutes. Make sure you allow the mixer to rest every 2-3 minutes so it does not overheat. You will know it is ready when the dough no longer sticks to the sides of the bowl and is a nice smooth ball.
kneading with a dough hook
Rising stage
Place the dough ball in a bowl and cover it with plastic wrap and allow it to rise until it doubles in size. The amount of time will vary depending on the temperature of your kitchen. I do not like variability, so I always allow my dough to rise in my Ninja Foodi on the proof setting. If set to 90 degrees F, this step will reliably take about 1 hour.
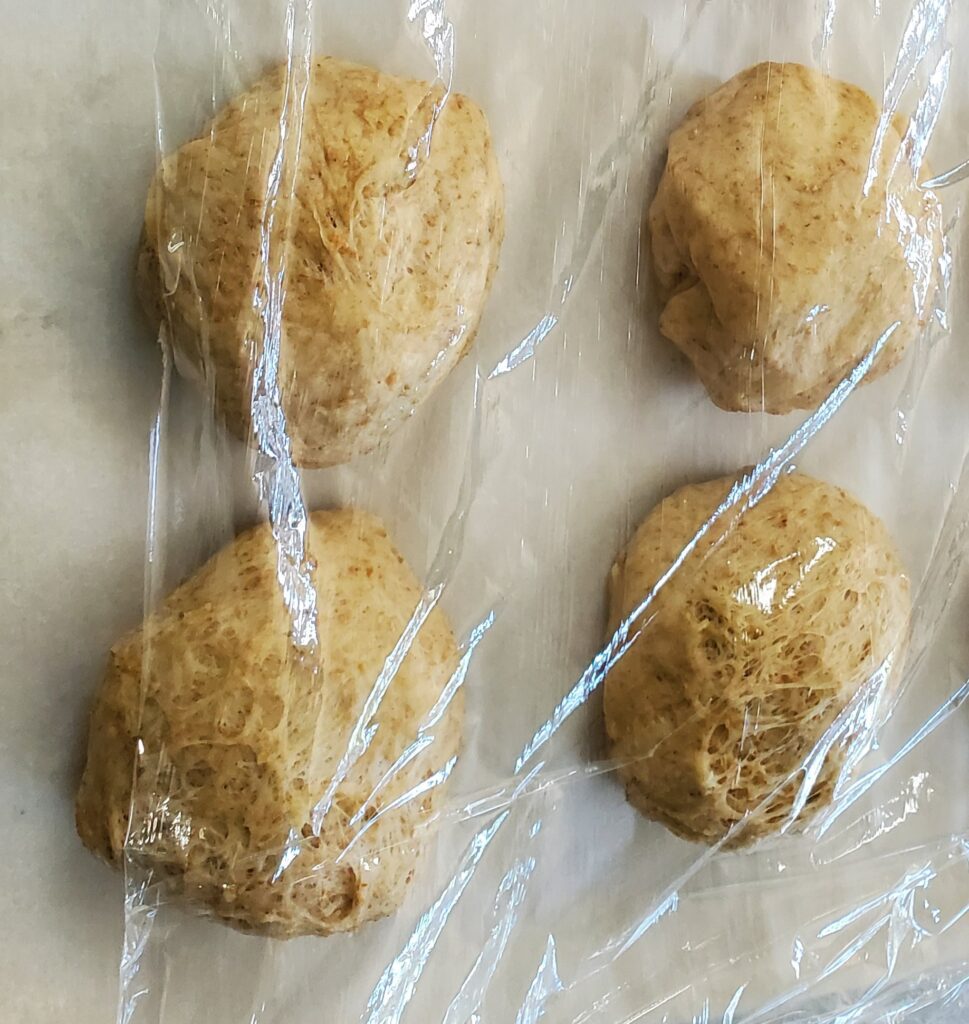
Once the dough has doubled in size, transfer it over to a lightly floured counter top and divide the dough into 4 equal pieces. (or 6 pieces if you prefer smaller buns.) Shape each piece into a bun by pulling the edges under to form a nice bun shape on top.
Place the shaped buns on a parchment lined cookie sheet. Cover with plastic wrap an allow it to rise for about 30 minutes. Once again this time will depend on the temperature of your kitchen. I like to set my cookie sheet on a heat mat to ensure they will be ready to bake in 30 minutes. When they a plumped up and rounded, they are ready to bake.
Baking the buns
Preheat the oven to 350 degrees F.
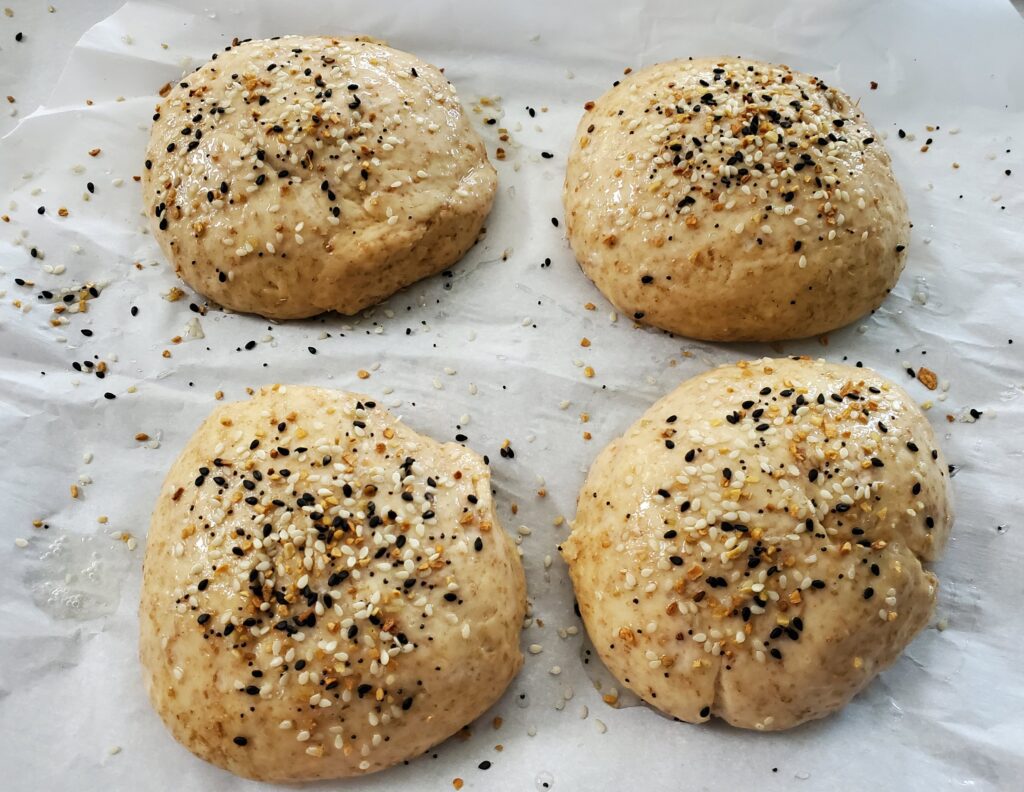
Use a fork to whisk the egg whites with the water. Use a silicone brush to spread the egg wash over the top of each ball of dough. Sprinkle on everything bagel seasoning.
Dough balls with egg wash and everything bagel seasoning
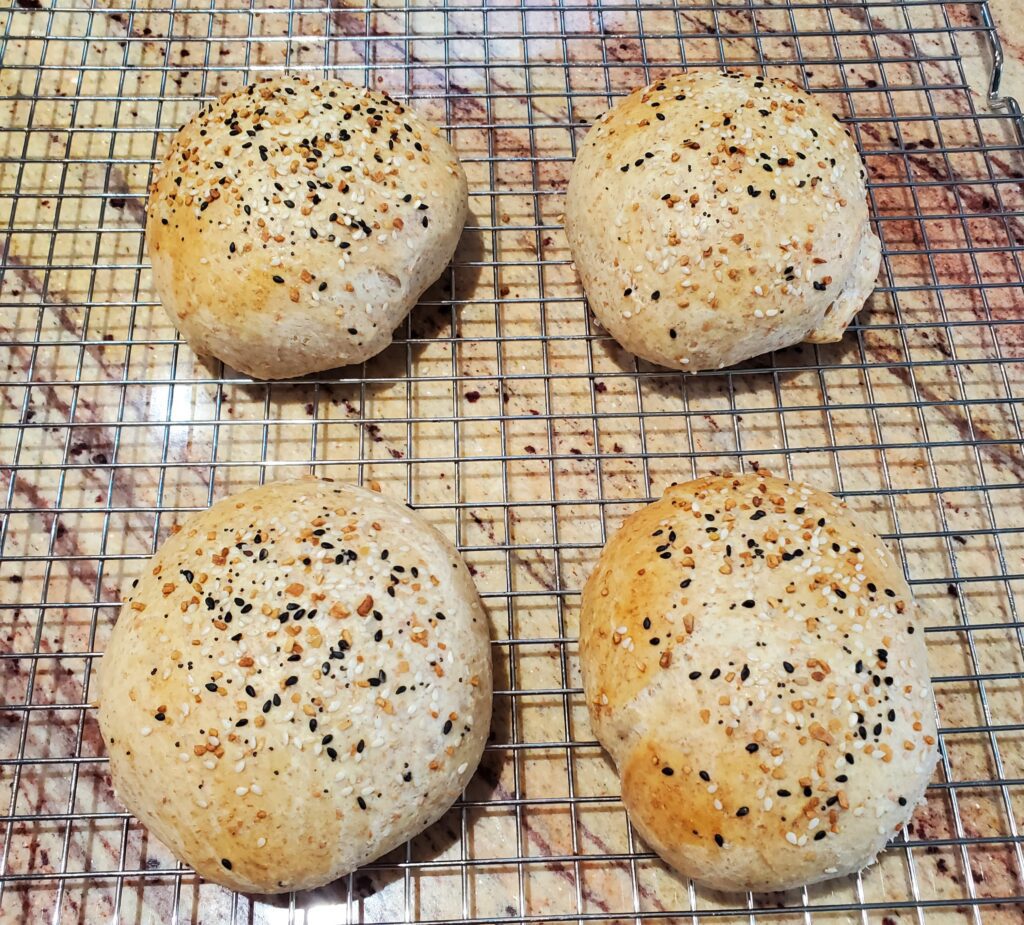
Bake for 20 minutes or until the tops are lightly browned and they sound hollow when you tap on the bottom.
First combine the warm milk, sugar and yeast in the stand mixer bowl. Mix to dissolve the sugar.<br>Next add the flours, salt, discard butter and egg yolk. Use the paddle attachment for the stand mixer to incorporate these ingredients. You may have to use a rubber scraper to scrape the sides of the bowl.<br>Swap out the paddle for a dough hook and knead the dough for ~7 minutes. Make sure you allow the mixer to rest every 2-3 minutes so it does not overheat. You will know it is ready when the dough no longer sticks to the sides of the bowl and is a nice smooth ball.<br>Place the dough ball in a bowl and cover it with plastic wrap and allow it to rise until it doubles in size, approximately 1 hour. The amount of time will vary depending on the temperature of your kitchen. Once the dough has doubled in size, transfer it over to a lightly floured counter top and divide the dough into 4 equal pieces. (or 6 pieces if you prefer smaller buns.) Shape each piece into a bun by pulling the edges under to form a nice bun shape on top.<br>Place the shaped buns on a parchment lined cookie sheet. Cover with plastic wrap and allow it to rise for about 30 minutes. Once again this time will depend on the temperature of your kitchen. When they :a plumped up and rounded, they are ready to bake.<br>Preheat the oven to 350 degrees F.<br>Use a fork to whisk the egg whites with the water. Use a silicone brush to spread the egg wash over the top of each ball of dough. Sprinkle on everything bagel seasoning. Bake for 20 minutes or until the tops are lightly browned and they sound hollow when you tap on the bottom. Cool on a wire rack. <br>
NOTES
As an Amazon Associate, I earn from qualified purchases.
If you own a Traeger or really any smoker, one of the go to recipes you just have to try is pulled pork. This is the best Traeger pulled pork recipe! It’s so simple. You just have to make sure you have enough time to get it done before your guests arrive. Pulled pork is a great recipe to feed a crowd, but it also makes great leftovers.
Disclaimer: This post may contain affiliate links. I earn commission at no additional cost you you.
How long must you smoke a pork butt at 225 degrees F?
It depends on the size of your pork butt, your smoker and the weather. It also depends on weather or not you wrap it. If you follow my recipe and have a 6-7 pound pork butt and warm weather (-70 degrees F) it should take about 12 -14 hours.
What tools do you need to make the best pulled pork?
Apple or hickory pellets (Or better yet, a mixture of both)
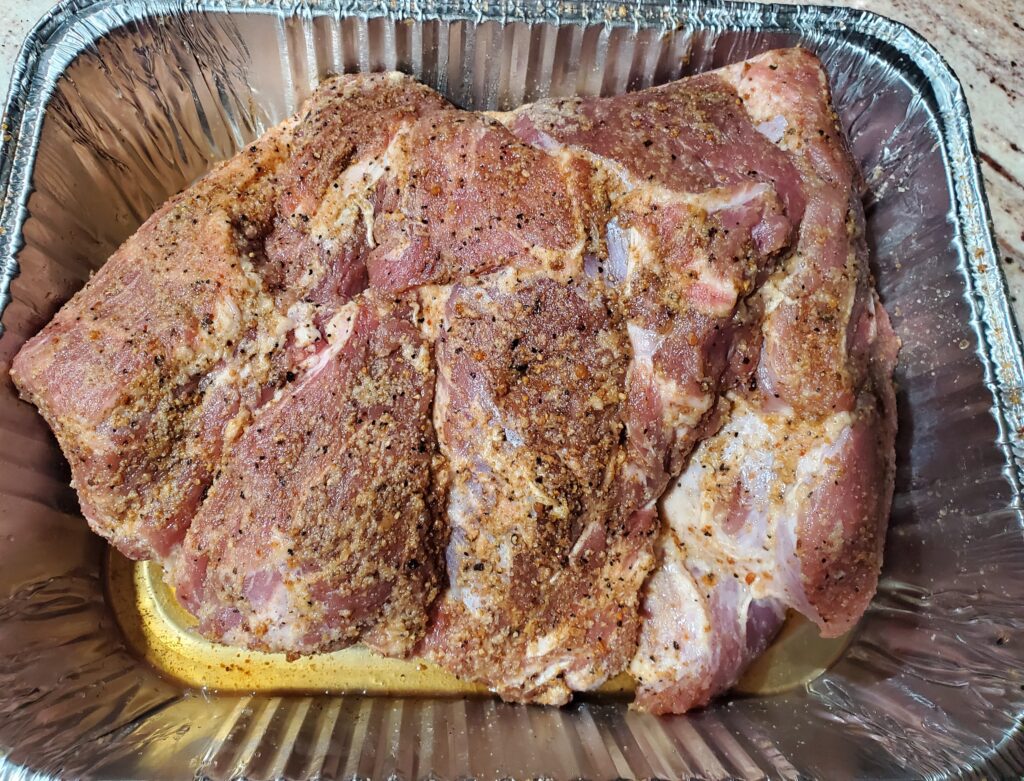
Trim your pork the night before you want to smoke it. Remove excess fat but it is not necessary to remove all of the fat since by the time the pulled pork is ready, the fat will be mostly gone and fat adds flavor.
Season your pork with Traeger Pork and Poultry rub. Place it in the refrigerator overnight.
Seasoned and trimmed pork butt
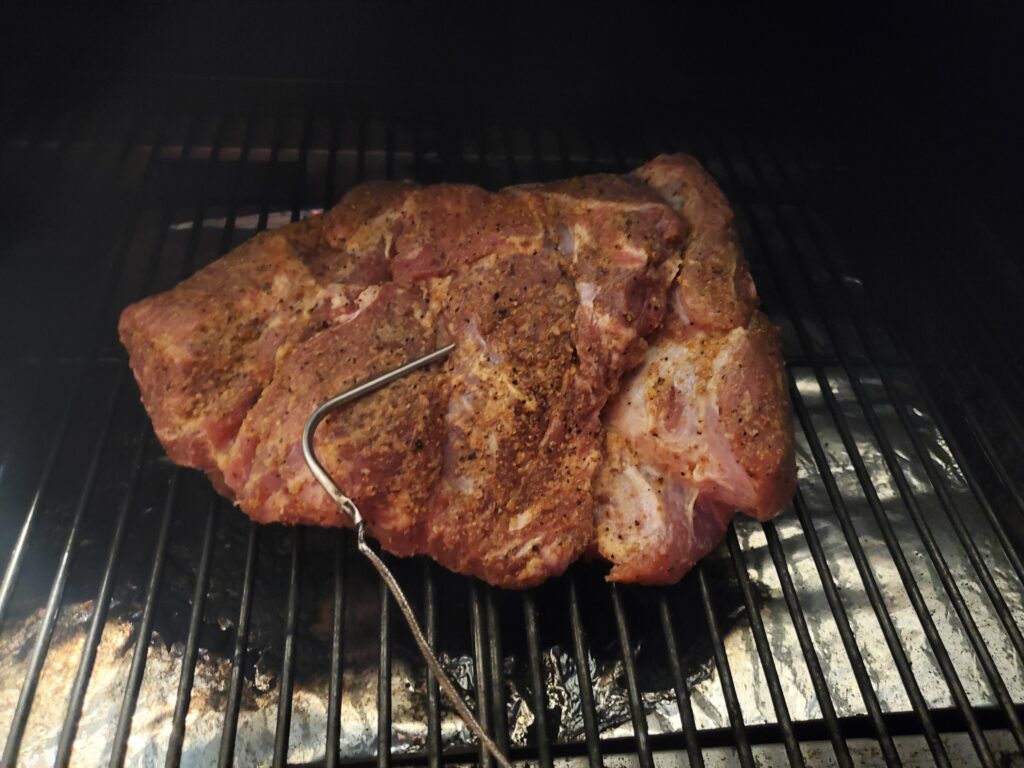
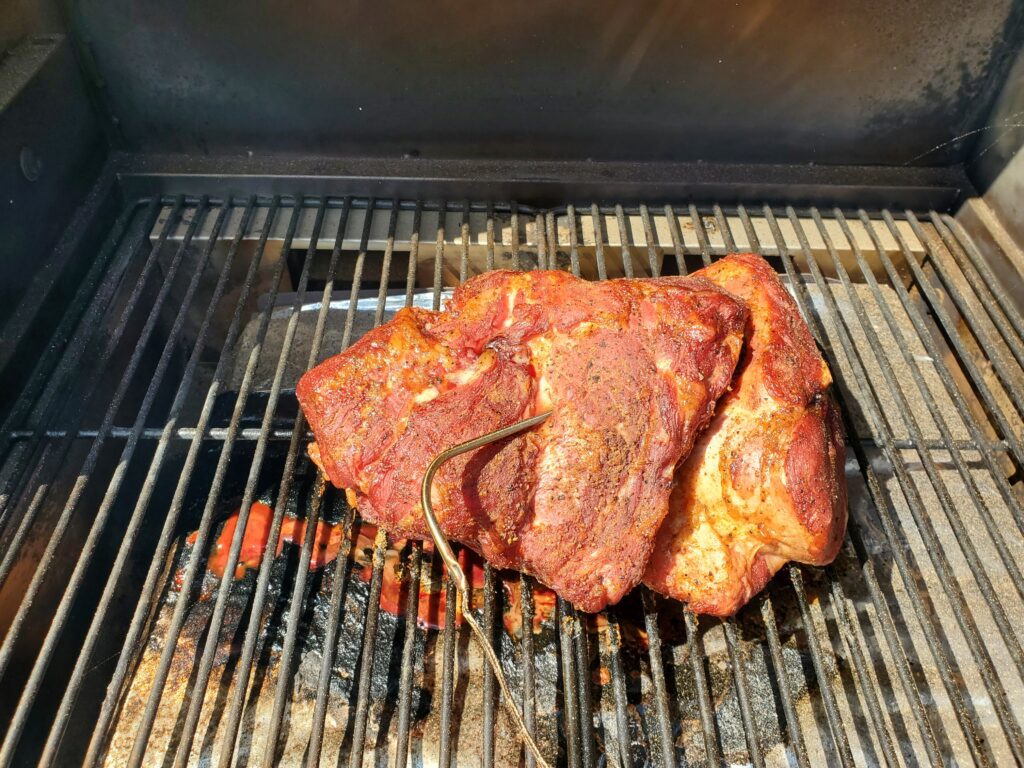
In the morning remove the pork from the refrigerator and preheat the Traeger to 225 degrees F. When the Traeger is preheated, place a meat thermometer in the pork and place it directly on the grate. Close the Traeger and monitor the temperature.
Once the thermometer reaches 160 degrees (~6 hours). It is ready to wrap.
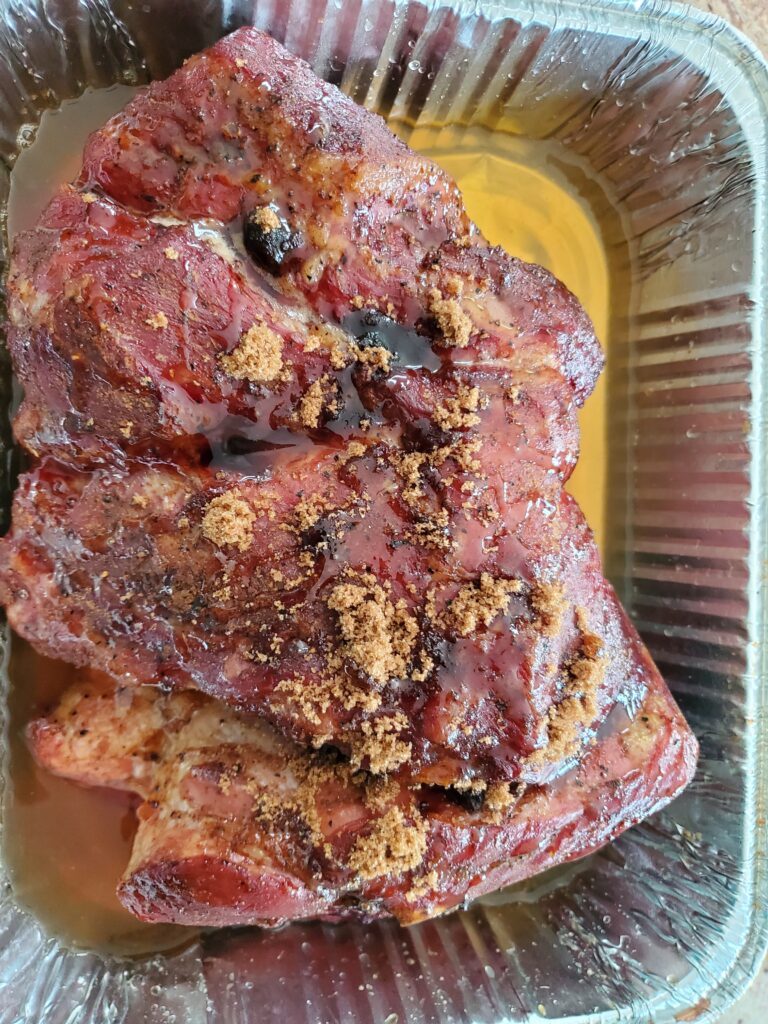
For the wrapping stage, warm up the apple juice in the microwave so it is warmer than the pork. Remove the pork from the Traeger and place it in a foil pan. Alternatively, you can use butcher paper or just foil. Sprinkle on the dark brown sugar, drizzle with honey and add the warm apple juice to the pan. Cover the pan with foil, put the meat thermometer back in the meat. You can stick it right through the foil on top.
Pork seasoned with honey, brown sugar and apple juice. Ready to cover.
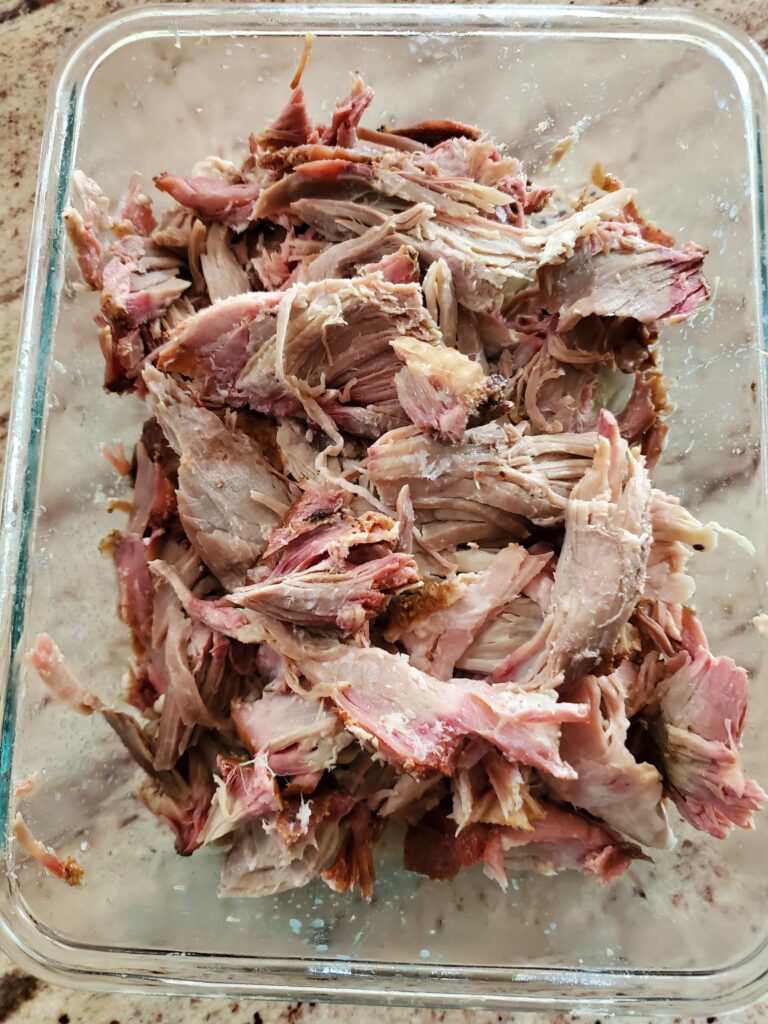
Continue to smoke for 6-8 more hours at 225 degrees F or until the internal temperature reaches 205 degrees F. Remove the pan from the Traeger and allow it to rest for at least 30 minutes before pulling it.
Pulled Pork – ready to serve.
You can use 2 forks to pull the pork, but if you have room to store them these meat shredder claws will get the job done faster.
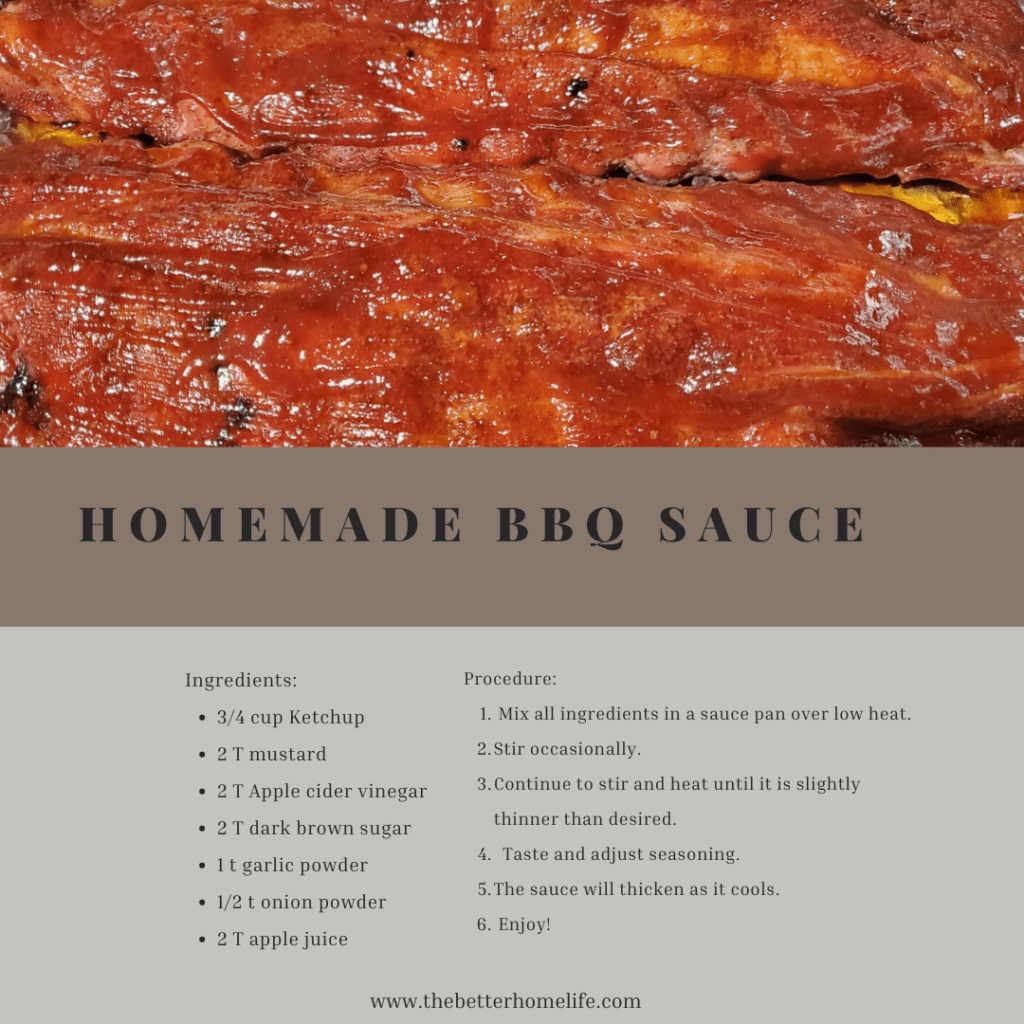
What is the best sauce to add to pulled pork?
I like to wait to add sauce to my pulled pork because it’s better to allow each guest to choose a sauce they prefer. It’s also better for leftovers. You can get more creative if you do not add the sauce. Try these amazing pulled pork street tacos!
Sheet pan pancakes are a quick and easy way to feed a crowd in the morning without having to stand by the stove for hours. They also make great leftover breakfast for easy weekday mornings. This sourdough sheet pan pancake recipe is also great for using up some extra discard. This recipe can also be used to make regular sourdough discard pancakes and waffles.
Sourdough discard – If you don’t have sourdough discard you can replace it with 1/2 cup of all-purpose flour and 1/2 cup of buttermilk or milk.
Sourdough discard sheet pan pancake ingredients
2 Cups All-purpose flour
1 teaspoon baking soda
1 teaspoon baking powder
1 teaspoon sea salt
3 tablespoons sugar
1 cup sourdough discard
1 and 1/2 cups milk
1 teaspoon pure vanilla extract
4 tablespoons butter, melted
2 large eggs
1/2 cup fresh blueberries, washed and patted dry
5-6 fresh strawberries, washed patted dry, and sliced
1 banana, peeled and sliced
1/4 cup of chocolate chips
Sheet Pan Pancake Directions
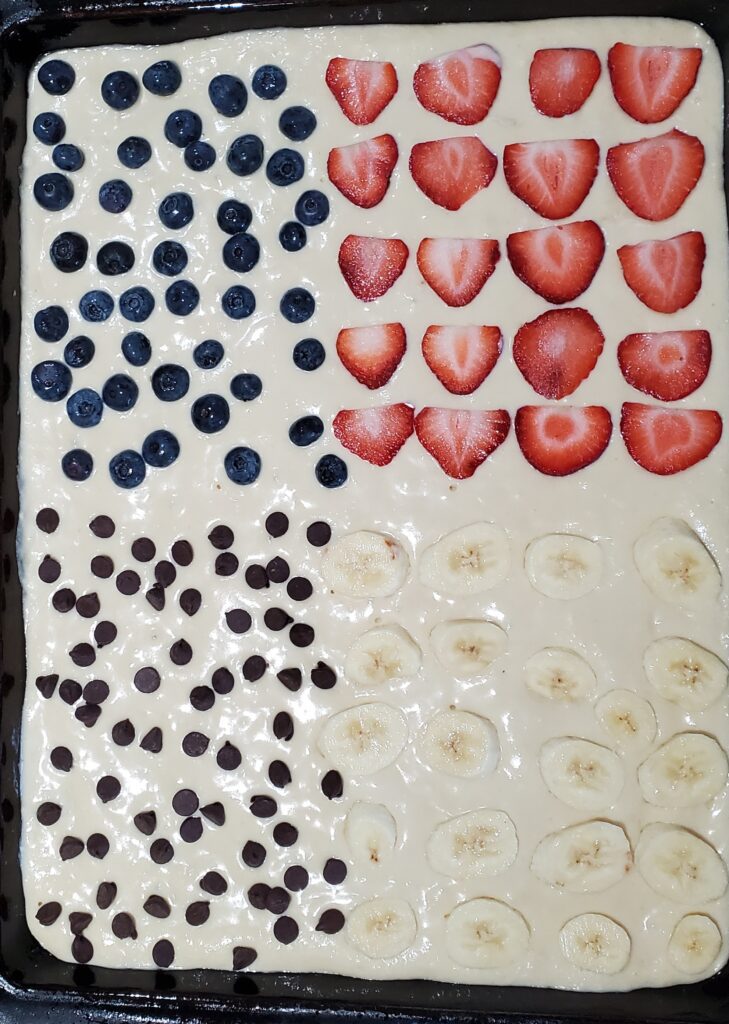
Mix all of the dry ingredients (flour, baking soda, baking powder, salt and sugar) in a bowl. Crack the eggs and whisk them a bit before adding. Add the discard, milk, vanilla, melted butter and eggs to the dry ingredients and mix well. It’s ok if the batter is a little lumpy. Pour the batter on a greased or parchment lined 18 x 13 inch sheet pan. Allow the batter to sit for 20-30 minutes before baking.
Meanwhile, prepare your fruit. Make sure your fruit is patted dry.
Add the chocolate chips and fruit to the top of the batter.
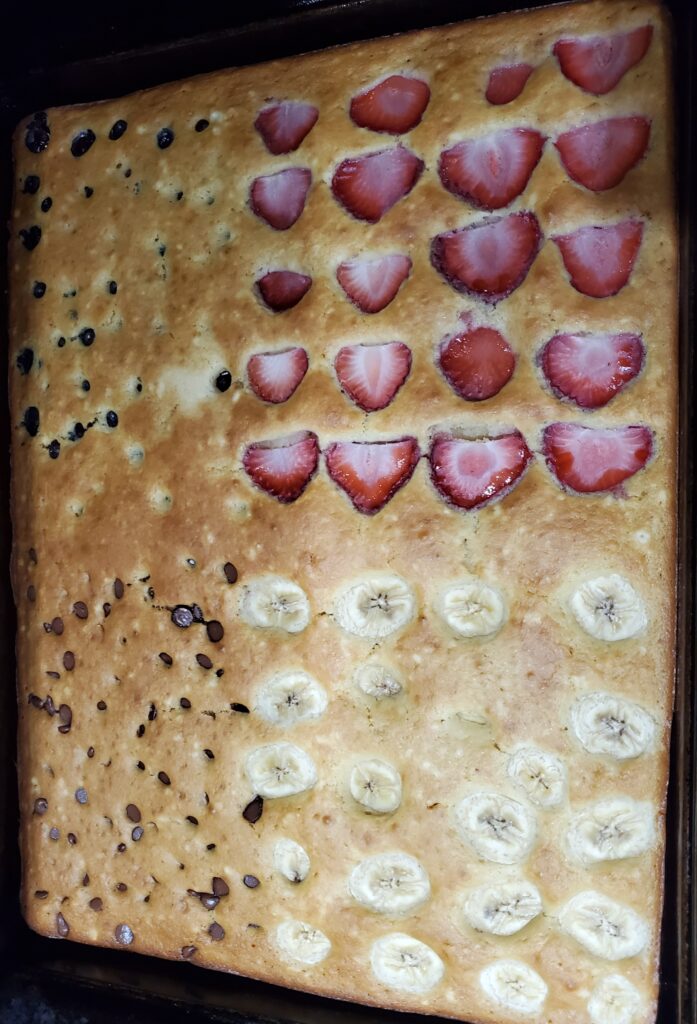
Preheat the oven to 425 degrees F. Bake for 15-18 minutes or until the top is golden brown. Wait 1-2 minutes before slicing.
Sheet pan pancake mix-in and topping ideas
Mix-ins:
Fresh blueberries
Fresh strawberries
Fresh raspberries
Fresh black berries
Bananas
Chocolate chips, or any chip e.g. white chocolate, butterscotch etc..
Fresh thin apple slices, with cinnamon
Cinnamon and brown sugar
Nuts e.g. walnuts, pecans, cashews
Toppings:
Maple syrup
Powdered sugar
Strawberry syrup
Whipped cream
Nutella
Jam
Can you use this recipe to make regular pancakes or waffles?
Yes you can use this same recipe to make sourdough pancakes and waffles.
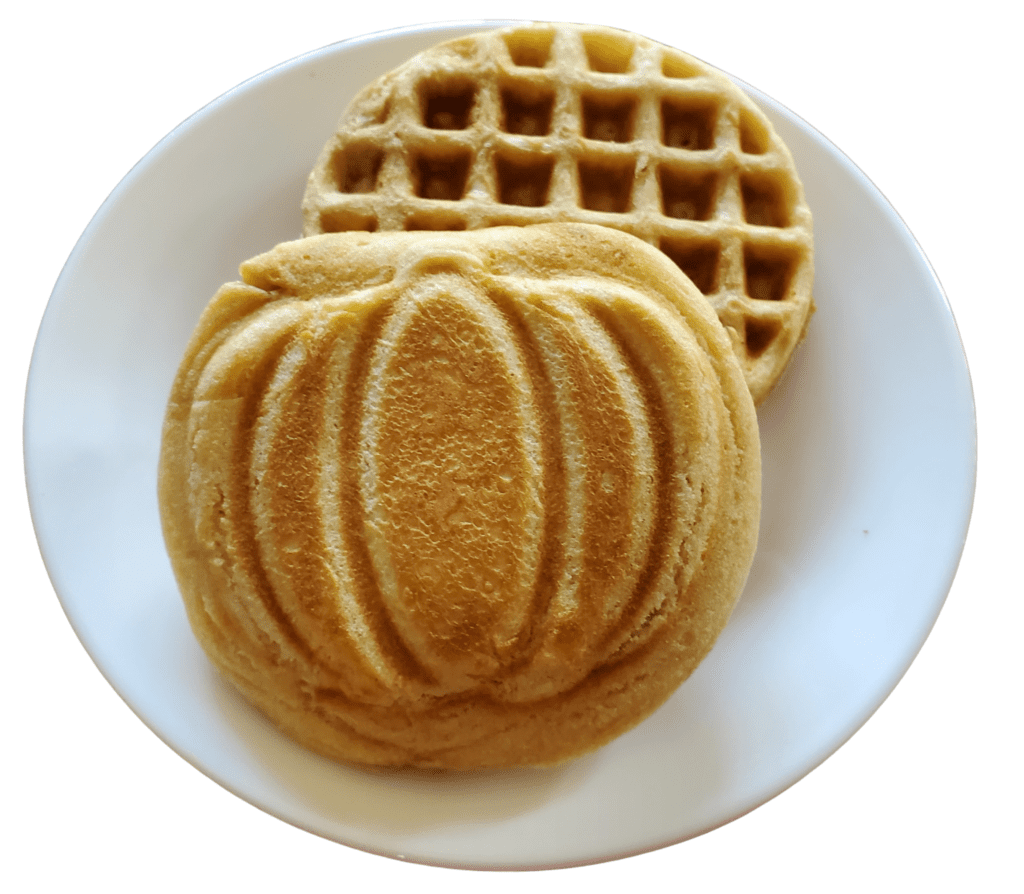
Find this cute pumpkin waffle maker here. These mini waffles fit perfectly in a standard toaster and make a quick and easy breakfast. Just make the waffles on the weekend and you will be ready for a busy week.
5-6 fresh strawberries, washed patted dry, and sliced
1 banana, peeled and sliced
1/4 cup of chocolate chips
DIRECTION
Mix all of the dry ingredients (flour, baking soda, baking powder, salt and sugar) in a bowl. Crack the eggs and whisk them a bit before adding. Add the discard, milk, vanilla, melted butter and eggs to the dry ingredients and mix well. It's ok if the batter is a little lumpy. Pour the batter on a greased or parchment lined 18 x 13 inch sheet pan. Allow the batter to sit for 20-30 minutes before baking.
Meanwhile, prepare your fruit. Make sure your fruit is patted dry.<br>Add the chocolate chips and fruit to the top of the batter.
Preheat the oven to 425 degrees F. Bake for 15-18 minutes or until the top is golden brown. Wait 1-2 minutes before slicing.
NOTES
As an Amazon associate, I earn on qualified purchases.
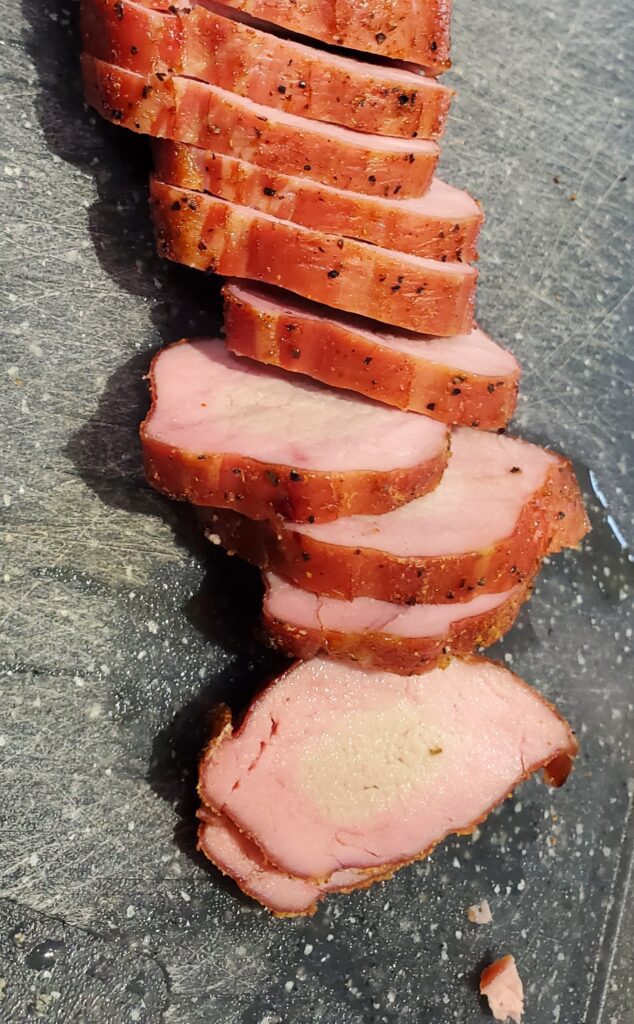
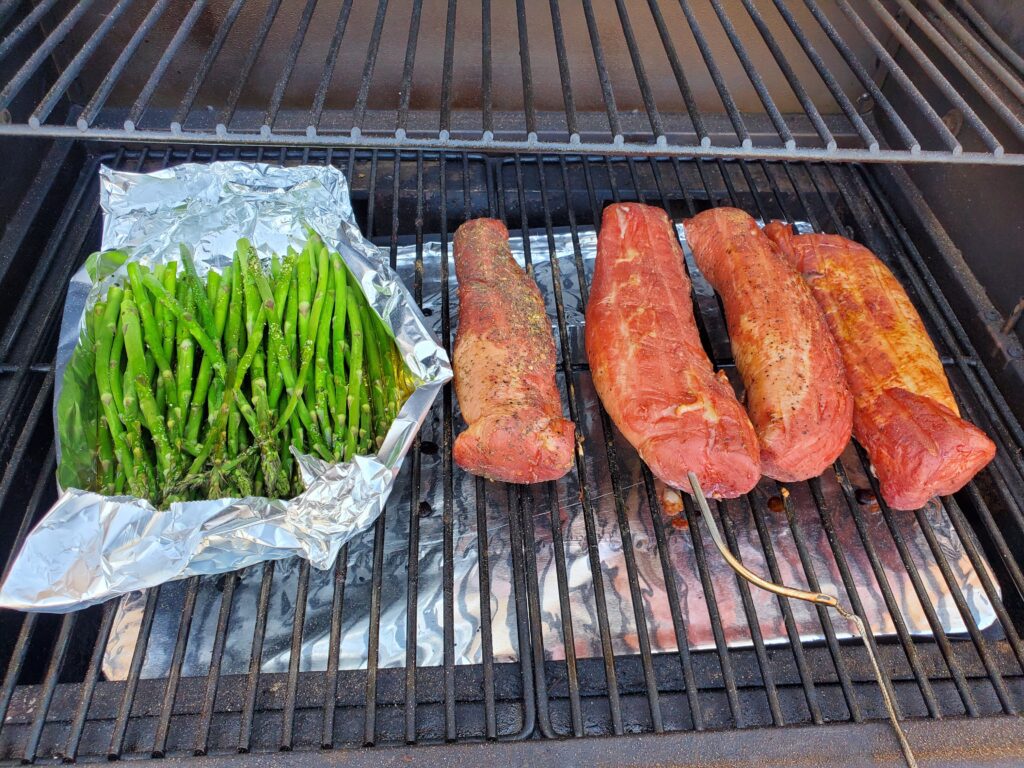
Smoked Pork tenderloin is so easy. It’s easy to prepare, and simple to smoke. Add a couple of tasty sides and you have one of the easiest family dinners possible. Many side dishes can be smoked at the same temperature along with your pork tenderloin. Here’s how:
Disclaimer: This post may contain affiliate links. I earn commission at no additional cost to you.
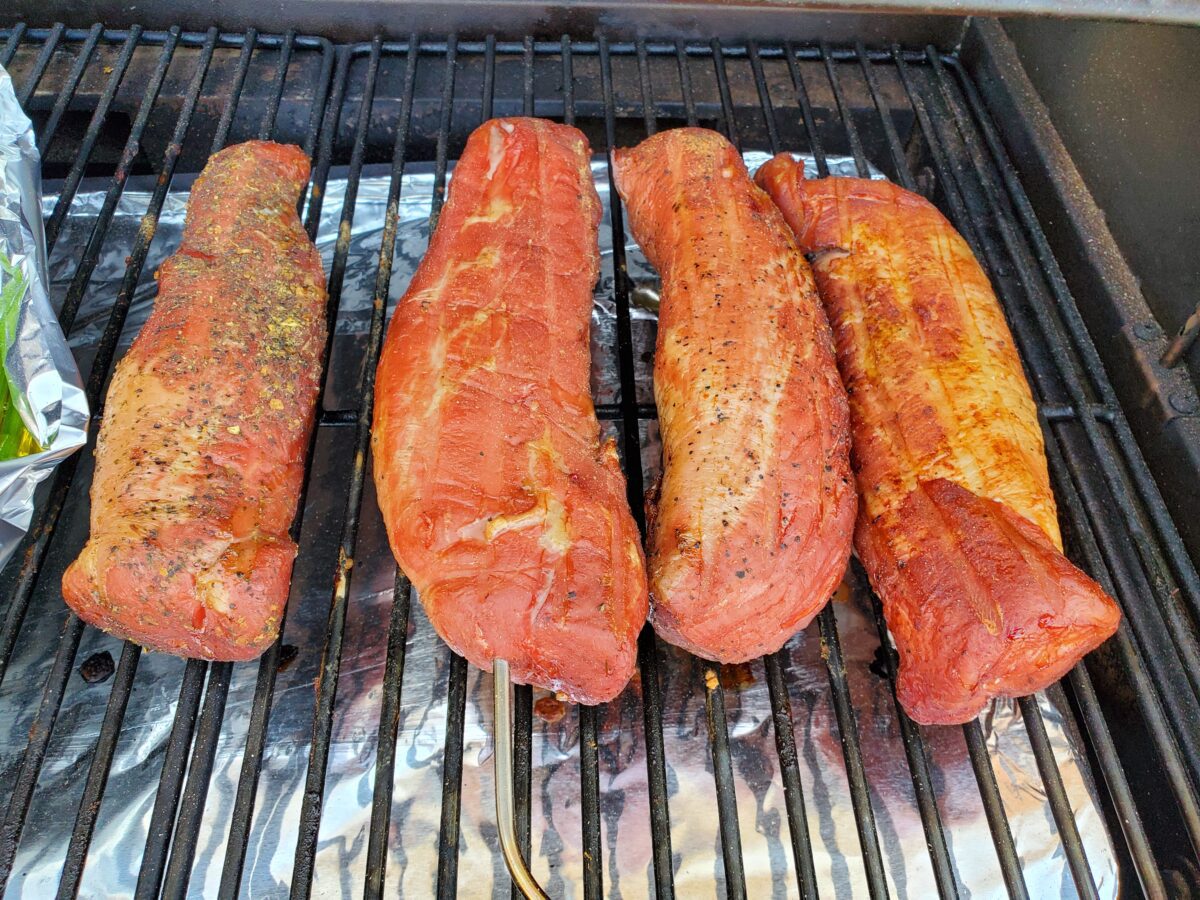
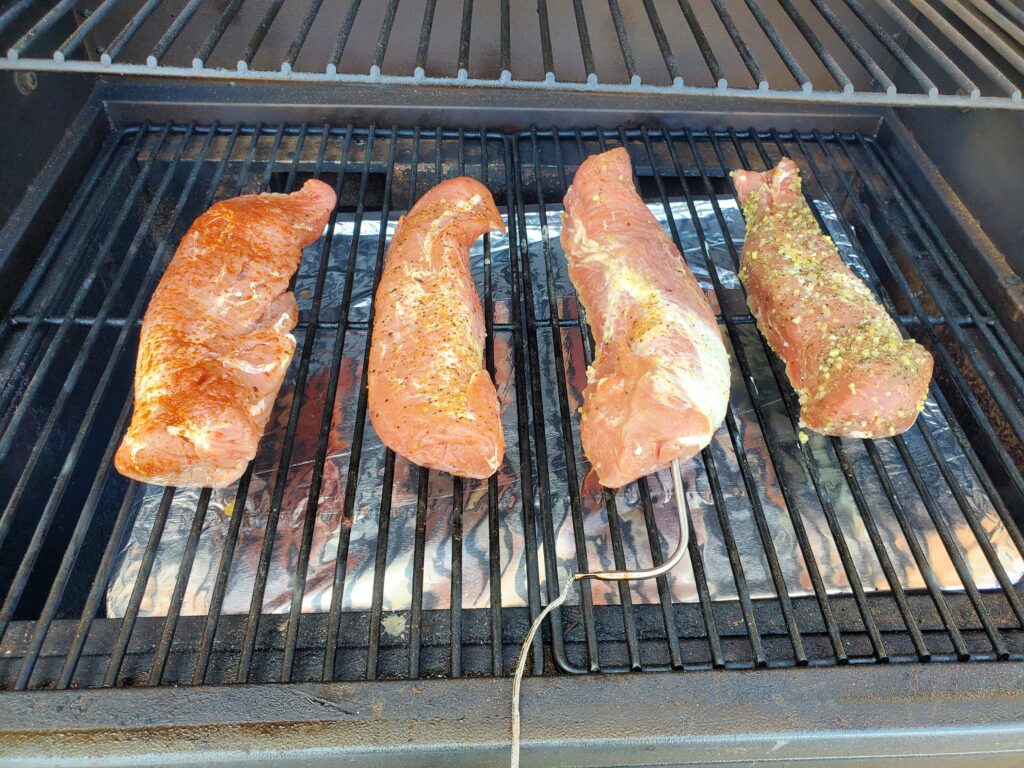
Preheat your Traeger to 225 degrees F. Place the seasoned pork tenderloins on the Traeger. Place a meat thermometer in the center of the largest tenderloin.
Smoke for 1.5 – 2 hours for 145 degrees. Smoke for 2 – 2.5 hours for 160 degrees. The smoke time varies depending on the size of your tenderloins and the weather.
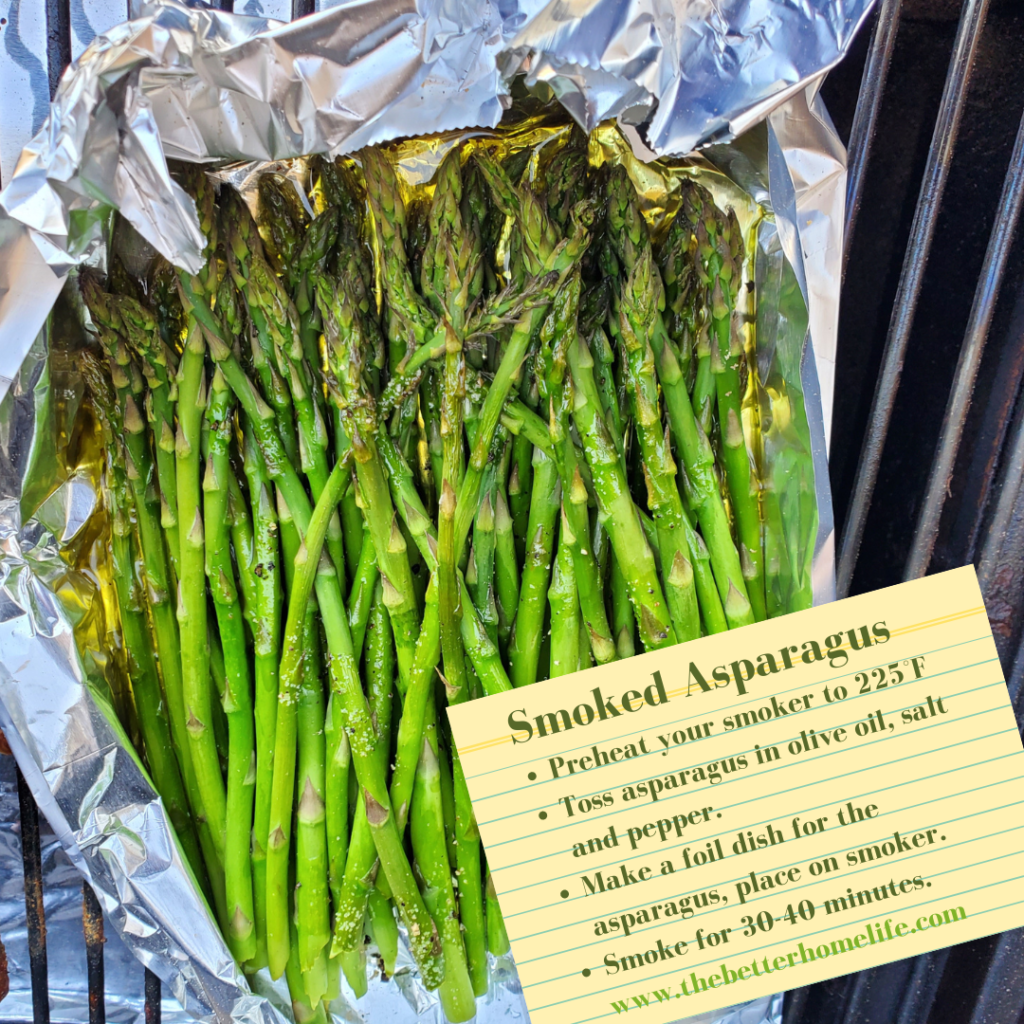
How to smoke vegetables and potatoes on the Traeger
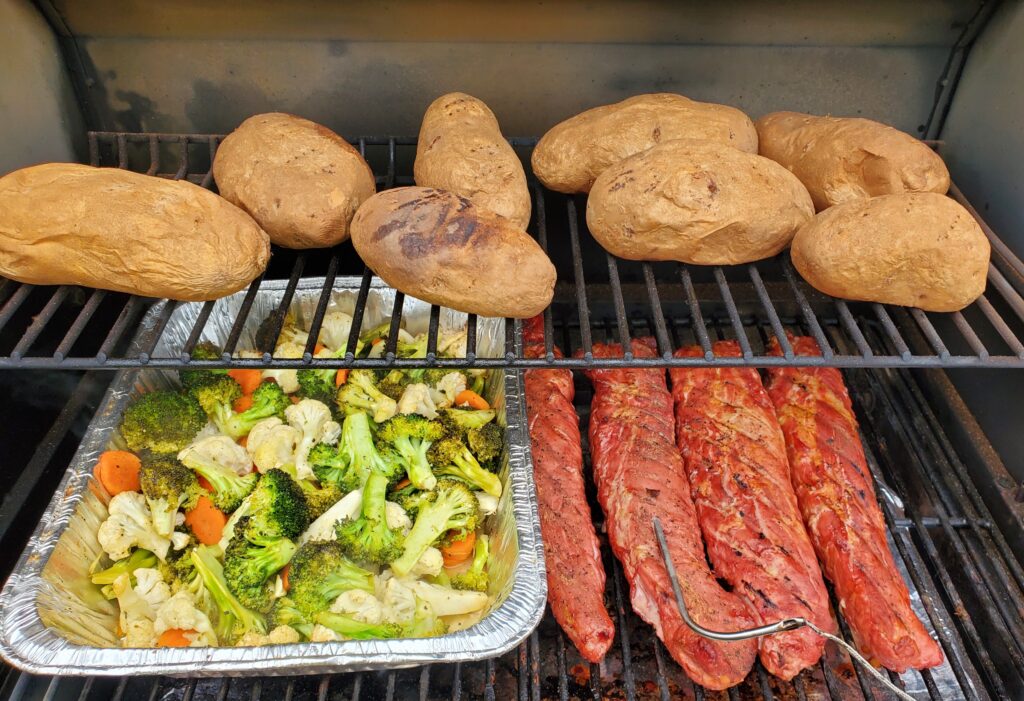
Smoke up some veggies along with your pork tenderloin. You can smoke most veggies at the same temperature as the pork tenderloin. Just add them after the first 1-1.5 hours of smoking.
Baked potatoes need to be smoked at 400 degrees for ~ 1 hour depending on the size of the potato. If you want to serve them with your smoked pork tenderloin, put the potatoes on first at 400 degrees for 30-40 minutes, then turn the heat down to 225 add the pork. The potatoes will finish cooking at the lower temperature over the longer time. I usually add a few extra potatoes and use the leftover smoked potatoes to make potato salad. Find the best potato salad recipe here.
Back-to-School is viewed as expensive time of year, but it doesn’t have to be. There are plenty of ways to save money on school supplies. When we send our kids to school they are taught to reduce, reuse, recycle. Unfortunately, they forget all about that during back-to-school shopping and want all new stuff. Use this time to teach them how to save money on school supplies by reusing items that are still in good shape.
Disclaimer: This post may contain affiliate links. I earn commission at no additional cost to you.
Lessons learned when kids reuse their backpack
Kids learn to be thrifty. Reusing a perfectly good backpack teaches kids that they don’t need to spend money on new things all the time. Show them the back-to-school budget. Show them the things that they actually need, maybe it will be new shoes or new clothes. Have them help shop for the things they need.
Kids learn that they don’t always get everything they want. This is an important lesson for kids. I always offered my kids the option to put a new backpack on their birthday or Christmas wish list if they were really sad about using their old backpack, but it never made the list. Sadly, because backpacks are so cheap in November. I could have saved big on those Christmas items.
Kid’s learn to reuse! This is a great lesson in being a good steward of our Earth. What happens to all of those discarded backpacks? You can hardly even give them away. Even charities want new backpacks. They probably end up in a landfill. Prevent that by reusing those backpacks!
When is it time for a new backpack?
The backpack is too small
You can’t buy an adult size backpack for a four-year-old. A pre-school backpack can be used through first grade, maybe second grade. Eventually the kid will be too big for the bag, or the stuff they need to carry will not fit in the bag. This is a reason for a new backpack.
The zipper broke
This is a big problem for the licensed character backpacks you will find in many of the big box stores every year. I never bought these backpacks for this reason. We did receive a free brand new Nemo backpack from a friend. Of course we used it, but it only lasted a year and a half. Much less time than the quality pre-school backpacks my other kids used. My advise, buy quality!
The pattern is too babyish
This need is avoidable. Once again, do not choose character backpacks. Not only will they wear out faster, but the kids will outgrow the fascination with the character on their backpack. Of course, I’m not suggesting that you send your kid to school to get bullied for their baby backpack. I’m suggesting that you use your judgement and buy something with a design they will not out grow right away. Tie dye instead of My Little Pony. Stripes instead of Sonic. Save the fun characters for items that will not last, like shoes, T-shits, pencils or notebooks.
The straps broke
This is the most common breaking point on a backpack. In my experience the straps or top handle were the first thing to go. The next most common wear point is the side “water bottle pocket”. Look for strength in these areas.
The backpack was lost or stolen
Things happen, kids are human and humans are not perfect. It is possible to lose things. This is somewhat preventable if you teach responsibility, but even responsible kids make mistakes. I do not recommend highly desirable brand names for backpacks because they do increase the chance of theft. I really love Under Armor and North Face products, but choose not to buy backpacks from them because of the increased chance of theft. It’s fine to buy T-shirts, sweatshirts and other items, but if your backpack is stolen, everything inside is also stolen. It’s just not worth it. Better to choose a less “cool” brand name for a backpack.
How many backpacks do kids need form Pre-K-12th grade?
Four or five backpacks should be plenty. One back pack every 3-4 years, should be enough. Hopefully the last bag will stick with them through college and beyond if you buy quality. It’s best to start out with reusing backpacks as early as possible because that way reusing will be the expectation.
What to look for in a quality backpack
First choose the right size for your child:
4-6 years: ~15 L or 900 cubic inches – Skysper Kids Backpack or Pottery Barn Kids size small
Look for a water bottle pocket that does not have mesh. Mesh will wear out. It’s also nice to have 2 water bottle pockets, incase one wears out. This is hard to find. JanSport has a great one. Find it here. I have found the JanSport brand to hold up for several years. They also have a lifetime warranty against manufacturer defects. They only problem with JanSport is that they do not make a backpack small enough for a 4 year-old.
Shop luggage brands and hiking brands for quality backpacks. I found that once my kids were adult size, there were many backpack options that were high quality in luggage and hiking brands. My son liked to carry his backpack by the top handle. This is a feature that is made stronger in some luggage brands. Samsonite has a very strong handle on the top of the bag. It has held up to this way of carrying for several years.
Osprey is a hiking brand that makes a laptop backpack. This is a brand we have a lot of experience with. They make a quality bag that holds up well.
Take an inventory of the school supplies you have
Don’t feel like you need to buy your child a whole new wardrobe just because they are starting a new school year. Go though their backpacks and their closets. Determine what still fits, and what still works. For example, if their backpack is still in good shape, they can use it again. If their pants are too short add them to the shopping list.
Next Compare what you have to what you need
Obtain a school supply list from your child’s school, if available. The most expensive school supplies are often reusable. Here are some things that you can often reuse for several years:
Save money on Reusable School Supplies
Save money on reusable school supplies by reusing them, handing them down from one kid to the next, or if needed these item tend to have huge price drops after school starts. Try to hold off if possible and buy these items in October or November.
Scissors
Pencil box
Backpack, if you buy quality
Lunchboxes, if you buy quality – Find some great bento box lunch ideas here.
Save money on School supplies, you will need every year
Most of these consumable items are on mega sale at most big box retailers every year. These items should not break the bank, especially if you shop early, and shop around. For the best savings on consumable school supplies shop early and shop around.
Pencils
Pens
Markers, only in younger grades
Glue sticks, only in younger grades
Colored pencils
Notebooks
Filler paper
Graph paper
Erasers
Composition Notebooks, wait to buy these until you know which one your child’s teacher wants them to have.
Classroom supplies: Clorox wipes, paper towels, etc…
Shoes
Clothing, especially for growing kids – Find out how to save on clothing here.
This sourdough discard strawberry shortcake is to die for! So flaky and delicious. The perfect mix of sweet and sour. You will not want to make it any other way. Included below you will find directions for making the shortcakes, strawberry topping, and homemade whipped cream. You can also use Redi whip if you prefer. As always, I do not like to turn on the oven in the summer, so I’ve included directions for baking the shortcakes on the Traeger.
Disclaimer: This post may contain affiliate links. I earn commission at no additional cost to you.
1/3 cup sourdough starter discard (straight from the fridge)
1/3 cup milk
Shortcake directions
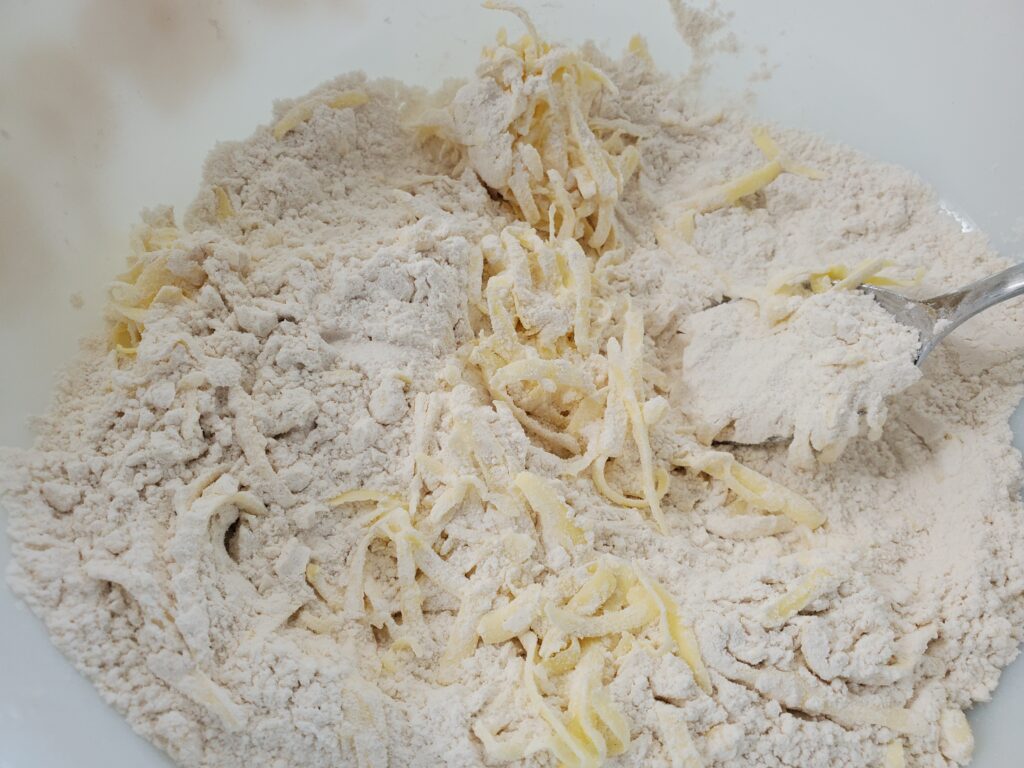
Mix the flour, baking powder, salt and sugar in a mixing bowl. Use a cheese grater to grate approximately half of the butter into the flour mixture. Tip: use the butter wrapper to hold onto one end of the butter while grating. Mix the grated butter into the flour mixture.
Melt the other half of the butter. Add the discard, milk and melted butter to the dry ingredients and mix until dough forms.
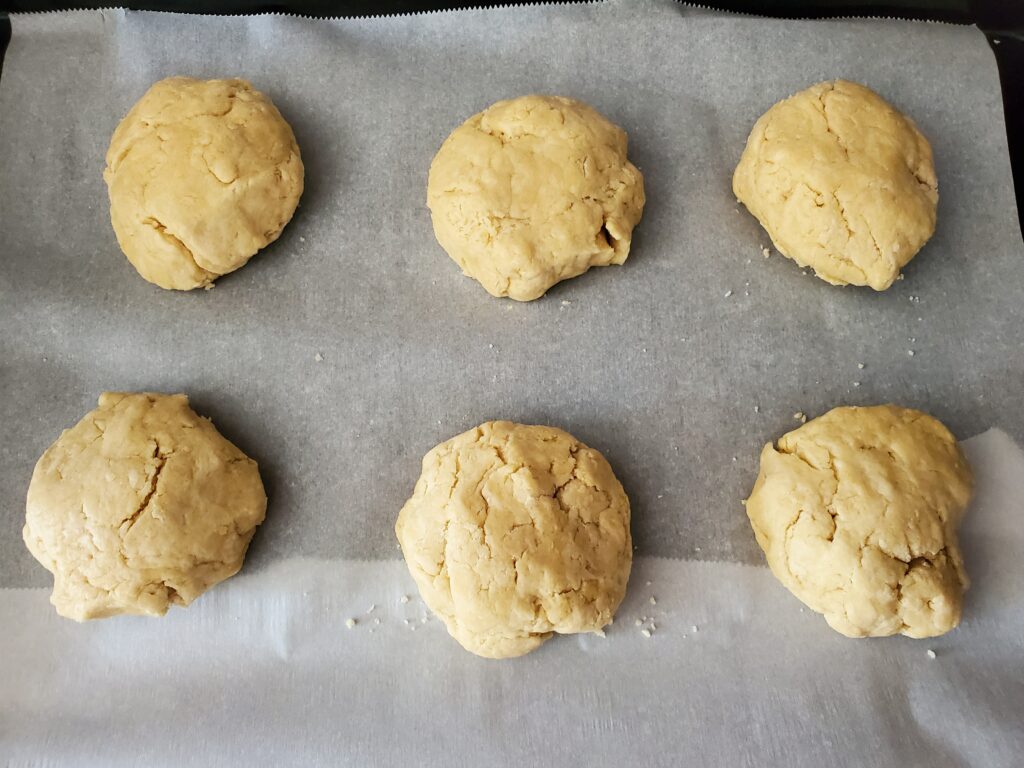
Shape the dough into 6 shortcakes. Place the cakes on a parchment lined cookie sheet.
Preheat the oven to 425 degrees F. Bake the cakes for 17-18 minutes or until lightly browned.
Allow the shortcakes to cool if desired.
Strawberry Topping Ingredients:
2 pounds fresh strawberries
1/4 cup sugar
Strawberry topping directions:
Wash the strawberries, and remove the stems. Slice the strawberries into bite size pieces. Place the berries in a bowl. Add the sugar and mix. This mixture can be added to the shortcakes right away, or if you prefer softer strawberries with more syrup, wait a couple of hours before serving.
Homemade whipped cream ingredients
2 cups heavy cream or whipping cream
1/2 cup powdered sugar
1 teaspoon vanilla
Homemade whipped cream directions
Mix the ingredients together in a bowl. Whip with a hand held mixer or stand mixer with a whisk attachment until peaks begin to form about 3-4 minutes. Do not over whip!
Homemade whipped cream is best used right away, although it can be stored for up to 24 hours in the refrigerator. If you choose to pipe your whipped topping onto the strawberry shortcake, I recommend the Wilton 8B tip. Otherwise, it tastes great if you just spoon it on!
How to assemble the strawberry shortcakes
Cut the shortcake in half. Place the bottom half in a bowl, layer with strawberries, then whipped cream then the top half then whipped cream then more strawberries. Yummy!
Can you bake strawberry shortcake on the Traeger?
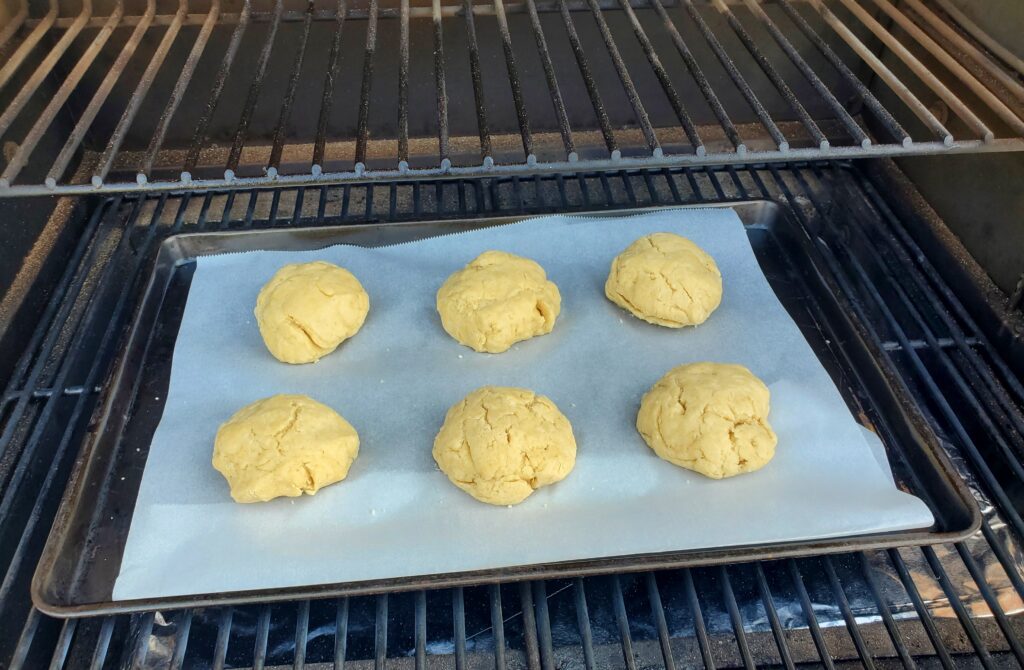
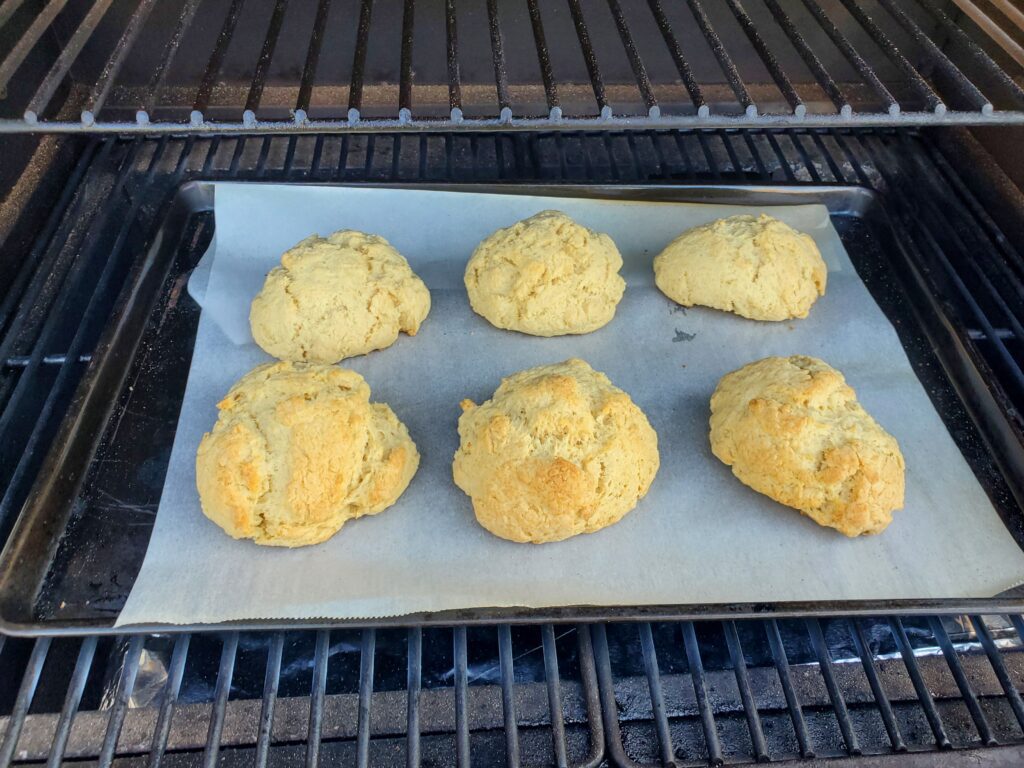
Yes you can! Preheat the Traeger to 425 degrees F. Place the parchment lined cookie sheet with shortcakes on the Traeger. Bake/smoke for 17-18 minuets or until lightly browned.
Shortcakes on the TraegerShortcakes baked on the Traeger.
As an Amazon Associate, I earn on qualified purchases.
Recipe By Kristin
Course: Dessert
Cusine:American
Difficulty:Easy
Servings
6 minutes
Preparing Time
5 minutes
Cooking Time
18 minutes
Calories
kcal
INGREDIENTS
2 cups All-Purpose flour
1 Tablespoon baking powder
1/2 teaspoon salt
3 tablespoon sugar
1/2 cup (1 stick) of cold butter
1/3 cup sourdough starter discard (straight from the fridge)
1/3 cup milk
Strawberry topping
Whipped cream
DIRECTION
Mix the flour, baking powder, salt and sugar in a mixing bowl. Use a cheese grater to grate approximately half of the butter into the flour mixture. Tip: use the butter wrapper to hold onto one end of the butter while grating. Mix the grated butter into the flour mixture. Melt the other half of the butter. Add the discard, milk and melted butter to the dry ingredients and mix until dough forms.<br>
Shape the dough into 6 shortcakes. Place the cakes on a parchment lined cookie sheet.
Preheat the oven to 425 degrees F. Bake the cakes for 17-18 minutes or until lightly browned. <br>Allow the shortcakes to cool, if desired.