Sheet pan pancakes are a quick and easy way to feed a crowd in the morning without having to stand by the stove for hours. They also make great leftover breakfast for easy weekday mornings. This sourdough sheet pan pancake recipe is also great for using up some extra discard. This recipe can also be used to make regular sourdough discard pancakes and waffles.
Disclaimer: This post may contain affiliate links. I earn commission at no additional cost to you.
What tools do you need to make a sheet pan pancake?
A standard half sheet pan 18 x 13 inch
Alternatively you can use a 11 x 17 inch rimmed cookie sheet pan (just reduce the discard to 3/4 cup and reduce the milk to 1 cup)
Sourdough discard – If you don’t have sourdough discard you can replace it with 1/2 cup of all-purpose flour and 1/2 cup of buttermilk or milk.
Sourdough discard sheet pan pancake ingredients
- 2 Cups All-purpose flour
- 1 teaspoon baking soda
- 1 teaspoon baking powder
- 1 teaspoon sea salt
- 3 tablespoons sugar
- 1 cup sourdough discard
- 1 and 1/2 cups milk
- 1 teaspoon pure vanilla extract
- 4 tablespoons butter, melted
- 2 large eggs
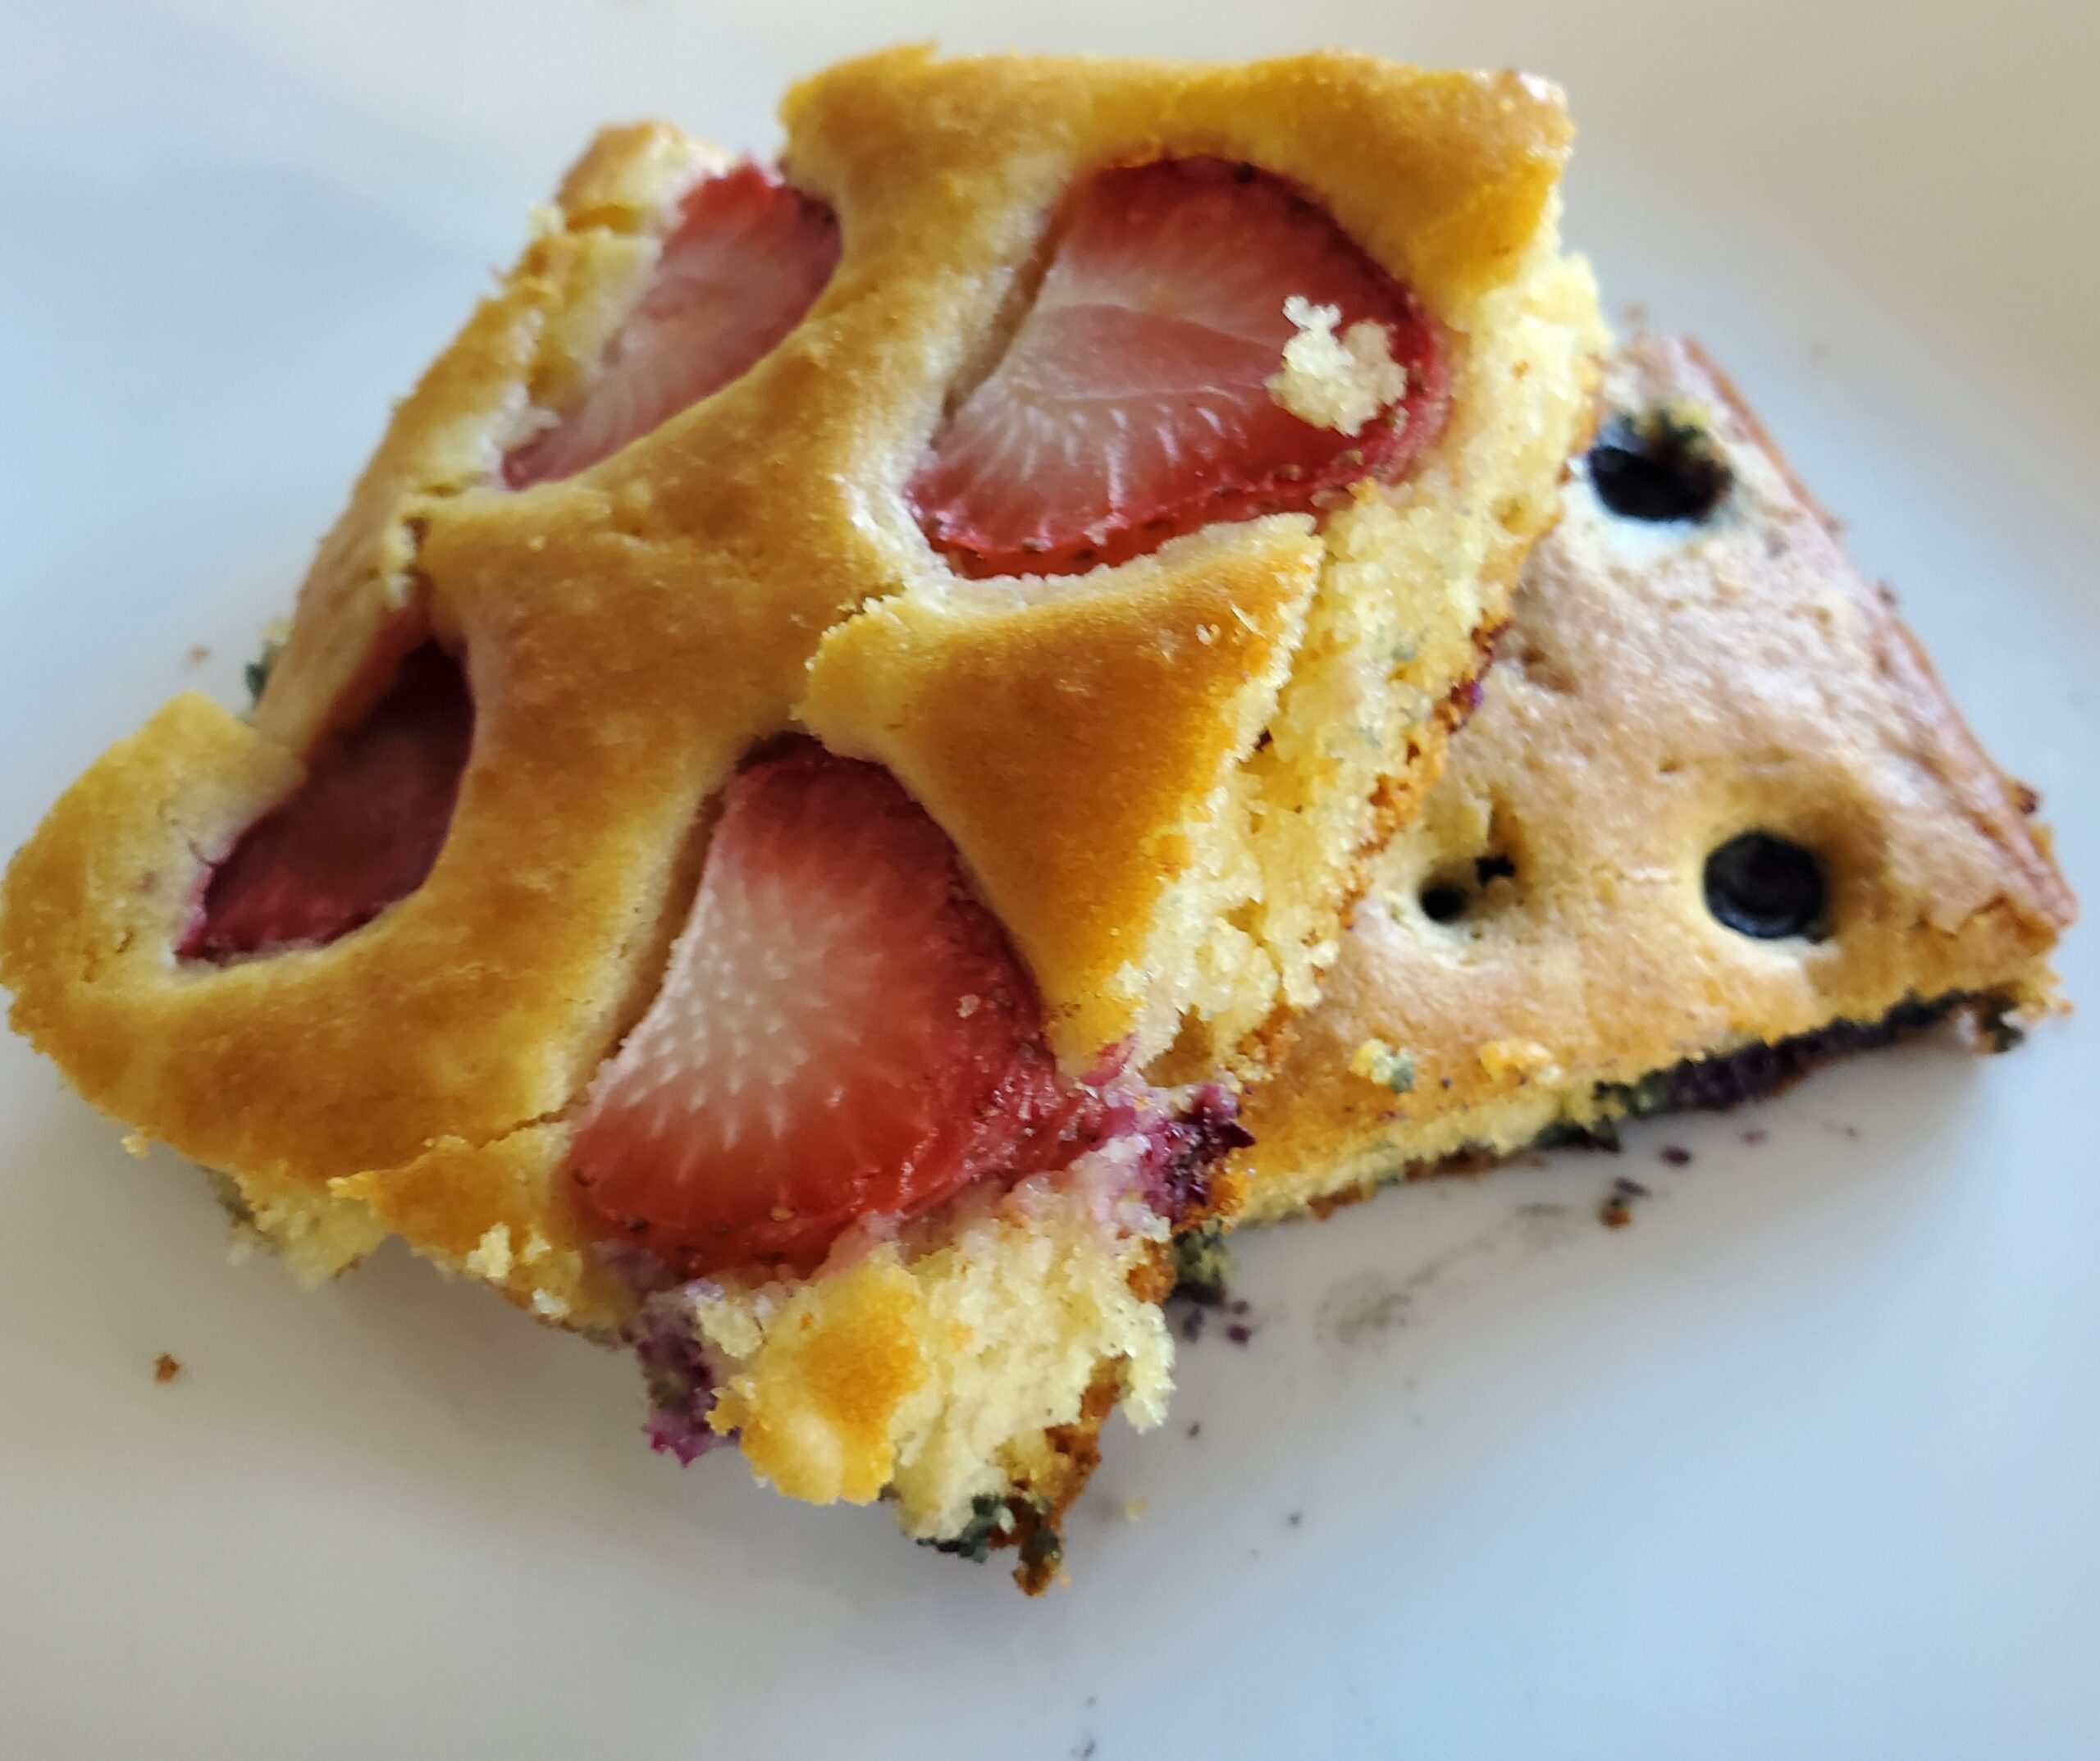
- 1/2 cup fresh blueberries, washed and patted dry
- 5-6 fresh strawberries, washed patted dry, and sliced
- 1 banana, peeled and sliced
- 1/4 cup of chocolate chips
Sheet Pan Pancake Directions
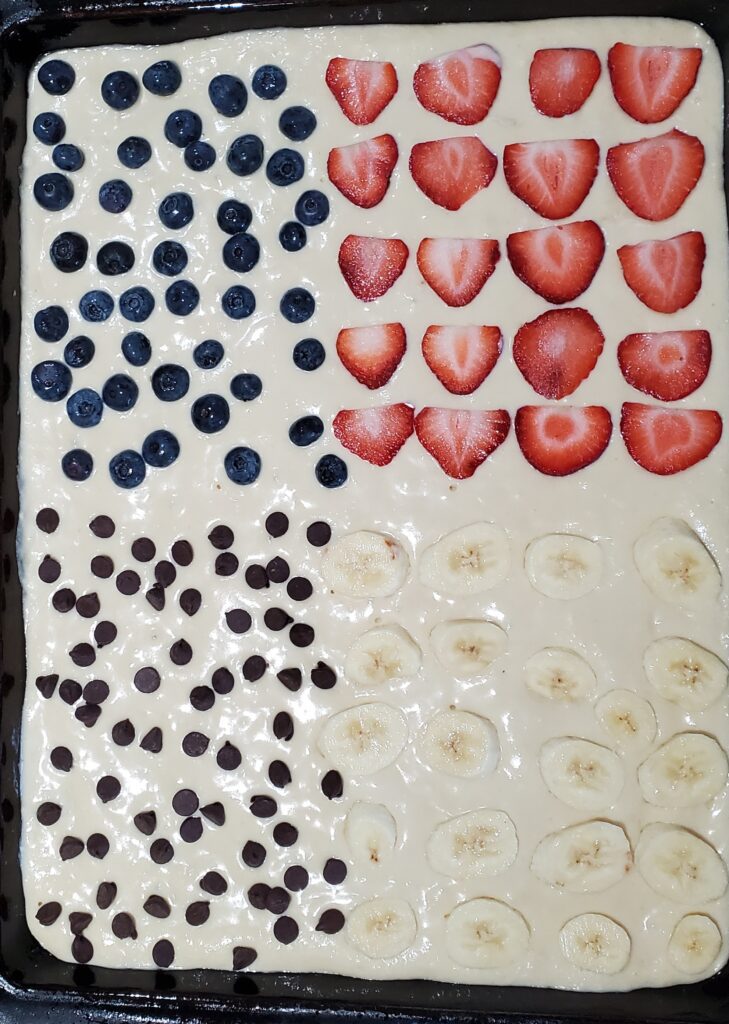
Mix all of the dry ingredients (flour, baking soda, baking powder, salt and sugar) in a bowl. Crack the eggs and whisk them a bit before adding. Add the discard, milk, vanilla, melted butter and eggs to the dry ingredients and mix well. It’s ok if the batter is a little lumpy. Pour the batter on a greased or parchment lined 18 x 13 inch sheet pan. Allow the batter to sit for 20-30 minutes before baking.

Meanwhile, prepare your fruit. Make sure your fruit is patted dry.
Add the chocolate chips and fruit to the top of the batter.
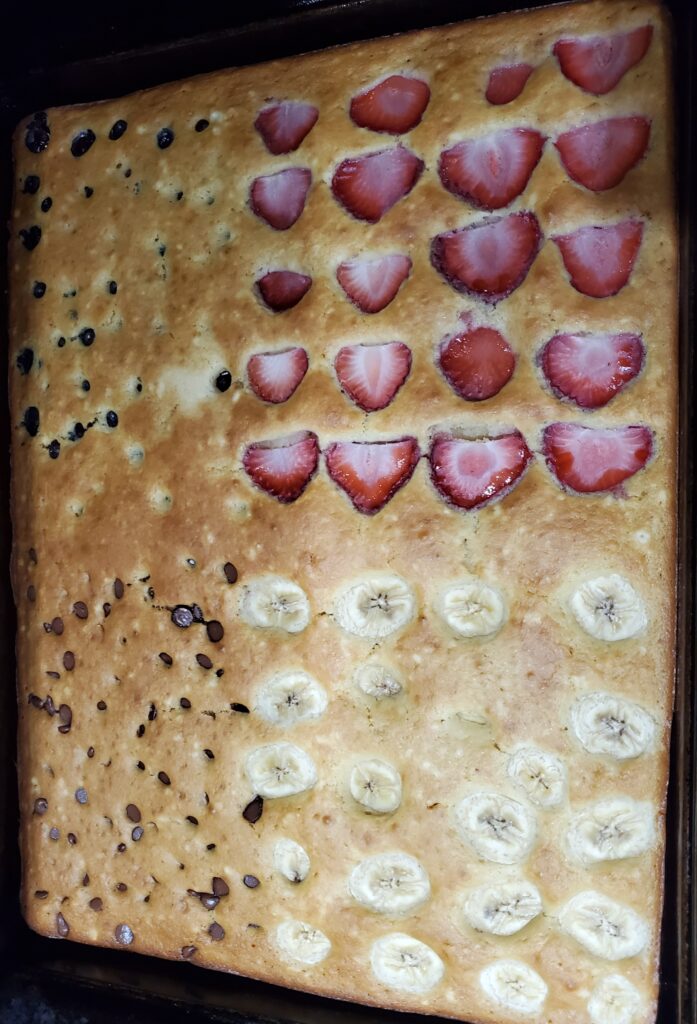
Preheat the oven to 425 degrees F. Bake for 15-18 minutes or until the top is golden brown. Wait 1-2 minutes before slicing.
Sheet pan pancake mix-in and topping ideas
Mix-ins:
- Fresh blueberries
- Fresh strawberries
- Fresh raspberries
- Fresh black berries
- Bananas
- Chocolate chips, or any chip e.g. white chocolate, butterscotch etc..
- Fresh thin apple slices, with cinnamon
- Cinnamon and brown sugar
- Nuts e.g. walnuts, pecans, cashews
Toppings:
- Maple syrup
- Powdered sugar
- Strawberry syrup
- Whipped cream
- Nutella
- Jam
Can you use this recipe to make regular pancakes or waffles?
Yes you can use this same recipe to make sourdough pancakes and waffles.
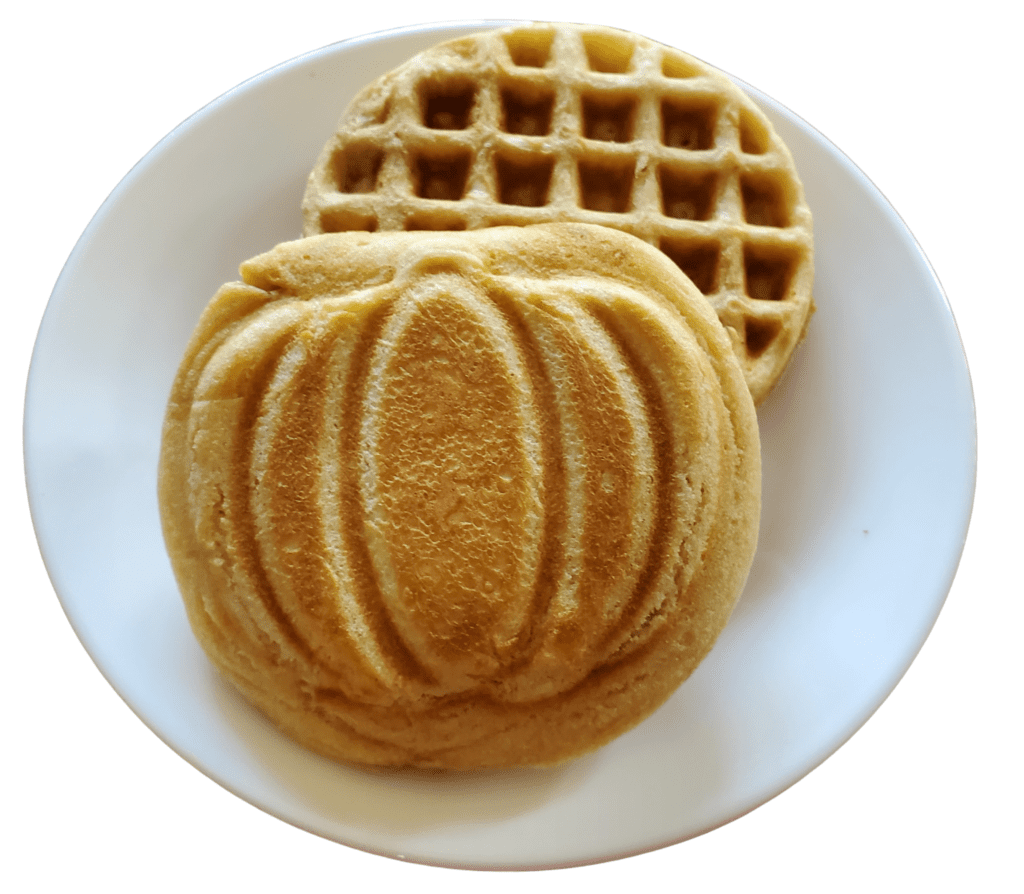
Find this cute pumpkin waffle maker here. These mini waffles fit perfectly in a standard toaster and make a quick and easy breakfast. Just make the waffles on the weekend and you will be ready for a busy week.
More Sourdough Discard recipes
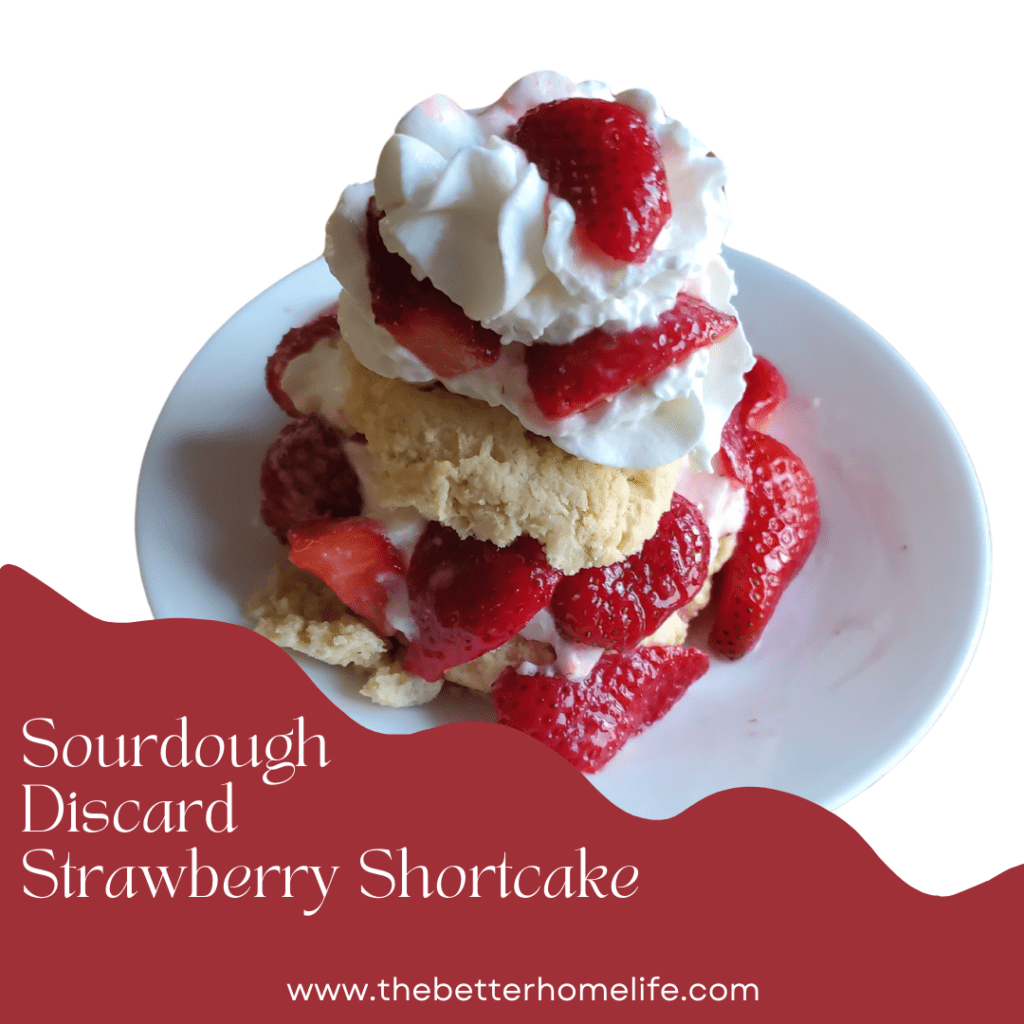
Dessert: Sourdough discard strawberry shortcake
Great for dipping: Sourdough discard pita bread
Perfect for family pizza night: Sourdough discard pizza dough

Printable Recipe
Servings
12 minutes
Preparing Time
10 minutes
Cooking Time
15 minutes
Calories
kcal
INGREDIENTS
2 Cups All-purpose flour
1 teaspoon baking soda
1 teaspoon baking powder
1 teaspoon sea salt
3 tablespoons sugar
1 cup sourdough discard
1 and 1/2 cups milk
1 teaspoon pure vanilla extract<br>
4 tablespoons butter, melted
2 large eggs
1/2 cup fresh blueberries, washed and patted dry
5-6 fresh strawberries, washed patted dry, and sliced
1 banana, peeled and sliced
1/4 cup of chocolate chips
DIRECTION
- Mix all of the dry ingredients (flour, baking soda, baking powder, salt and sugar) in a bowl. Crack the eggs and whisk them a bit before adding. Add the discard, milk, vanilla, melted butter and eggs to the dry ingredients and mix well. It's ok if the batter is a little lumpy. Pour the batter on a greased or parchment lined 18 x 13 inch sheet pan. Allow the batter to sit for 20-30 minutes before baking.
- Meanwhile, prepare your fruit. Make sure your fruit is patted dry.<br>Add the chocolate chips and fruit to the top of the batter.
- Preheat the oven to 425 degrees F. Bake for 15-18 minutes or until the top is golden brown. Wait 1-2 minutes before slicing.
NOTES
As an Amazon associate, I earn on qualified purchases.